 |
1/48 Testor AH-64D Longbow Apache
by Percy Olson
Photos by Steve Bamford
--------------------
|
I started this kit a while ago but after finishing the cockpit I found that I had troubles continuing due to lack of good photographs. Well, when ARC put up their AH-64
walkaround photos, I no longer had an excuse and restarted full bore into the kit.
The fit and finish of the kit are okay, although the plastic is somewhat soft and there was a minor amount of flash that needed to be cleaned up. When I received the kit (a trade through a fellow Internet modeler), one of the landing gear was snapped off. This was slightly annoying, but at least it was in the box. I took great pains to keep track of this part and kept it in a zip-lock bag in the box.
The cockpit was sprayed with Model Master Acryl Interior Black and assembled and drybrushed. I am mostly an Out-of-the-Box modeler, so I didn't really add any detail to the cockpit. It would benefit from some sort of after market or TLC detailing, although it's not too bad to begin with.
 |
The real pain I had while building this kit was trying to NOT sand off all the raised rivets; it's riddled with them, although
they're better done than many other kits I've seen with raised rivet detail. I tried a number of seam filling techniques, neither of which was completely successful. The first technique I tried was using Milliput, but for me, it was more trouble than it was worth, and because I kept having to keep it wet, streams of white Milliput ran all over the model. This wasn't a big deal, but did require some cleanup. I then tried using some automotive spot putty
(Bondo), and although I have to wait a while for it to dry, it works well. I also tried Mr.
Surfacer, smoothed with a q-tip soaked with Isopropanol Alcohol. This works well, but I found it also removes Milliput and the Bondo putty if I wasn't careful.
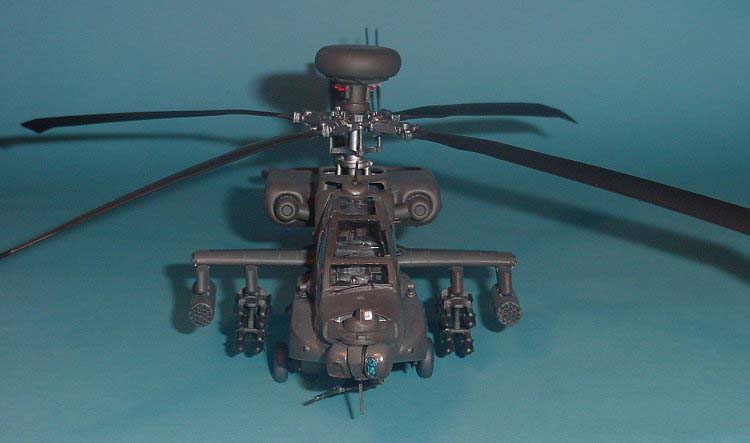
I learned a trick from a friend of mine about putting the right droop and twist into rotor blades so I tried his technique on this model. Unfortunately I didn't notice that on almost all helicopters, the tip of the rotor blade tilts downward, not upward as mine are now done. The technique is to tape the individual rotor blades onto a large glass jar in such a fashion that they would have the appropriate droop and twist. You fill the bottle with hot (almost boiling) water, put the lid on and let it cool to room temperature. This worked absolutely great! It's just too bad the operator had to mess it up.
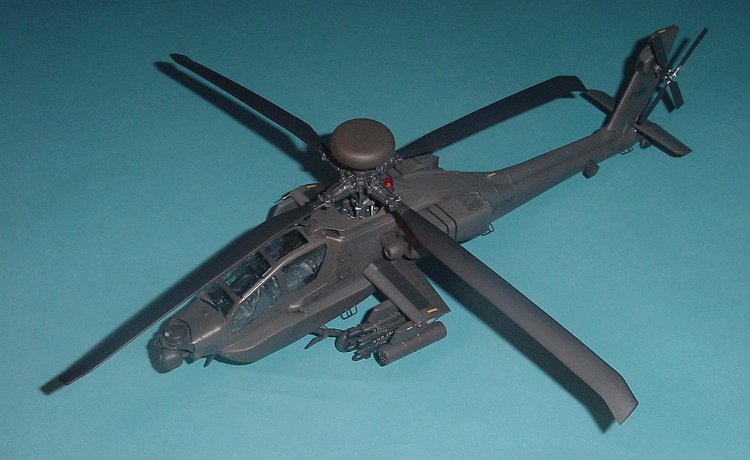
Due to the size of the greenhouse on this chopper, I decided to paint the interior of canopy. What I did was mask with Parafilm M and spray the interior color, which I guessed to be Model Master Acryl FS34031 US Army Helo Drab. The end result was quite satisfactory.
 |
I decided to button this bird up and glued the two doors on. I differ from the masses when attaching my canopies and usually use
Tenax 7R. What you say? How can I do this? Well, as it turns out, most of the aircraft I build have framing around the canopy that hides the bonding of the two types of plastic and the resulting bond is awesome. The canopy exteriors were masked with Parafilm M and then the real painting started.
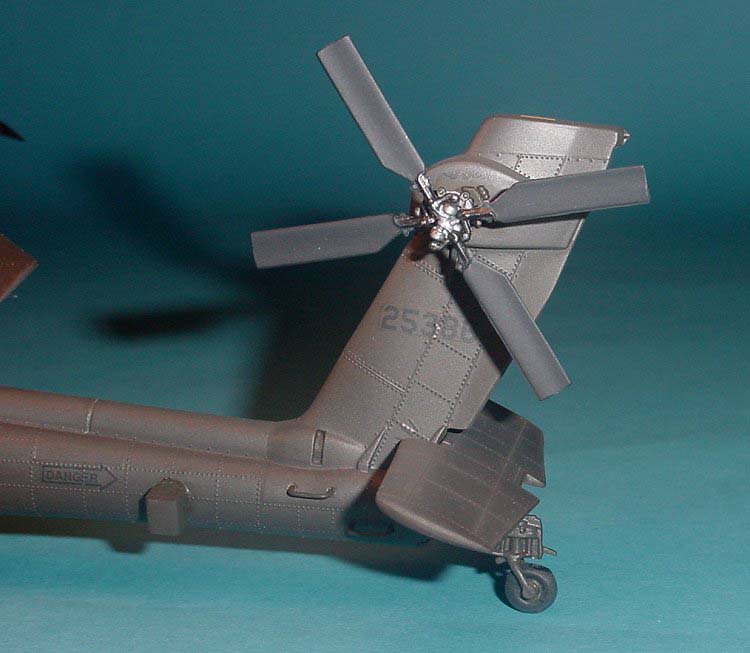
Earlier on, I mentioned how the one landing gear was broken. Well, during the seam cleanup process, I broke off the second gear, but this time I didn't see where it landed. Ouch! It landed somewhere between the modeling room and the living room, which consists of two carpeted hallways and one carpeted flight of stairs. Needless to say, I didn't find it and had to resort to scratchbuilding a new one. The good news is that I was really happy with my first real scratchbuilding attempt. I can no longer tell the two apart.
The overall exterior color is also MM Acryl FS34031 US Army Helo Drab. Two light and one medium coats were sufficient to cover the exterior. I wasn't extremely happy with the single monotone look and since my weather skills are still in the infancy stages, I tried something new. I lightened the base color by 40% and lightly sprayed some of the top surfaces. I found that this gives a fading effect and help break the monotone of the single color.
 |
The kit decals were used and once again, being brave, I tried something new. I tried using Future as the "decal solvent". This is where you place the decal in a small pool of future and try and make the decal settle down nicely. Well, for me, it was a big disappointment. I had nothing but troubles on anything other than a perfectly flat surface. I did one side of decals with Future and the other with the traditional decal solvents
(Mico Sol and Set) and I was much happier with the traditional method.
Once the decals were finished I applied a couple of coats of future and then a coat of MM Acryl Flat Clear. I weathered the model using the wet pastel slurry method. I really like this technique because if I mess up, water and a q-tip will fix anything.
Of course, the final test is, does it look like an Apache? Well, to my untrained eyes, it does, and it was fun to build so I'm happy.
Percy
(click on the image below to load the full size photo)
(use your back button to return to this page after viewing full size photo)
 |
 |
 |
 |
Photos and text © 2000 by Percy Olson/Steve Bamford