|
Introduction
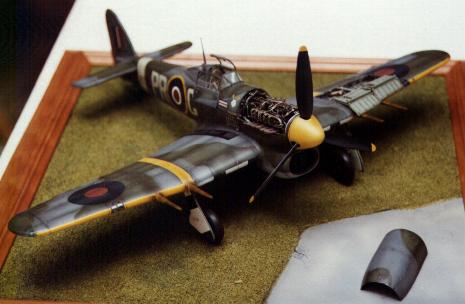
The model was built using the Revell
kit. Being a detailing freak, I put in lots of work. As the build progressed,
defects and areas requiring attention were highlighted.
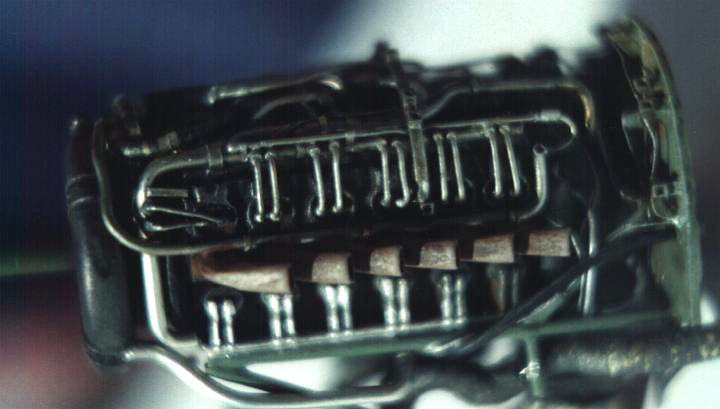
Engine
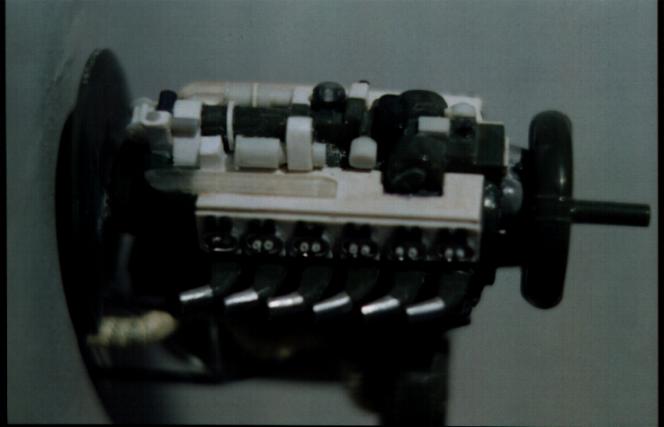
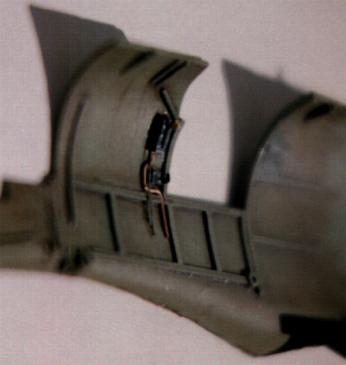
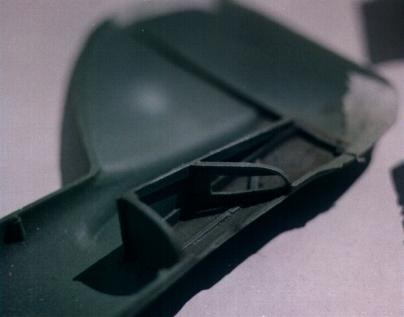
The kit includes a removable side panel
revealing a highly inaccurate engine. I decided to uncover the upper half of the
engine up to the exhaust pipes. The removable panel was fixed in place and the
top half of both fuselage sides cut off. The two removed pieces were then glued
together to form one cover.
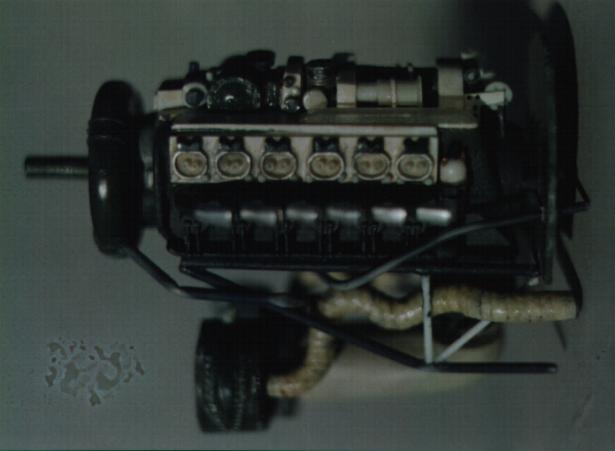
The kit’s engine including the
radiator housing were assembled. Inaccurate areas and those lacking in detail
were accurized. The kit’s exhaust stacks, which are round were replaced with
aluminum tubing which was flattened to give the required oval shape and filed
down to the proper thickness.
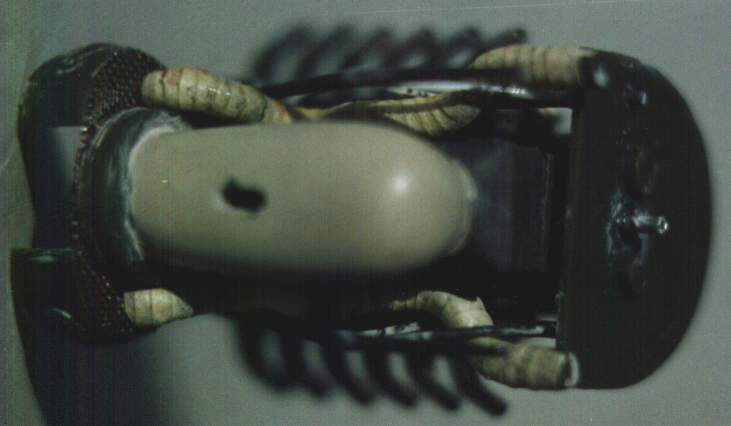
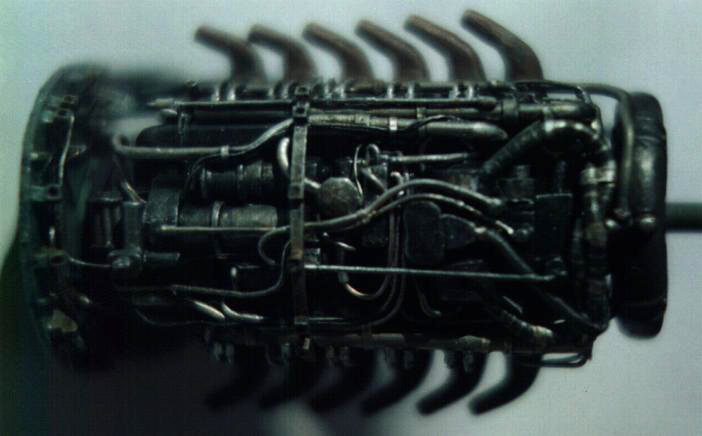
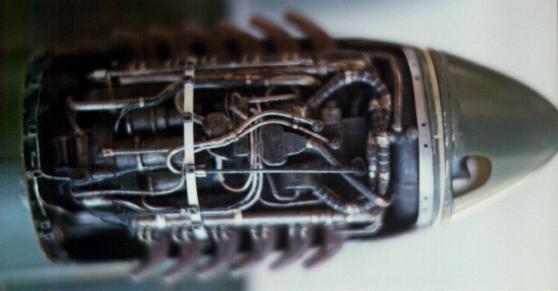
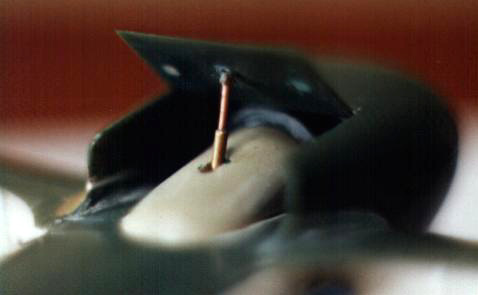
The size and shape of the radiator duct
is completely wrong and this was rebuilt with Milliput. It has to be much larger
and protrudes prominently from the underside. A slot in the duct accommodates
the radiator flap actuating piston which passes right through it. The radiator
supplied was also rebuilt since this is very small. Pipes and wires were added
onto the firewall as were fastening eyes for the engine covers. Engine bearers
running from the main horizontal supports to the firewall were also constructed.
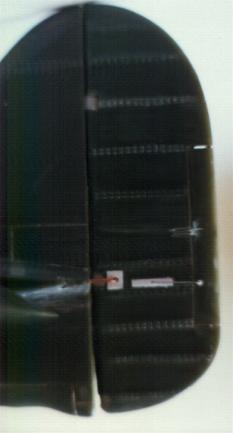
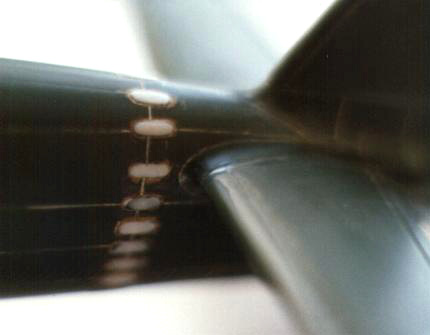
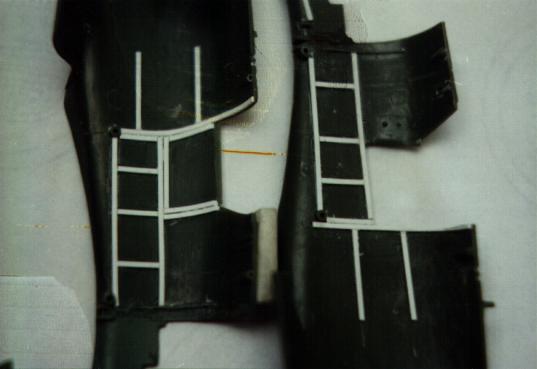
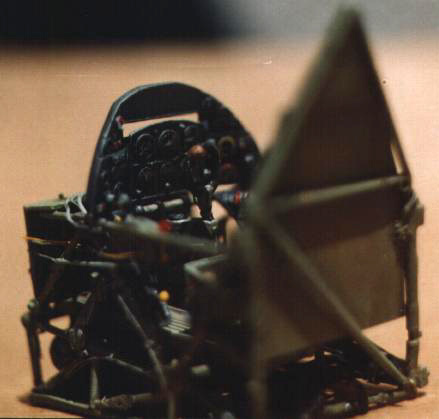
Fuselage
The fuselage was checked for accuracy
against 1/32nd scale plans and no particular defects were noted. The
tail wheel area was detailed although most of this does not show in any case.
The cockpit area on the fuselage halves was detailed next. Internal framing was
made from plastic strip. Wiring and other items of equipment were than added
just beneath the windshield. The tail reinforcing plates were replaced with
plastic sheet sections.
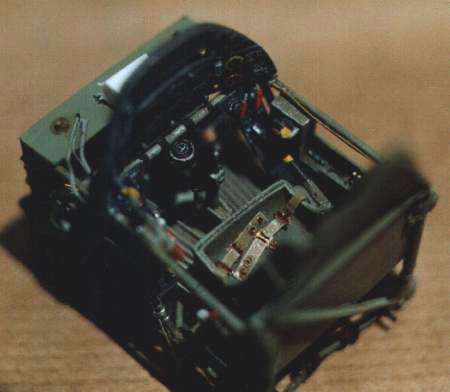
Cockpit Area and
Canopy
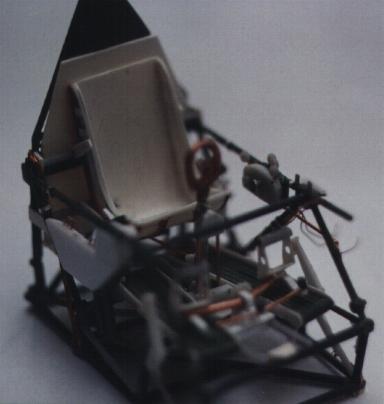
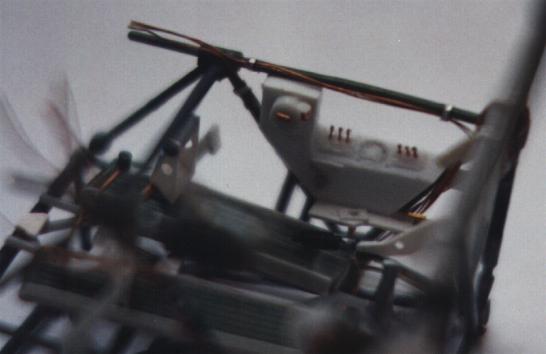
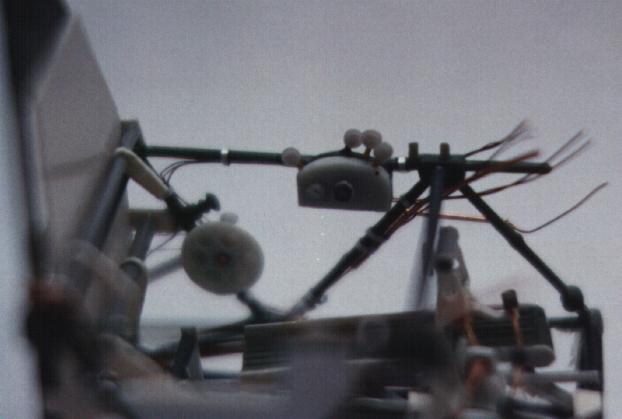
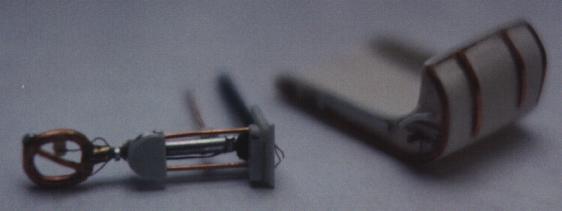
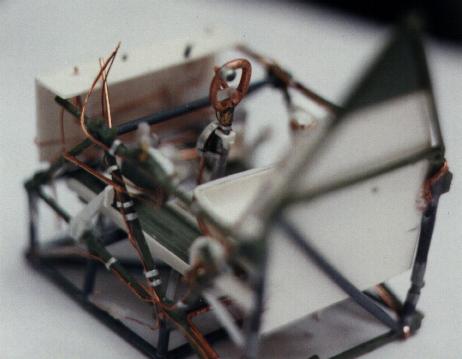
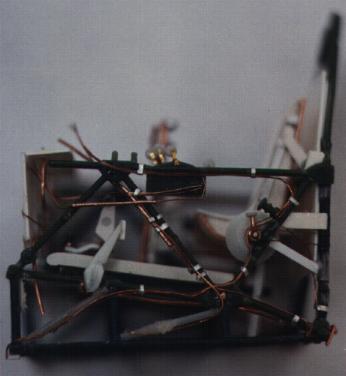
The Typhoon cockpit, like all
Hawker fighters, was built around a tubular structure. All items in the cockpit
such as the instrument panel, side consoles and equipment, wiring and even the
seat armour were attached to this structure. This structure was duplicated and
all the cockpit accessories were fixed onto it. All details including the side
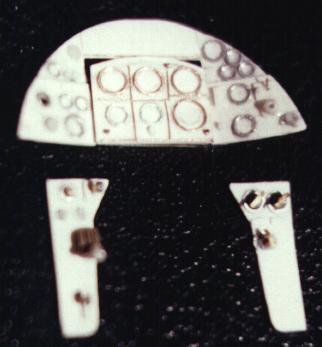
consoles, switches levers and knobs, the control column, the instrument panel
and the pilot’s seat were scratchbuilt. Photoetched seat belts from Teknics
were used.
Brian
(Editor's Note- Due to
the large number of detail photos that Brian provided with his article, we've
split it into three segments. Stay tuned for Part II, coming Thursday!)
To read Part II of
Brian's Article, click here.
To read part III of
Brian's article, click here.
|