|
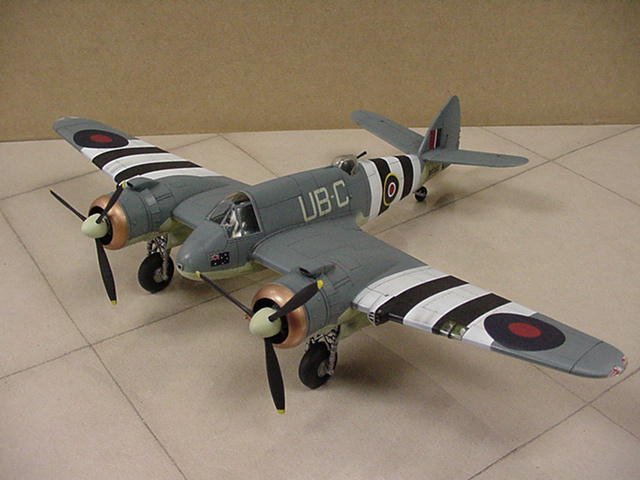
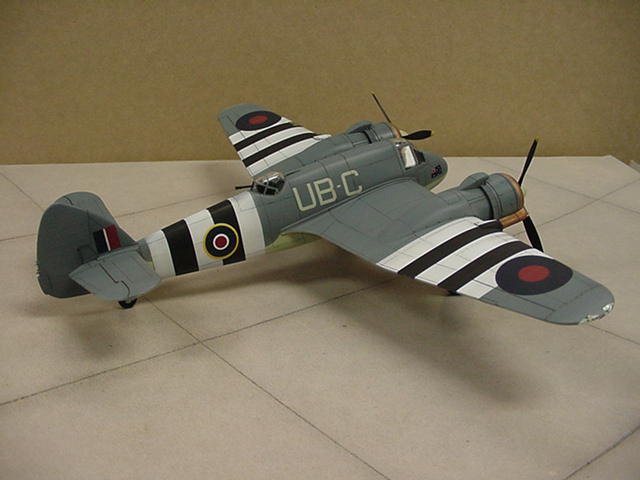
Hasegawa 1/72 Bristol Beaufighter
Mk. X Kit no. CP119
The Beaufighter was developed from
the twin-engine Bristol Beaufort bomber, adopting that plane's main wing, tail
assembly and landing gear without significant modifications.
The Mk. X was specifically
designed as an anti-shipping attack plane, and it inflicted heavy damage on
German naval assets in the North Sea and the Atlantic Ocean. The Mk. X
had the ability to carry a wide variety of ordnance including torpedos, bombs,
and underwing rockets.
| This model
was built straight out of the box. The model goes together quite
easily, and almost no filler was used. I build with super-glue,
so once the glue dries, I go right to the sanding stage. The
model can be built with the additional horizontal stabilizer fillet,
or the regular tail. I decided to go with the regular tail, as
the aircraft would be posed without a torpedo. |
| Click
on image below to see larger image |
 |
|
The interior details are a bit
sparse (typical Hasegawa in this scale) and instruments and side panels are
done in decal. The navigator's station consists of only a seat on a
platform, and the machine gun. This doesn't matter too much though, as
nothing but the seat can be seen through the observation bubble. The
front office however could do with some sprucing up. The excellent Aires
set would go well here, and although I used this set in a later Beaufighter
project, I opted to keep to the kit parts on this project. Assembly went
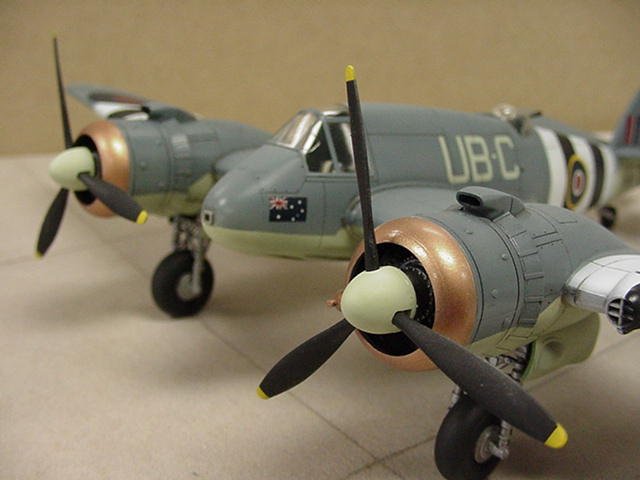
without any surprises, and all parts fit quite well. The engine pieces
are well detailed and a set of white metal hedgehog exhausts is included in
the kit.
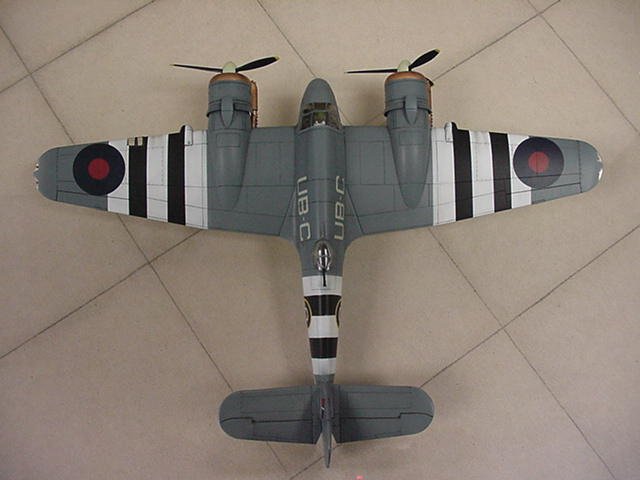
Painting was done with Model
Master Enamels. I started by pre-shading with flat black. I then
sprayed the white bases for the wing and fuselage invasion stripes. Once
these were dry, I masked off the white area, and painted the two-color
fuselage colors. After the paint had fully dried, I removed the masking
and painted the black wing stripes. I opted to use the kit decals for
the fuselage stripes. It should be noted that the kit comes with a
complete set of wing and fuselage stripes in decal form. I painted the
collector rings with Humbrol Copper mixed with Model Master flat black, and
military brown to achieve a worn look. Once all the paint had fully
dried, I applied several coats of Future floor polish. Future is the
best acrylic gloss I've ever used. I've been using it for several years,
and it's never gone bad...knock on wood! I apply my Future in several
light coats, building up to a glass-like finish.
Once the Future was on, I set the
project aside for two days. Future usually takes about a day to fully
dry, but I had finals during this time, so I wasn't able to get back to it
until later.
The decals were applied over the
course of two days. I use Solvaset on my decals, and usually have no
problems. This project was no exception, as the decals went down
perfectly, and in some cases I didn't even use the Solvaset.
After the decals were dry, I
washed the model in warm soapy water to remove all the decal adhesive and
solvaset residue. You want to be careful washing a model that has Future
on it, if the water is too hot, or you scrub too hard, you'll take the Future
and any decals right off. When you're washing the model, just a little
soap and water, and easily rub across the surface with your thumb or
forefinger, nothing more.
After the kit was dry, I started
to apply the wash. I use Model Master enamels mixed with airbrush
thinner applied with a fine brush to the panel lines. Once the wash is
complete, I soak a Q-tip in airbrush thinner and wipe away the excess wash in
the direction of airflow.
I set the kit aside to dry, and
after a few hours under the fan, I applied the Testors Dullcote. Testors
knocks the shine down quite nicely, and can be applied in thin coats to
achieve the desired effect.
|
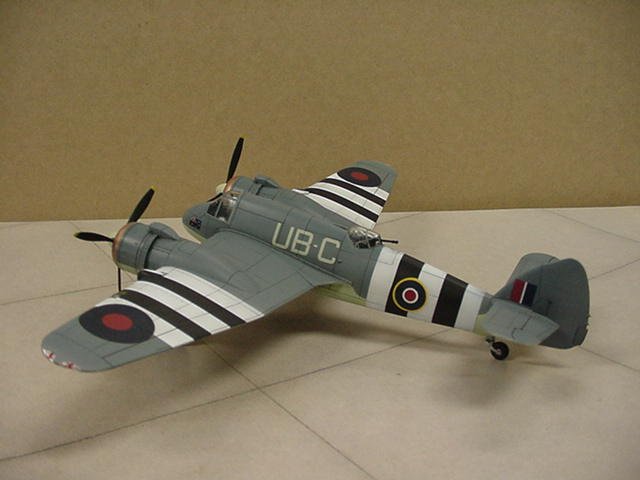
After another 24 hours, I
weathered the aircraft with chalk pastels. I added exhaust
stains, carbon stains from the guns, and general wear and tear.
The Hasegawa Beaufighter
is a great little kit. It's light years ahead of the Airfix Beua,
and would even give a Tamiya Beaufighter a run for it's money.
|
| Click
on image below to see larger image |
 |
|
I highly suggest this kit.
Thanks to Dave Heno at Hobby
Island, Houston, TX for providing the kit, and John Greiner for taking the
pictures.
Josh
|
|