|
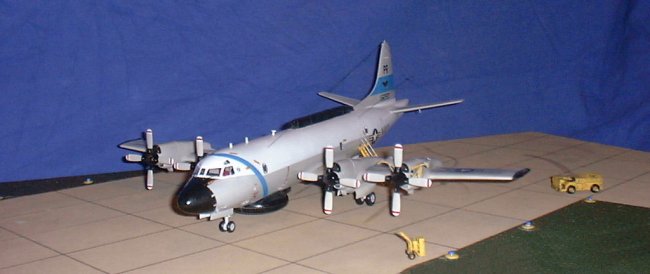
EP-3E Orion, Hasegawa 1/72 with Superscale
Decals (72-433) and engine from “Engine&Things” (Engine & Things
72002 Allison T-56 for P-3)
Intro
There is not much to say about the EP-3E, since
the “mid-air-collision”-incident with a Chinese interceptor and the
resulting trouble this type of electronic intelligence aircraft is well known.
The Kit
The kit is the standard Hasegawa P-3C Orion kit
with extra resin parts for the different "bumps" and fairings. But it is
still a little bit basic with some things totally missing (like the wire antennas or
the votex generators) and in some aspects with very little detailing. So I added
a little bit of time and work, because I wanted to show my EP-3E with an open
engine bay and with flaps in lower position and add the other missing parts.
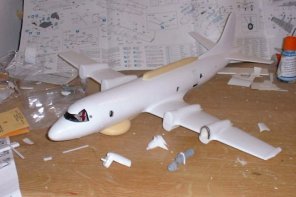
The Building
|
Click on image to
right to see larger image |
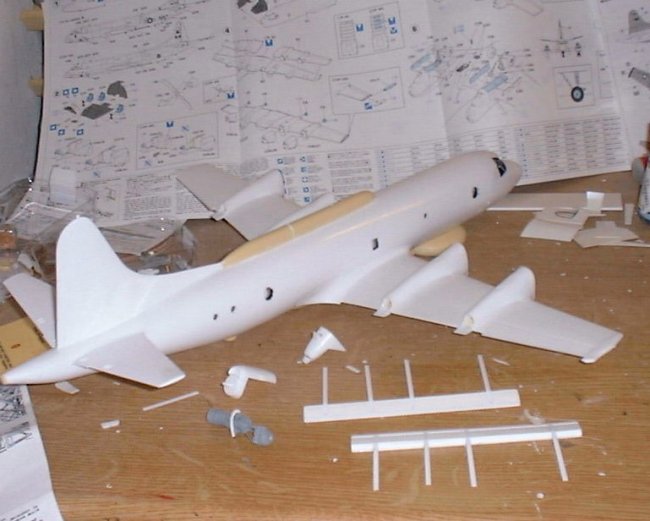
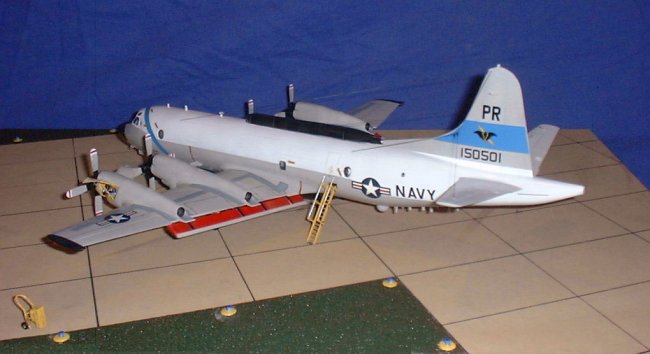
The Building of the kit was straight forward
until the wing area. Here I had to remove the flaps and closed the holes to
avoid the direct view thru the wing and middle fuselage section. The flaps
themselves where scratchbuilt, using plastic sheet and thin wire, all in all 16
parts / flap. But I think, it was worth the effort, the Orion looks great
with the flaps down.
|
|
|
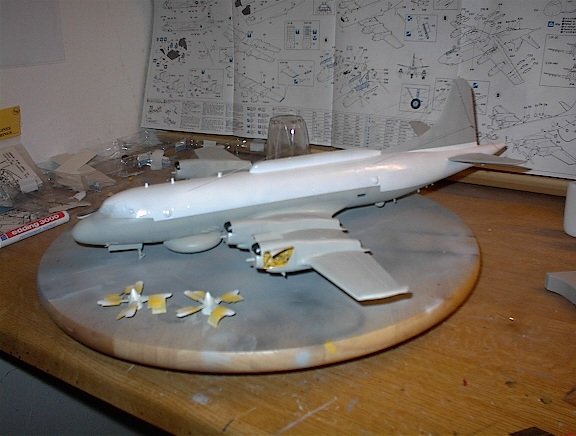
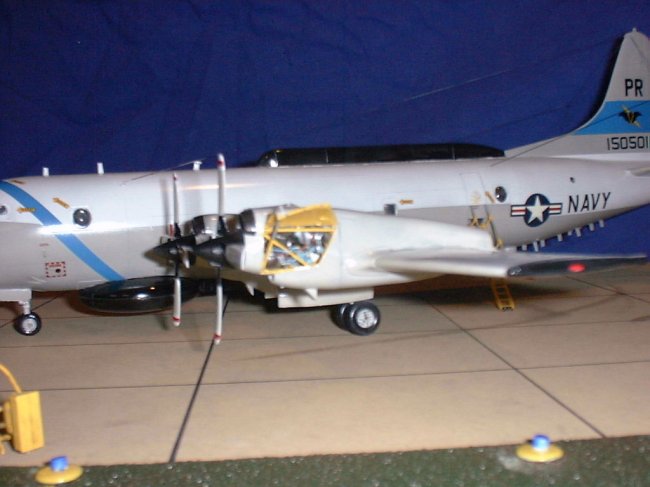
The next task was the open engine bay, and the
worst problem wasn`t the building of it, much harder was to find pictures of an
Orion with an open engine bay to see how it opens etc. (and if anybody has some
good photos of it – please send them to me), I was not very lucky to find them.
The only things I have are some technical drawings in b&w and very bad
pictures from where you can get an idea of the thing). But I had the engine from
“Engine&Things”, so I wanted to use it. So I cut of the engine cowling
and build the “inner life” of the engine bay. I used different types and
sizes of plastic sheet and metal wire and I think, the result is fine, even if
the engine itself is very hard to find after I finished.
|
|
Click on image
below to see larger image |
 |
|
The rest of the kit was not very dramatic to
build, the resin parts where no problem and fit good and the kit is not very
demanding, all in all. The votex generators (directly behind the big fairing
under the fuselage) are made from plastic sheet and the wire antennas are very
thin fishing line I bought in a fishing shop around the corner. It seems to be
the best solution for wire antennas, strong, fine and smooth. To fix them I
drilled holes in the fuselage and glued some thin metal tubes in them. Now it
was very easy to fix the fishing line with superglue into this “sockets”.
At last I added some antennas under the tail,
again made from plastic sheet.
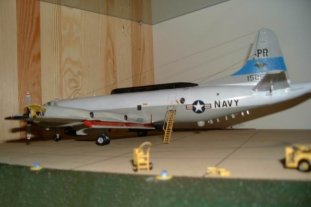
Painting and Decaling
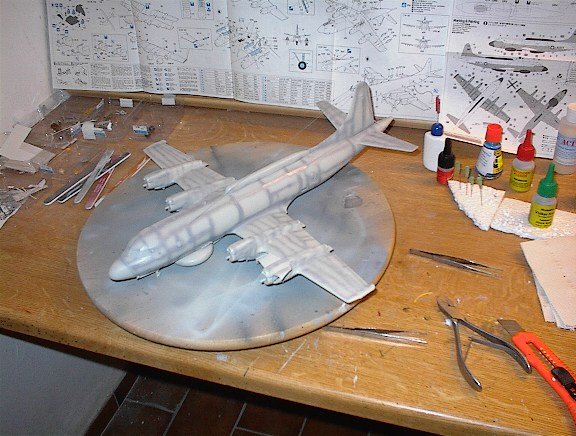
There is not much to say about the painting,
I used my airbrush and Gunze colors, as always. I sprayed in different layers,
first all grey with dark grey on the raised panel lines to make them
“visible”. On this is the final layer in the aircraft colour. It is on the
pictures not visible, but it has a nice effect.
The decals are from Superscale, sheet 72-433
“EP-3E / P-3B VQ-1 & VP-4”.
The Hasegawa decals are really good and you need
them for the wingwalks and some warning signs, but the aircraft Hasegawa offers
is a little bit boring, so I decided to use the colourful Superscale decals.
|
Click on images below to
see larger images |
 |
 |
Conclusion
I enjoyed the building of the kit. Even if you
don`t lower the flaps and keep the engine bays closed, this is an impressive kit
if finished. Some extra detailing should be done to come to an good result, but
all in all this should be no problem, the fitting of the parts is good, and
everybody can decide, how much detailing he wants.
Thomas
|
|