|
For the past 3 years now, I’ve
been visiting this website and slowly but surely began to visit more often.
It’s a cool site Steve! I was really impressed with some of the finished
models and had the opportunity to meet a few ARC regulars at the last couple
Nationals. For my first contribution to ARC, I decided to share my F-18. I’m
sure many of you have built this kit at one point or another and know it’s not
exactly your typical “shake ‘n bake” kit. I thought it would be kind of
cool to see if anybody would mistake it for the Hasegawa kit so I decided to
build it anyways . Since there have been many reviews on this kit, I’ll get
right to it!
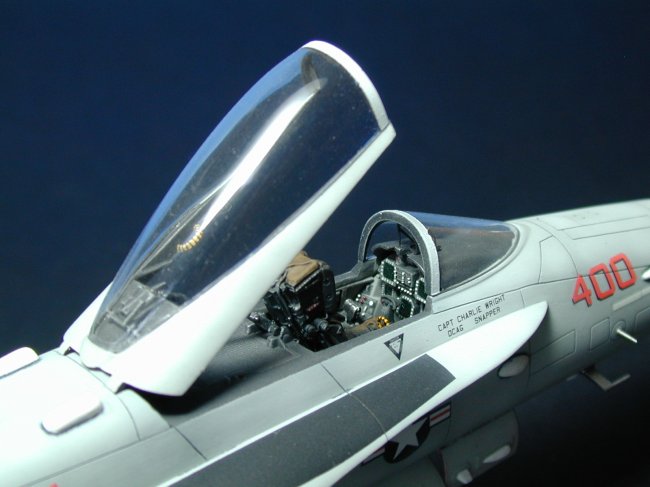
Cockpit:
For this area, Monogram
gives you the correct instrument panel for the “A” model, but not for the
“C” model as advertised on the box. Well…I wanted to build the “C’
model. To correct this, I filed off the analog gauges on the right side of the
main instrument panel and replaced it with a MFD screen from True Details. In
addition, I wasn’t satisfied with the ejection seat so I pickup the Multi
Purpose set from Black Box and replaced it with the resin part instead. The
sidewalls were empty so I scratch built my own with sheet plastic. After
corrections and additions were made, I carefully painted the whole front office
and moved on to the landing gear.
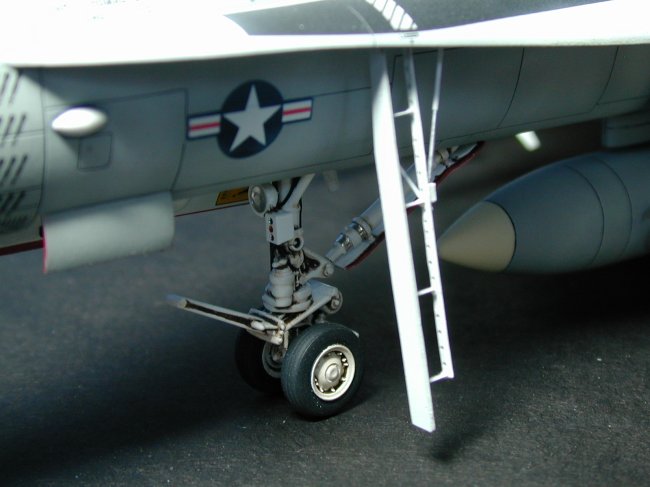
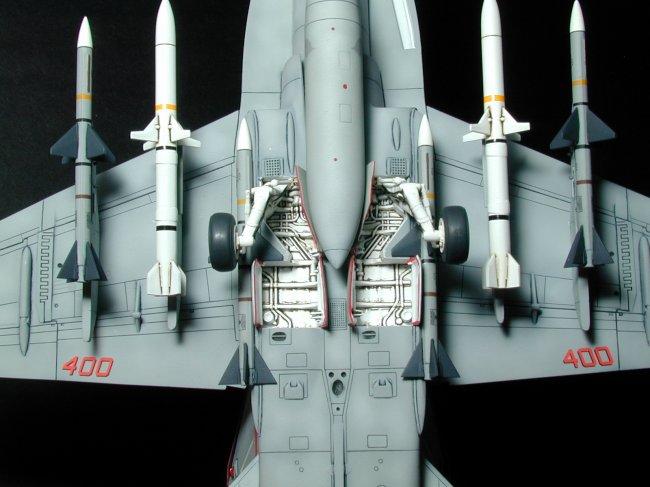
Landing Gear:
The stock landing gears are
actually nice when cleaned up. Though not nearly as nice as the ones from the
Hasegawa kit, they had enough detail for my satisfaction. All they needed were
some copper wire to represent the hydraulic lines and a nice paint job. After
painting them with Tamiya White, I applied an oil wash to bring out the details
and burnished some bare metal foil on the oleo struts. The wheels were attached
and set aside so I worked on the vertical & horizontal stabs.
Vertical & Horizontal
Stabilizers:
When I took a closer look at the V-stabs, they seemed a bit under sized and the
fin tips looked flat to me. I wasn’t about to correct the size since it
wasn’t very noticeable. However, I did correct the shape of the fin tips by
adding half-round plastic rod on the top of each fin and sanded them to shape. I
then scribed the panel lines and added photo-etch stiffeners found on the old
Eduard set.
The shape of the H-stabs looked
fine to me with the exception of the plastic rod that connected them. I removed
this flimsy plastic rod and replaced it with a steel wire instead. This gave the
stabs more strength for transportation purposes. Once again, I scribed the panel
lines and wet sanded until the surfaces were smooth. I set the parts aside and
started on the fuselage.
|
Click on
images below to see larger images
|
|

|
 |

|
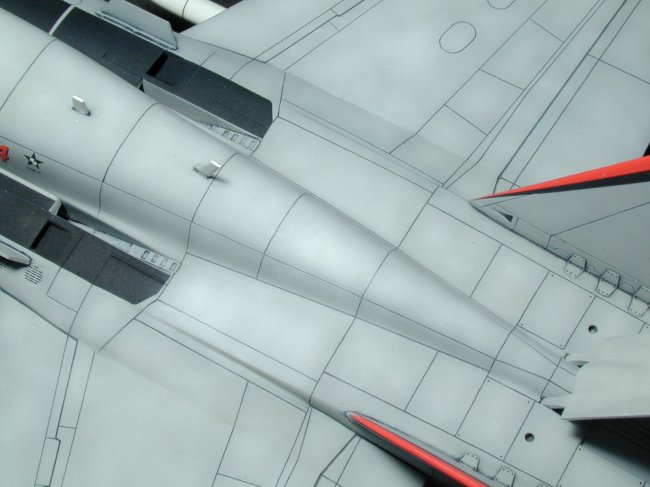
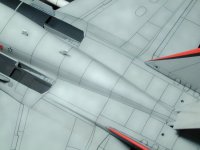
Fuselage:
This kit has the typical raised panel lines and soft detail found on most, if
not all, Monogram kits. The good news is that the shape is pretty accurate,
namely the spine. The Hasegawa kit has the wrong shape…so beware!
I carefully scribed all the panel
lines using my trusty old Tri-tool, pine vise, scribing templates, and some Dymo
tape. This was the most time consuming part of the build, as you can imagine,
but the results were worth it! I went on to assemble the fuselage halves and
filled the seams with thick CA glue. The intakes were installed at this point so
began sanding the entire airframe until I got rid of all those nasty seams and
gaps. Then I continued to wet sand it with 1000 grit sandpaper. When I finished
sanding, I primed the model with Mr. Surfacer to make sure that all the surfaces
were smooth. Now my BUG was ready for paint!
Paint:
I usually pre-shade my panel
lines with Tamiya Dk. Grey and paint my base coat over it. My references state
that the actual aircraft is painted FS 36320 Dk. Ghost Grey over FS 36375 Lt.
Ghost Grey, but the pictures seem to show one color. It’s kind of hard to
tell, if you ask me? :-) I wanted to paint the model based on the photos so I
chose to paint it FS 36375 using MM enamels. After the base coat dried, I masked
and painted the wheel wells with Tamiya white. I shot a coat of Future and set
it inside my Tupperware to dry for a few days. This prevents dust from settling
on the model. While I was waiting for the Future to dry, I was trying to make up
my mind on which markings to do.
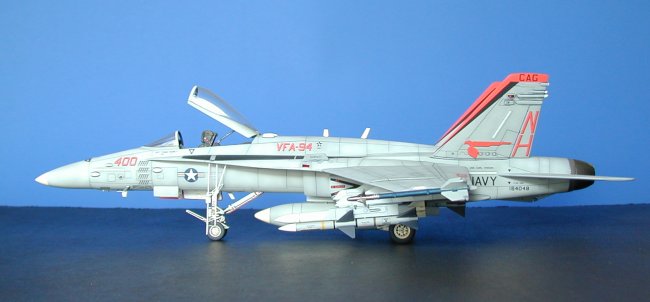
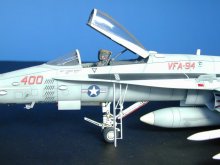
Decals:
There are a lot of cool markings
out there, but I had to only pick one for now. I narrowed it down to a couple
and was torn between VMFA-232 (The Red Devils) and VFA-94 (The Mighty Shrikes).
I chose VFA-94 since this was a new and colorful scheme that I haven’t seen
before. The only decal company with these markings at the time was CAM. Armagan
hooked me up with the sheet and I immediately went to work. The decals went on
with no problems so I shot a second coat of Future after the decals dried and
moved on to the weathering.
Weathering:
There are different ways of
accomplishing this, but I prefer oil washes over the other methods because the
colors are richer. It’s just my personal preference and I like the results. I
diluted a batch of Artist oil with turpenoid and mixed it in my paint pallet
until I got the consistency I wanted. I applied my wash as usual and wiped off
the excess with a lint-free cloth. After the wash dried, I shot a coat of
Humbrol Mattcote and it was ready for the ordnance.
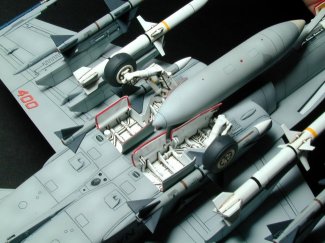
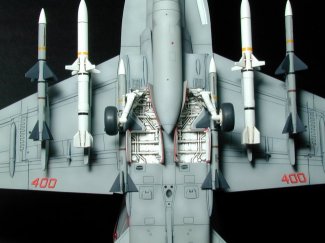
Ordnance:
I checked out some reference
material for typical load outs to see what my options were and decided to load
my BUG with 2 x harms AGM-88s, 4 x sparrows AIM-7Fs, and 2 x sidewinders
AIM-9Ls. I chose to install the AGM –88s on the inboard pylons so I used the
ones from the Hasegawa weapon set B along with the Aero 5A-1 missile launchers
to mount each warhead. The AIM-7Fs came from my spares box, and the AIM-9Ls were
from the kit. After installing a couple of AIM-7Fs on the fuselage stations, I
wanted to add a couple more on each outboard pylon as well. But first, I had to
scratch build a pair of LAU-115s since the Hasegawa set didn’t offer these
parts. I got some line drawings from another website and realized that they were
easy to make. I scratch built a couple and installed the AIM-7s. The AIM-9Ls
were OOB and for kicks I painted them as inert warheads just to give the model
more color.
Finishing Touch:
To finish my BUG, I just had to
add various antennas, pitot tubes, navigation lights, the boarding ladder, and
the canopy. The boarding ladder was the only part that posed any difficulty. It
actually came from the old Eduard PE set, but I wasn’t satisfied with the
thickness of the panel door so I fashioned one out of .010 sheet plastic and
laminated it to the brass part. I added some steel wire for the actuator and I
was finally done!
|
Click on
images below to see larger images
|
|

|
|
|
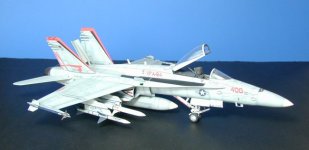
Conclusion:
Well there you have it! After spending 6 months to complete this project, I was
really satisfied with the finished model and had fun building it too. Although
the tooling on this kit does not compare to the more superior Hasegawa kit, it
just comes to show you what can be done to these old Monogram kits. As a matter
of a fact, this model took 2nd place at the 2002 US Nationals in VA
Beach…my first Nationals!
Later…
“TheVirus”
|
Click on
images below to see larger images
|
|
|
|
|