|
A
lot has been written on the history of the EE Lightning so just the “bare
bones “ here. Developed from the experimental P1a as a supersonic
interceptor, the Lightning was fortunate not to have been strangled at birth in
the notorious 1957 Defence White paper where it as noted that it had
(regrettably!) progressed too far to cancel.
As it was, the Lightning was never developed to it’s full potential as
replacement by missiles or another aircraft was always considered to be just
around the corner. The Lightning
was always limited in range & armament.
An IFR probe introduced from the F1A onwards partly redressed this as did
the larger interior fuel capacity of the F2A & F6.
During it’s service career, those who flew the Lightning claimed that
the increased tankage meant that they could carry out interceptions beyond the
airfield boundaries; the IFR probe meant they could do so outside Lincolnshire!
|
Click on
images below to see larger images
|
|

|

|

|
The
reluctance to sanction further development of the type meant that the Lightning
was always saddled with the limited range & armament with which it had been
conceived & limited the types export potential to just Kuwait & Saudi
Arabia. Both Japan & Germany
showed some initial interest in acquiring Lightnings but eventually settled on
the F104 Starfighter. In the
1980’s Austria was on the point of obtaining ex-Saudi Lightnings, offered as
refurbished by BAC but this too came to nothing & the Lightning disappeared
from the skies as a front line interceptor.
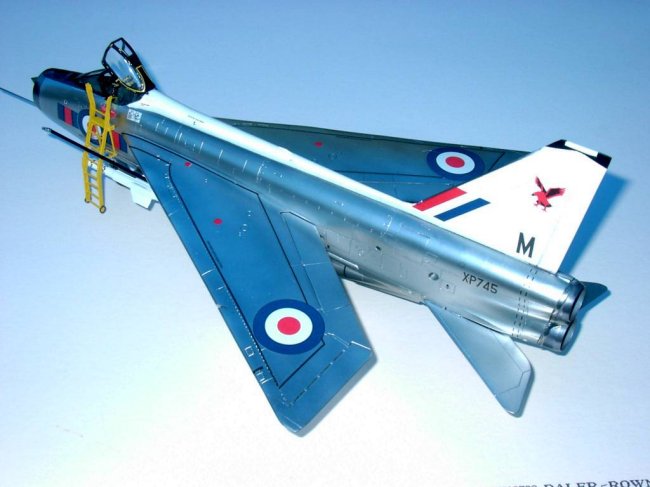
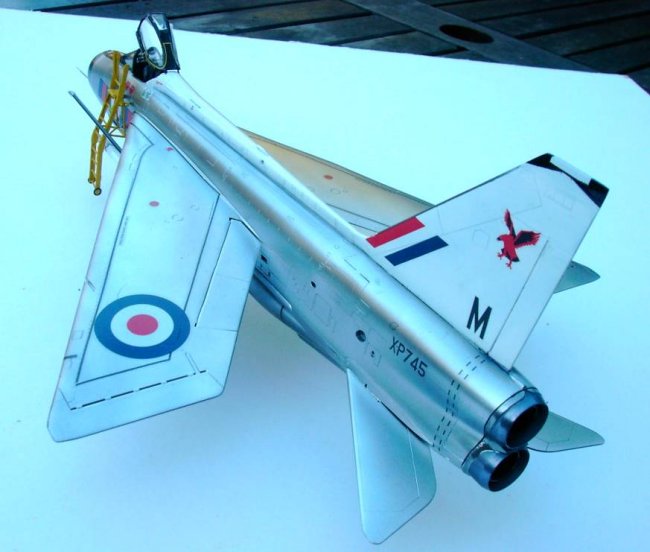
The
Airfix Lightning appeared in 1987, (just as the real thing was being phased out
by the RAF) in two boxings; F1/F1A/F2/F3 & F2A/F6.
Built here is the former as a 23 squadron F3.
Break
down of the parts is sensible. Surface
detailing is marvellous & apart from their Spitfire 22/24 & Seafire
46/47 has never been equalled by Airfix as far as I am concerned.
A huge decal sheet provides markings for six (!) machines of various
marks, all with highly colourful markings & stencils applicable to each of
the four marks buildable – outstanding. More
on the decals later.
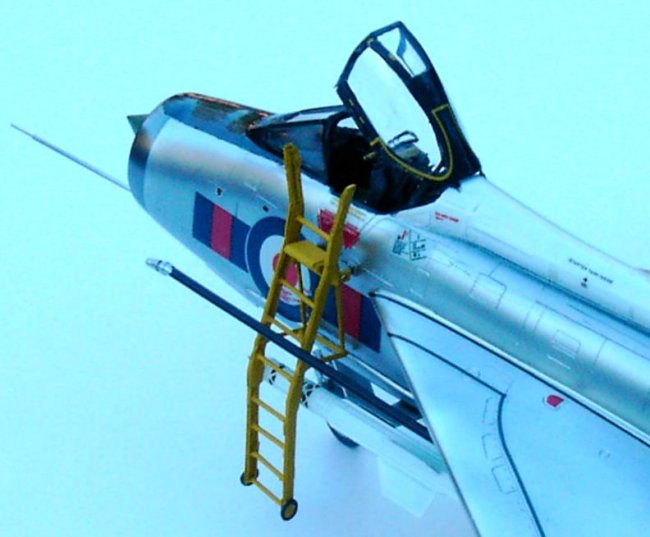
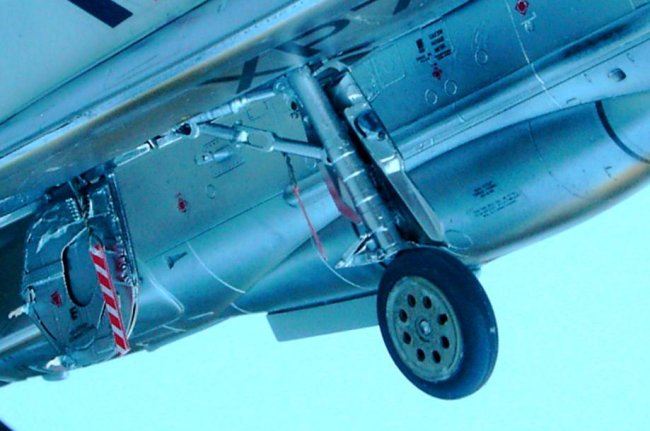
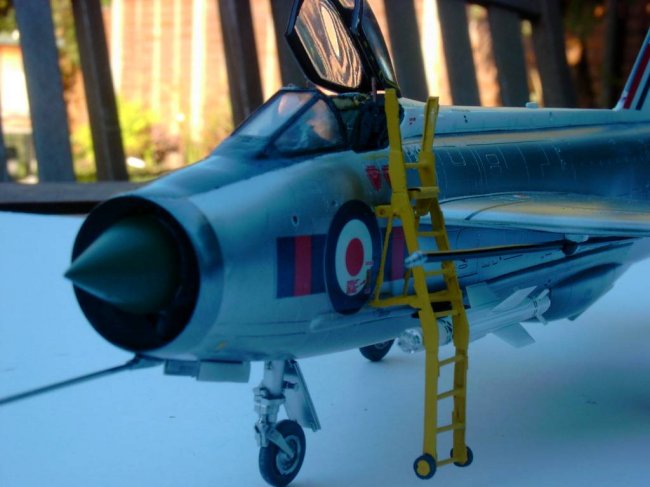
I
intended to incorporate as much as possible of the Flightpath detail set but
I’m afraid that my limited abilities with etched parts made it possible to
include just the main wheel bays, main oleos & wheels, some of the canopy
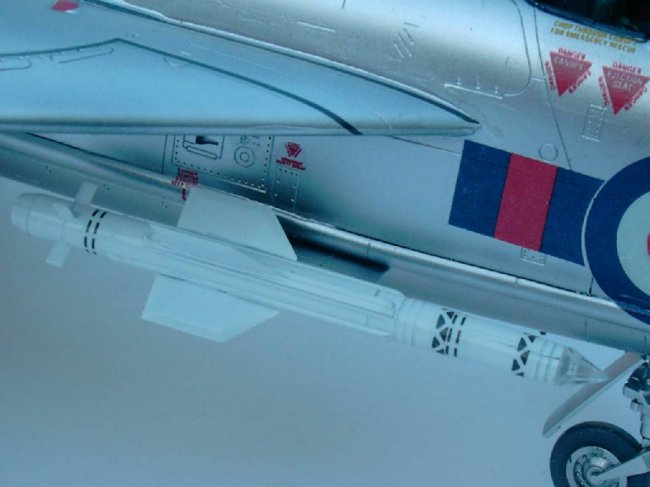
framing & the access ladder! (I spent a morning assembling one of their
Firestreaks, only to discover that it offered no real improvement over the kit
parts). In the hands of anyone who is more confident & capable
with etched components, this set, comprising hundreds of parts would create an
absolutely stunning super detailed model. As
it is for us mortals, only the cockpit & wheel bays are deficient on the kit
but fortunately the likes of Aires, Cutting Edge, KMC, CMR & Aeroclub all
offer low cost replacements/enhancements for these areas (lower cost compared to
the entire Flightpath set that is!). Some of the unused parts of the Flightpath set will no doubt
find their way onto a future F2A/F6.
Anyway,
I incorporated a Cutting Edge resin cockpit & added some lead ballast in the
nose cone to prevent a tail sitter. I
had purchased this kit off Ebay & it must have been in someone’s
collection for a while as the wings & fuselage halves were all severely
warped, which I understand, was a common problem with early releases of this
kit. The fuselage I managed to
coerce into something resembling straight but I had to rob the wings from
another kit in the stash.
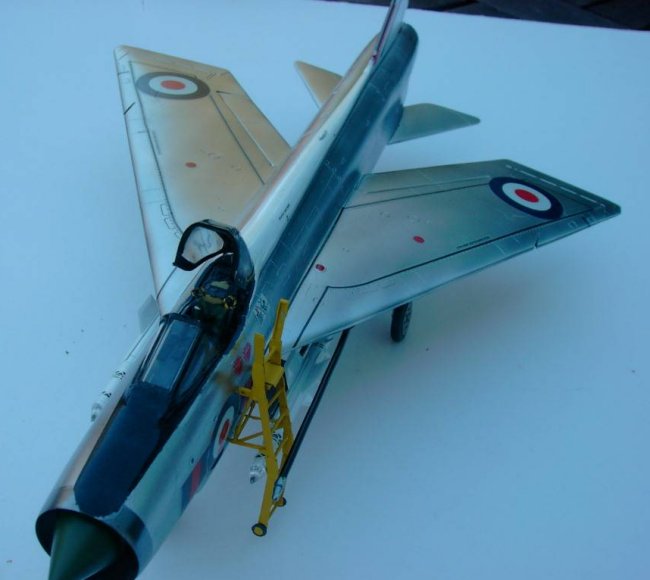
With
assembly of the airframe complete, the fin, spine & Firestreaks were sprayed
Xtracolour gloss white. The fin
& spine were masked when dry & whole thing was sprayed with Alclad gloss
black primer. The nose intake ring
& jet pipes were sprayed with Alclad stainless steel & after drying, I
applied Alclad Duralumin – big mistake so rubbed it down & started again
from the primer stage, this time using polished aluminium which gave the highly
polished look that I wanted for this aircraft.
Now
it was time for the superb decals. The
only negatives are a very matt finish & a surfeit of carrier film but the
latter is very thin & hardly noticeable.
The vertical bars of the 23 Squadron markings were a tad off register but
a few seconds with a rule & blade corrected this.
A total of three evenings work was required to apply them all with the
main national & squadron markings going on first as some of the stencilling
is applied over these markings. I
used setting solution but I feel that they would have gone on just as well
without. After decaling, I applied
a clear varnish.
The
Flightpath boarding ladder represents about four hours work but makes a great
addition to the kit. I also added a
few RBF tags (again from the Flightpath set) but kept this to a minimum as I
wanted to represent a “QRA” (Quick Reaction Alert) machine, which I presume
would have had the bare minimum of these attached for a quick getaway.
For this reason, I also decided against the Flightpath nose FOD guard
which did look nice – maybe that “next time”?
A
marvellous model of a marvellous aircraft.
In 1/48 the Lightning is a large & impressive looking model; it
“dwarfs” the Eduard Mirage IIIC that I have just completed & provides a
superb centrepiece for my growing jet display!
Graham
|
Click on
images below to see larger images
|
|

|

|
|
|