1/48 Tamiya F4U-1D Corsair |
 |
Gallery
Article by Aaron Pfau |
|
|
|
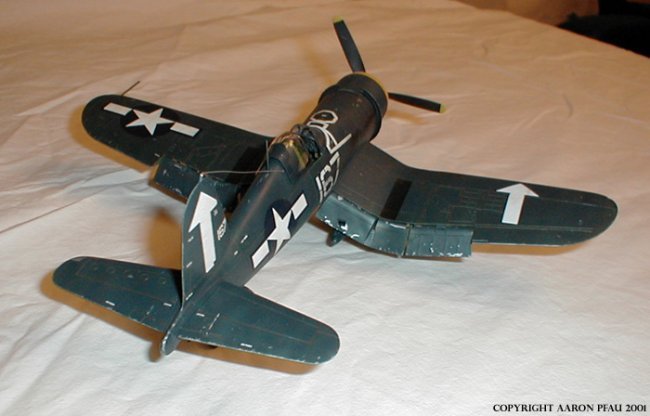
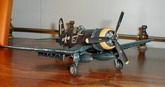
This is the enormously popular
Tamiya 1/48 F4U-1D Corsair completed almost entirely out of box. I got
the inspiration to build it by watching reruns of "Baa Baa Black
Sheep" on The History Channel. Since I have several super-detailed
projects in the works, I wanted to finish something quick to prevent burnout.
And also, to prove to my wife that I could actually finish a model!
This kit is simply a work of art
and was a total joy to build. Out of box, there's lots of great
detail, beautiful crisp panel lines, and the fit is nearly flawless. Its
Tamiya high quality through and through. I can't speak of its accuracy
as I try not to get too caught up with accuracy issues, but I haven't heard
anything bad yet.
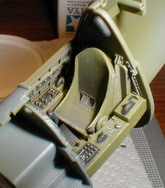
I used many
new techniques on this kits, at least new to me. For the cockpit,
I started with a basecoat of Model Master (MM) interior green, interior
black for the boxes and instruments, and drybrushed with chromate
yellow, and grey. Rather than using a dark wash, I used dark grey
pastel chalk scrubbed into the cracks and crevices to get a sense of
shadow and grime. This way, I could easily wipe away any
mistakes, and it helps give a little texture.
|
Click on
images below to see larger images
|
|
|
For the
instrument dials, I filled them in with drops of Future to create a
clear lens type of effect. Seatbelts were made with thin strips of
construction paper threaded through some photo etch buckles, the only
non-kit parts I used.
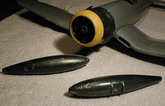
The paint
scheme is a simple overall Dark Sea Blue, however I wanted to weather
this baby up, so I tried a new technique for chipping the paint.
That technique is covered here at ARC under the "Tools n Tips"
Section. I get more comments about the chipped paint than anything
else. And even though it adds a few more steps, it is very much
worth it when you're done!
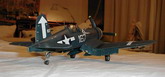
The panel lines were highlighted
by making a wash of burnt umber oil paint thinned with Turpenoid. Using
a fine brush, I lightly touched each panel line so the paint would run out and
flow through the line. Then, I used paper towel and wiped across the
panel line in the direction of the airflow. This cleaned up where the
paint ran out of the line, and also helped to further weather the surfaces
adding some more color and variation to the dark blue and over the decals.
This technique was courtesy of Drewe Manton, thanks Drewe! Other dark
stains, like the gun ports, were created by brushing on black oil paint and
feathering it in to the base coat. Oil paints are just awesome for
blending paint into other colors. One safety tip though, I coated the
entire plane in Future before I used the oil paints, as the thinner used in
the oil paint can sometimes react to enamel finishes.
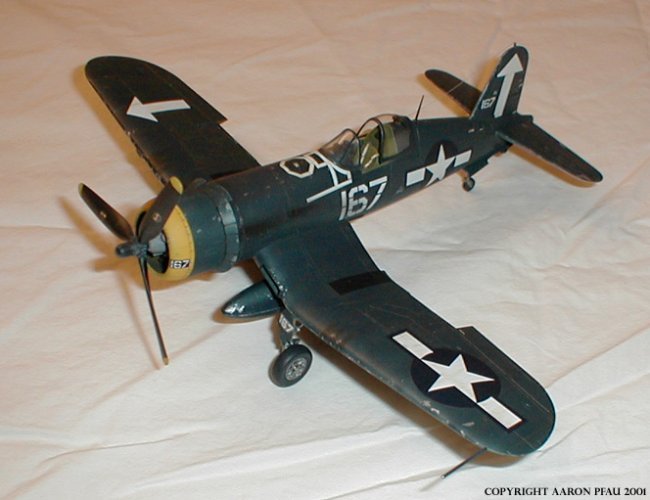
The decals are from the kit and are my only complaint with the kit. They are way too thick! Even with solvent, they came out looking too thick and more like a sticker than a decal. Oh well, next time I'll use aftermarket decals!
That's about it, the antennae wire
was made with stretched sprue. Overall, a very fun project!
Aaron Pfau
|
Click on
images below to see larger images
|
|
|
|
|
|