|
Thanks to the
inspirtation provided by an ARC Forum group build this kit finally got dusted off
and built. It was bought within a few weeks of this kit being released, so
that makes it 23 years old and definately about time it was built. Amazingly,
for a kit that old, it's still better than most that come out now.
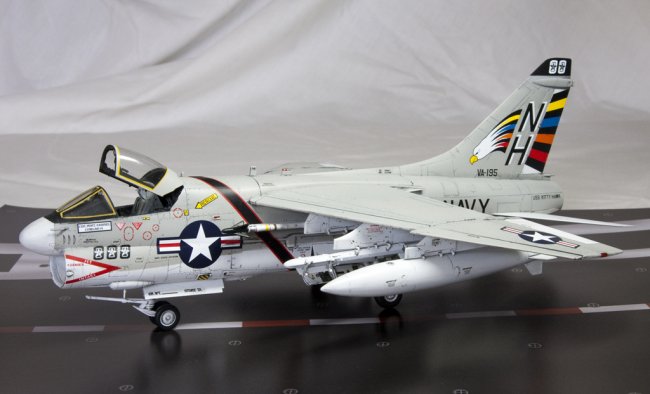
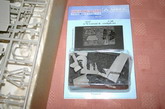
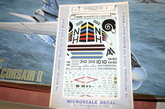
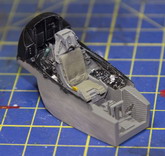
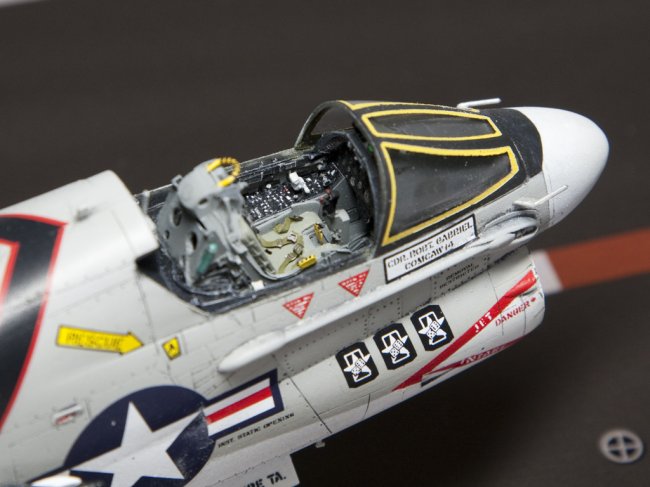
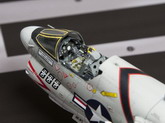
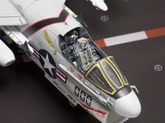
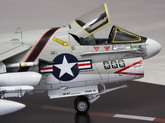
For extra detail in
the cockpit I added the Aires set and also used some Microscale decals to
brighten the outside up. I have to say that these decals are as old as the kit
but performed flawlessly when putting them on.
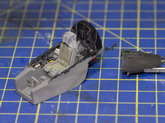
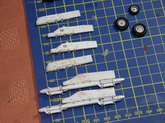
Construction, as
usual, started with removing big clouds of resin dust from the Aires parts
and the raised detail from inside of the kit fuselage. Lots of dry fitting and
careful cutting will pay big dividends here. It's a real shame that Aires don't
provide better instructions on fitting their parts, it would help massively.
Next step was to paint the cockpit before gluing it in place and joining
the fuselage. Another thing worth spending time on is the intake trunking. This
is probably the worst aspect of this kit but some sanding and dry fitting makes
this fit so much better and will save a lot of filling and sanding later.
Anything that saves a lot more work later on is worthwhile in my book.
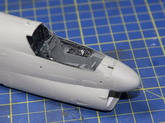
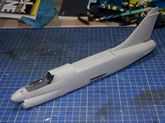
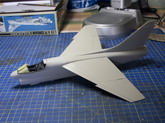
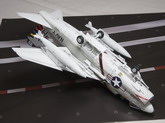
Once the fuselage is
together, the wings were fitted and again they are not the best fit. There was
a bit of a step at the front to take care of before all other, pre-paint,
bits could be added and a coat of primer then applied.
Click on
images below to see larger images
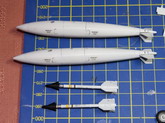
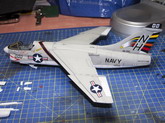
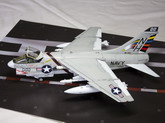
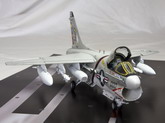
Once the kit and all
other parts, pylons, drop tanks etc, had been primed it was pre-shaded with some
dark grey and black. For the first time, since I got back into modelling, I
decided to use Acrylic paints to finish this kit. So 2 coats of Humbrol
White was sprayed onto the undersurfaces and all moving surfaces, followed by a
nice masking session and 2 more coats of Humbrol Gull Grey. Having used these
paints for the first time in over 20 years, the experience was a bit nerve
wracking, didn't want to mess up now, but they covered brilliantly and
I will definately be using them again. After a few days drying time, 3 coats of Kleer
were added, and again, the kit left for a few days for the Kleer to harden.
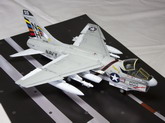
Decals were then
added before everything was given another coat of Kleer. Next came my
favourite step, a bit of weathering using Pro-Modellers Dark Dirt. I really enjoy
the look that this gives once washed off, the model begins to take on a 'real'
appearance. The final step was a coat of Xtracrylix Matt varnish before adding
all of the remaining parts.
All in all this was one of my most enjoyable builds and I won't wait so long before I pull the A-7D version out of the Attic.
Thanks to the guys on the forum for setting up this group build and motivating me into a build of a fabulous kit and aeroplane.
Thanks also to Steve for making it possible for us to share our builds and experiences.
Hope you enjoy it as much as I did
Peter Wilkinson
Click on
images below to see larger images
|