|
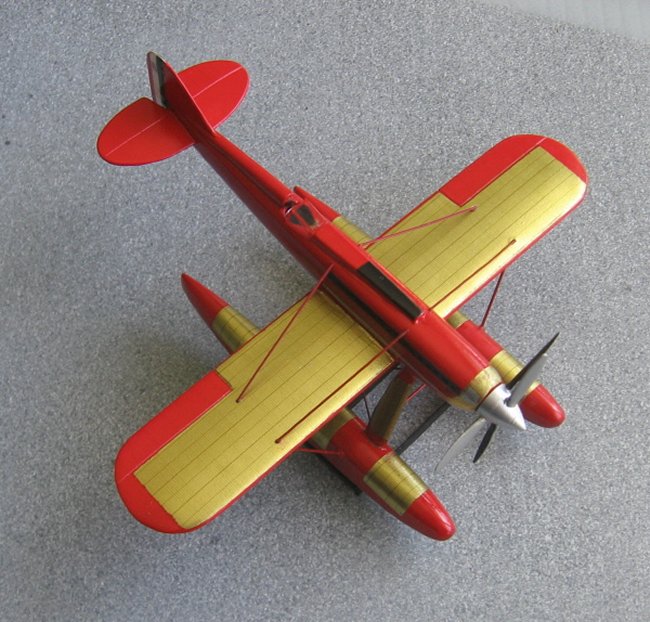
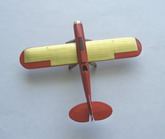
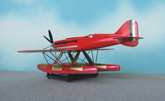
The
Macchi Castoldi M.C.72 is so famous that I won’t bother with extensive
introductions or descriptions.
With
an aura between the paintings of Giorgio De Chirico and the sculptures of
Giacometti, the pure lines of the MC72 speak for themselves.
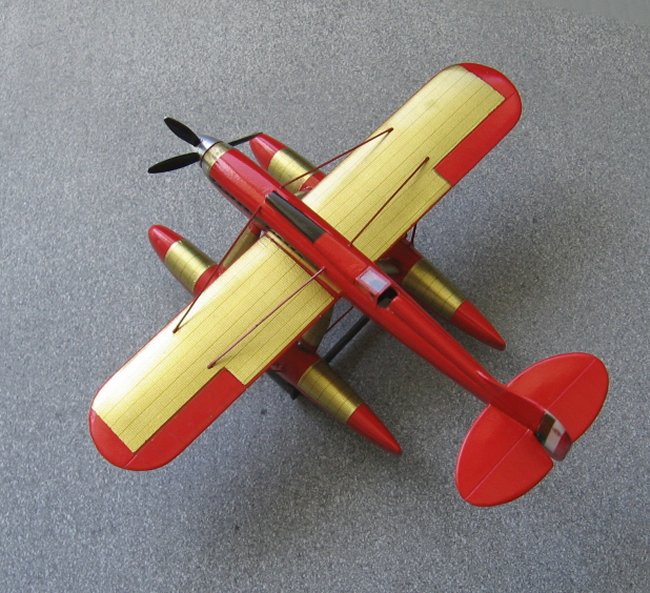
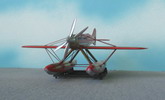
Suffice to say that the speed record it set in 1934 for seaplanes still stands
today, 76 years later! It was powered by a FIAT AS.6, which was actually two
AS.5 in tandem. It used surface radiators on the wings, floats and, if needed,
in the lower back fuselage. Two sets of contra-rotating props were used to
cancel torque.
It is
unthinkable that no contemporary kits exists of this iconic plane; only a few
out of production and rather inaccurate issues pop out from time to time here
and there. The recently-released Pavla kit of the Supermarine S.6 is a good step
in the right direction, though.
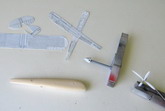
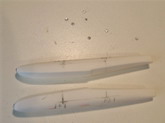
Once
more the scratchbuilding approach was needed in order to have one. A little
relief came from the generic Aeroclub pontoon vacuformed sheet that is available
from some vendors. This has floats that were a good general fit to the ones
needed here.
Click on
images below to see larger images
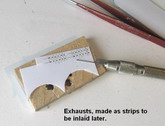
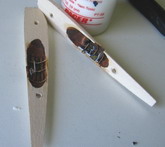
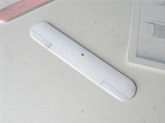
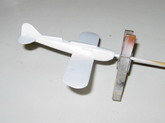
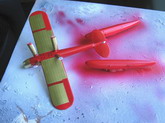
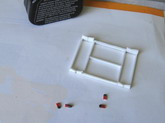
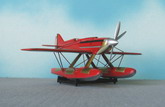
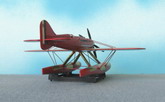
The fuselage
was carved from basswood but since my Mattel Psychedelic Machine has a
small plate it couldn’t be used to vacuform parts and the original was
used instead. To the main fuselage a turtle deck (wood), an air intake
(folded styrene sheet) and two strips with pre-located exhaust holes were
added later.
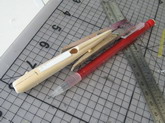
Flying
surfaces were made of styrene sheet and for the pontoon struts Contrail
airfoiled stock was used. The struts were given the correct silhouette and
pins were inserted at the ends in order to facilitate assembly later on.
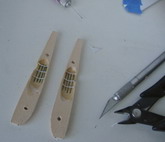
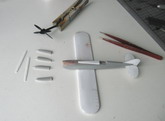
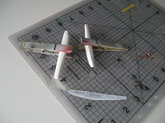
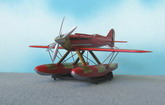
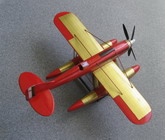
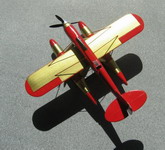
An interior
was built with some structural detail, seat, joystick, rudder pedals and
instrument panel, but -as it is some times the case with these types- very
little can be appreciated due to the small cockpit opening.
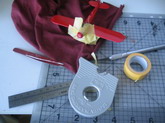
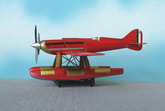
A spinner
that needed a bit of adjustment to match the plan was found in the spare
box. Prop blades were carved using as a base a discarded four-blade prop.
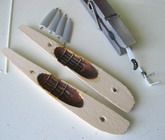
The vac floats were glued, re-contoured and prepared for receiving the
struts.
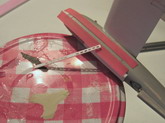
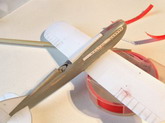
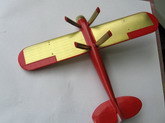
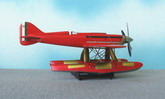
Once those
bits came together and after priming and painting decal time was up. I
decided to work the radiators as a two-decal endeavor. A metallic brass
coat was sprayed on decal paper and the radiator pattern was printed on
another. Masks were cut and then the decals applied.
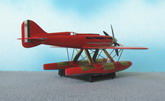
For the
statistic-inclined here are all the decals used:
2 black strips to cover the exhaust areas
2 aluminum strips for the stripe underneath the precedent
2 registration numbers in white at the base of the tail
2 Italian flags on the rudder
2 crests on the mentioned flags
4 brass decals for the wing radiators
4 brass decals for the struts
4 radiator patterns for the wing
6 radiator patterns for the struts (the front pair, as it is angled, required
both sides covered separately
2 tiny aluminum covers on the nose on top of the upper oil radiator
6 louvers on the front fuselage
4 louver pairs on the belly
2 red strips that cut the lower wing radiators in half
1 black strip on top of air intake
6 little decal strips for the canopy frame
6 hinges (they are only little red squares to represent the fin hinges
protruding into the rudder)
12 for the radiators on the floats (again, these are two-stage decals)
Total: 67
To
that 16 streamlined struts were added and a trolley was build to support the
model.
It is a joy when design encompasses beauty and efficiency, isn’t
it?
Gabriel Stern
Click on
images below to see larger images
|