|
History
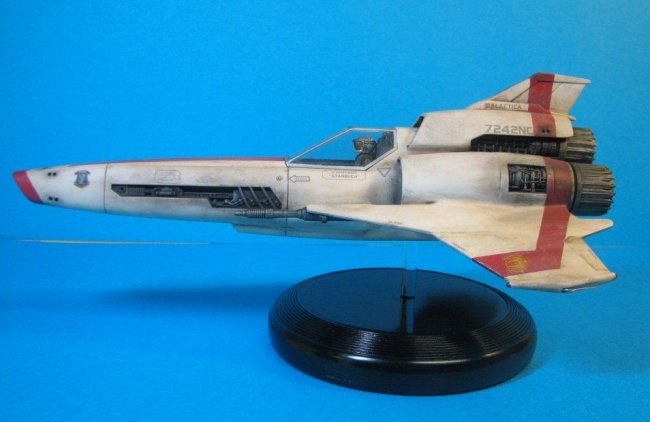
The
Colonial Viper Mk II is an Air/Space Superiority Fighter that appears in the
re-imagined Battlestar Galactica TV series.
The
Colonial Viper series of fighters were designed to operate in both atmospheric
and space environments and is the fleet’s primary superiority fighter/attack
craft. The Viper Mk II was introduced into service prior to the outbreak
of the First Cylon War. The Mk II remained in service until after the war
and was eventually replaced by newer, more advanced models. Prior to the
Cylon attack that sends the last of the human race running for their life, the
only flight/combat capable Mk II’s remaining are in the museum deck of the
soon to be decommissioned Battlestar Galactica.
The
Cylons launched a network attack on the Colonial fleet, which left them
vulnerable to weapons attack by the Cylon Raiders and Basestars. However,
due to the policies of the Galactica’s commander, Commander Adama, and the
antiquity of the Viper Mk II, the Galactica and the Mk II’s were immune to the
network attacks allowing the Galactica to escape the attack. The Galactica
now leads and protects the remainder of the human race in their flight.
Click on
images below to see larger images
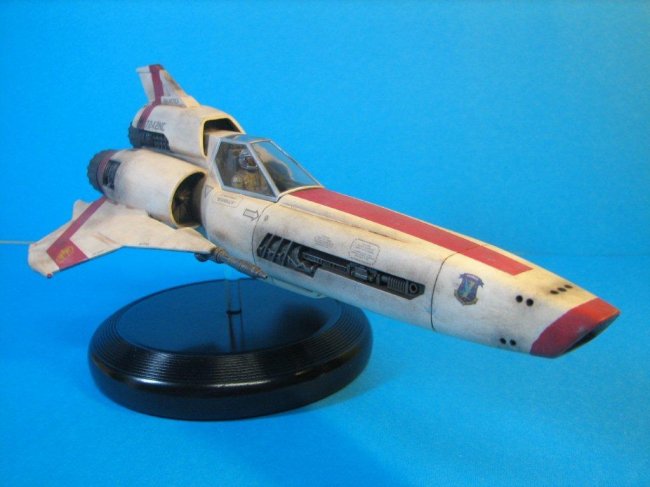
The
Model
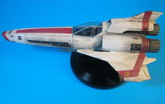
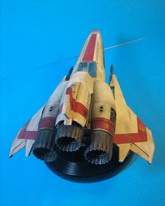
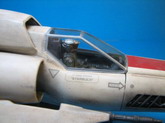
This
is Meobius’ first release from a four kit series from Battlestar Galactica.
The model is molded in white plastic styrene with a clear canopy. A two
piece resin pilot is included.
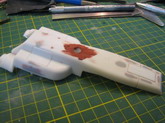
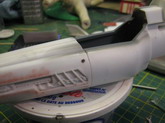
The
model is fairly well engineered to the point of being over-engineered in some
areas. Overall, the fit is very good but there are some areas that
required a bit of extra finesse. My biggest complaint of the kit was an
inordinate number of sink marks; practically every part had at least one sink
mark! The worst were the sink marks on the turkey feathers on the
exhausts.
The
instructions are very well done, with written instructions to build accompanying
the 3-D line drawings. Also included in each step are coloured in-build
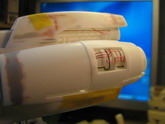
photographs, which are handy in determining part fit. Colour callouts are
inserted into the photographs, however, they are very tiny and I had to resort
to a magnifier to read. Colour references are to Testor’s lines of
paint, Model Master, Acryl and original Enamel.
Moebius
provides markings for two Vipers, Apollo and Starbuck. Moebius also
provides the red striping as well as separate emblems for the wing stripes for
those who wish to paint the stripes. Unfortunately, the emblems are not
backed with white and disappear in the red stripe.
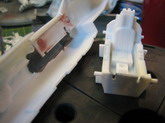
Construction
I
built the model out of the box with the following exceptions:
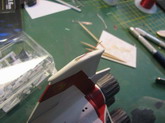
-
1)
Modification of the cockpit so as to attach the cockpit walls to the
fuselage sides to make filling the seam easier.
-
2)
Modification of the fuselage to accept an acrylic rod for a replacement
stand.
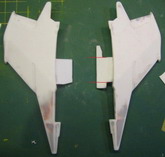
-
3)
Removal of the location tabs on the wings to allow installation after the
engines are assembled and those seams filled.
-
4)
Addition of missing details such as hoses, piping and emergency canopy
release, to replicate the full size studio mock-up.
-
5)
Replacement of wingtip antennas with wire.
-
6)
Drilled out the vector thrusters to provide depth over the provided decal
thrusters.
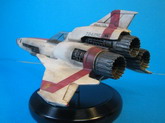
Finishing
I
used a combination of Humbrol and Testor’s paints to paint the model.
The overall model was painted with Humbrol’s Matt White and the striping was
Testor’s Acryl Insignia Red. The engine details, exhausts and avionic
bays were painted semi-gloss black followed by Alclad’s Steel. After
sealing with Future, the decals were applied, I chose Starbuck’s Viper.
The instructions indicate an option (1 stencil) for replicating either the CGI
model or the full-size mock-up, however, Moebius does not provide the stencil
for the full-size mock-up. I cut the wing emblems from the red decal
striping and applied to the appropriate locations. The difference in red
around the emblem and the red paint is hardly noticeable.
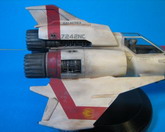
After
sealing with Testor’s Acryl Flat Clear, I applied oil washes of burnt umber on
the fuselage and black in the industrial areas (engines and avionics bays).
Drybrushing of light grey, white and aluminum toned down the darker washes over
the fuselage. Drybrushing aluminum, gold and copper over the industrial
areas highlighted the industrial areas. The use of differing metallics
gives these areas a sense of “alieness”. After sealing with another
couple coats of flat clear, I brushed on some weathering powders from Bragdon
Enterprises as well as some ground up white pastel.
I
hope you enjoy the model.
Bill Eggleton
Click on
images below to see larger images
|