|
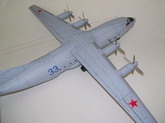
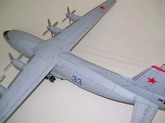
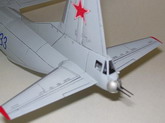
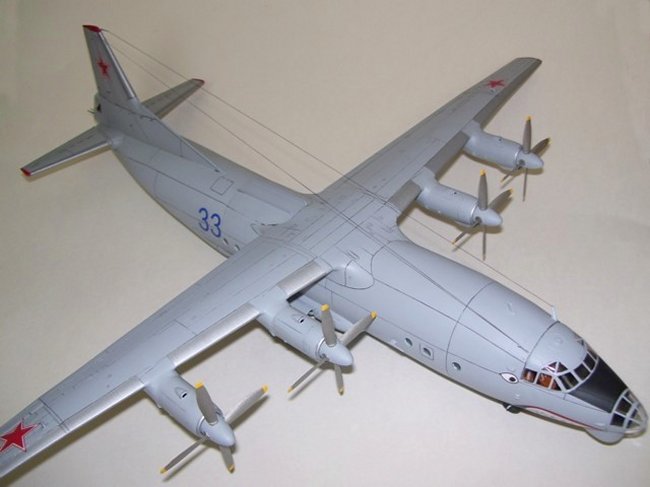
This is my finished
OOB build of the Roden 1/72 AN-12BK Cub. A VERY nice kit and not difficult to
build. All assemblies went together well with no putty used.
Click on
images below to see larger images
Assembly was
straight forward with no hassles. I started assembling the engines first. They
went together with no trouble at all and the fit was excellent. To make
assembling the engines to the wing easier, I attached the engine/wing fairing
parts to the wing. Then I could attach the front part of the engines with no
problems. Just a little sanding of the joints was needed to get a perfect fit
and alignment.
With the
wings/engines done, I started on the fuselage/cockpit. Since most of the cockpit
details could not be seen through the small windows, I didn't do allot of
painting. I only added tape shoulder belts to the seats. I tried to use the
instrument panel decal, but it would not adhere to the plastic panel, so I just
left it off.
I also did not do
any painting/detailing to the cargo bay since the model was going to be closed
up and nothing would be seen through the tiny fuselage windows. It was at this
stage I added LOTS of nose weight in the compartment behind the cockpit
bulkhead. I had to use tabs on the fuselage halves to aid in alignment since
there were not pins. I then assembled and attached the rear fuselage assembly
(including the tail gunner area) with no troubles. Everything fit just fine.
All this time I was
concerned about how the wings would fit the fuselage and what kind of seam/joint
I would have. After three dry fits, the wings gave me a snug fit. I had to do a
little sanding to get them to fit flush, but this only took 5 minutes of
sanding. The fit was great! And I did not have any problems with
wing/fuselage angle. It was self-aligning. I then painted and assembled the
props and they were also self-aligning with no problems. I added them after the
model was finished.
After the model was
painted, I gave it a wash using Pro modeler dark wash. This took me a week to do
all of the panels lines. I washed a few each day, let them dry for 10 minutes
then wiped off the excess. Worked like a charm!
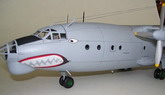
I used a mix of
decals from "Authentic Decals" and Aeromaster. The AD decals for the
mouth/eyes gave me trouble because they would not conform to any panel lines.
Even using LOTS of MicroSol they would not budge or wrinkle. I had to cut them
on the panel lines to get them to conform. I then used Clear Gel School Glue for
the fuselage windows and they came out looking terrific!
It was now time to
assemble the landing gear. One word of caution here. The plastic is soft and
easy to sand. The problem with this is that the gear struts/axles are soft as
well and bend easily. I was afraid that the weight of the model would bend the
gear struts. So far they are holding up nicely. Because of this, I plan on
making a cradle to support the model when I take it to any shows to save the
soft gear from breakage.
After the model was finished, I
added all the antennas. I then added two wire antennas using E-Z Line. (GREAT
stuff)
This model was an enjoyable build
for me because it did not give me any assembly problems and the plastic was easy
to work with. The only area I would be concerned about is the soft landing gear
legs holding up over time. I think this is a great kit for intermediate and
experienced builders. Now I just have to find a space large enough to display
it.
Scott Vomacka
|