|
Douglas DC2
History
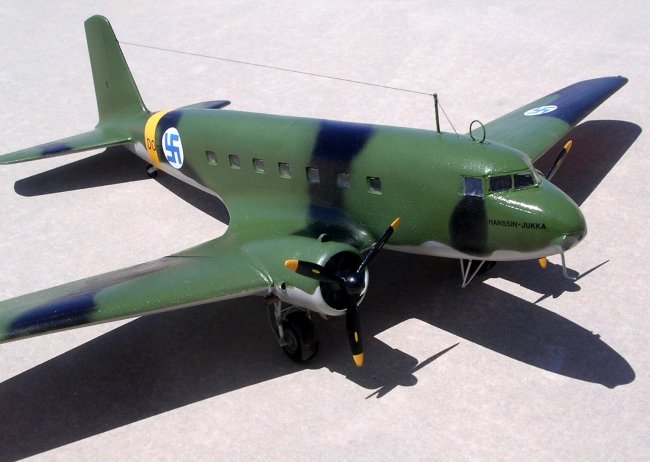
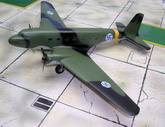
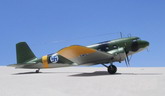
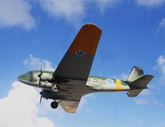
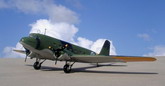
Douglas DC2 ‘Hanssin Jukka’ was a Finnish Air Force HQ VIP transport in 1942. The service history of this DC2 started when Count C.G.Von Rosen of Sweden donated the machine to the Finnish Air Force, having bought the DC2 from AB Aerotransport. The aircraft was flown to Finland in January 1940, and remained operational until June 1955. This DC2-115-E, production number 1354, was originally sold to Dutch Airline KLM and named “DeHaan”, registered as PH-AKU, and flew in European and Asian skies. After donation to the Finnish AF the aircraft was fitted with bomb racks and open dorsal gun position, being designated ‘DC-1’ and named Hanssin Jukka. On the 1st March 1940 it started its first and also last raid in the Winter War with Llv44, during which flight an engine was damaged. Eventually the aircraft was repaired and served with Lentolaivue 46.
Having served with a variety of units, the DC2 was officially written off the books in 1957. In 1958 it served as a coffee lounge in Finnish Hameenlinn. In November 1981 it was donated to the AF museum where it was renovated. On the anniversary day of the Finn AF, 6th March 1983, it emerged at the Air Museum in Tikkakoski where it is still exhibited.
Click on
images below to see larger images
The kit.
Name of aircraft: DC2
Make: MPM 72527
Scale: 1/72
Cost: $37.40
Type: Multi media kit with two Finn AF and one Spanish decal options.
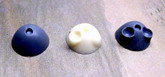
The kit is moulded in medium grey plastic with fine engrave panel lines that appear to be accurate and conforms to drawings. It is another high quality kit from MPM, which can be classified as a multi media type. Apart from the injection-molded parts the kit contains resin and brass etch items as well as a vac form canopy for the dorsal turret. The clear parts for the windscreen and side window panels are injection moulded and are very clear. However I preferred to use Kristal Kleer. This had a drawback in my case having decided to make the VIP version. These carried side curtains to each window, which I could not add as the Kristal Kleer medium, will not give the desired flat finish if these are added. The propeller comes as individual blades and there was a choice for using either injection moulded shaft and central hub or one made of resin. Still I did not find it a difficult task to build each prop unit. Alternatively for those who find this hard task they can refer to Aeroclub, who comes to the rescue with a complete white metal propeller-part number PO-17. Two resin propeller spinners are also provided in the kit.
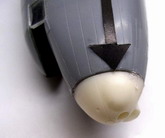
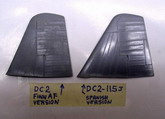
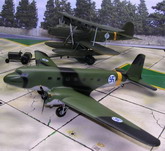
The kit offers three nose cap parts to choose from. The one adopted for the VIP version was the one made of resin, and having one landing light in it. This was not a perfect fit to the rest of the fuselage, but needed fairing the gap with a small amount of filler. There are two fin and rudder parts to choose from and the instructions, as usual with MPM, were easy to follow made it clear which parts to use. The kit offers three colour options and each comes with the appropriate extra parts, which includes resin pylons and bombs and very detailed gun position for the bomber version.
Construction.
The first step of construction is to assemble the cockpit interior. This consists of two crew seats, a floor, bulkheads, a detailed instrument console, and a pair of control columns that come in four parts. To the rear of the cockpit there are two bulkheads and a floor that runs the length of the fuselage. All the interior was painted slate grey and the whole assembly, using bits of plastic added to the interior of the fuselage halves as effective aligning guides in the absence of locating pegs, was closed, forming now a complete fuselage. The wing comes in five pieces, and although these are butt jointed to the fuselage, the centre lower section gave all the strength needed needed to complete the job. There are two parts for the wheel well roof, which were painted and fitted in the wing parts before these were closed. Going back to the fin and rudder parts, these could cause a problem unless a secure joint is obtained and allowed enough time to dry completely. The horizontal tail planes needed some trimming before fitting in place. Even the main planes required some filling.
Painting and finishing.
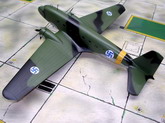
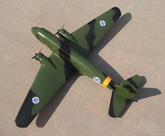
MPM suggests Humbrol numbers for paint and with Humbrol being a popular brand it was not difficult to cross reference with alternative brand of colour paints. The first step I took was to airbrush the areas that are in identification yellow. These were first given a coat of semi-matt base white. These areas are the underside of wing tips and the fuselage band. First these areas were given an undercoat of matt white followed by yellow. These areas were then masked and the entire underside of the fuselage and wings was airbrushed in light
grey. These areas were masked again and all the upper surfaces were airbrushed in Finnish medium green. Upon drying the irregular black paint camouflage was applied, therefore completing the camouflage scheme of the model. Applying the decals gave very pleasing result, thus adding another important aircraft model and extend my Finn AF section.
Conclusion
Building the MPM model required at some stage more time and effort. The unique camouflage scheme offered very much contrast to other types of colours on WWII aircraft. However the kit also offers alternative colour finishes to satisfy the keen modeller be it military (72527) or in separate boxing as a civil type (72508).
Carmel J Attard
Click on
images below to see larger images
|
|