|
I rarely build
anything straight out of the box, and I'm always looking for a different way of
presenting the model. I contemplated doing a two seat conversion, or an unusual
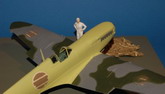
colour scheme, but they just weren't different enough. So after spotting a
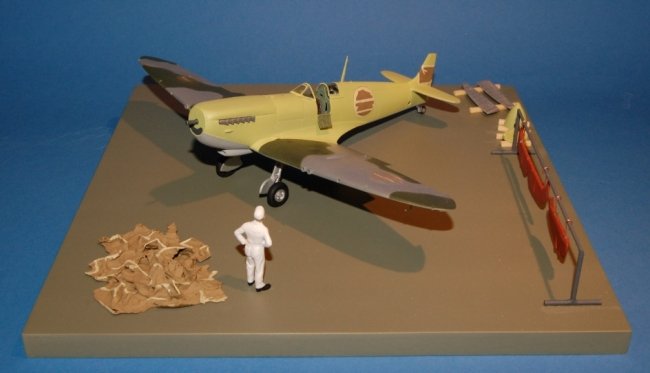
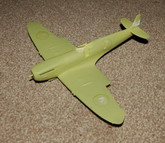
picture of an aircraft under restoration, I decided to model this Spitfire as a
present day restoration. The rebuild work is complete and it is now in the paint
shop receiving its new scheme.
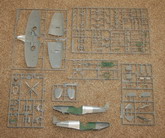
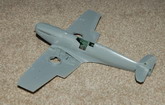
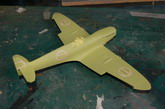
The build of the kit
was more or less straight forward, other than a few changes to add detail or
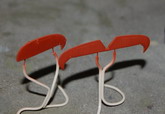
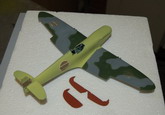
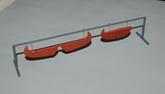
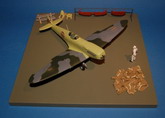
modify to suit the diorama. The elevators and rudder were cut free, hinge slots
filed in, and are displayed with the fabric in primer, hanging from a painting
rack that was soldered up from 1/16 brass tube. Ailerons were also cut from the
wings while the top and bottom skins were still separate. They were finished in
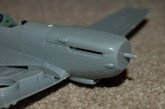
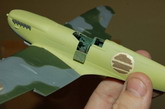
bare metal, resting on timbers on the hangar floor. The cowl has also had all
the fasteners drilled out slightly, as the cowl Dzus fasteners are quite
prominent.
Click on
images below to see larger images
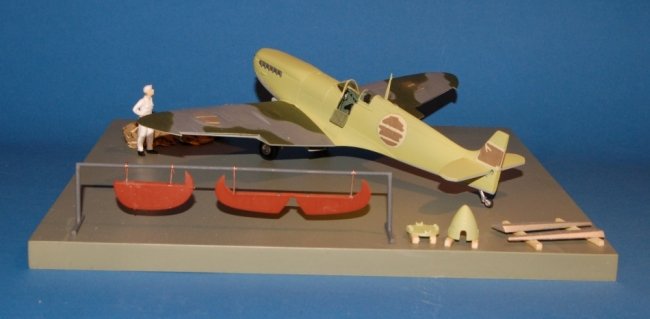
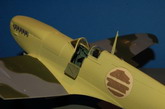
Before starting the
painting, I had a chat with a guy involved with fullsize Spitfire restorations.
He told me that roundels are generally not painted onto the camo colours, and
that the primer is masked out in the roundel position prior to the camo coats.
They do this for a couple of reasons. One is to avoid weight build up due to
several layers of paint, while the other is that the roundel position is used as
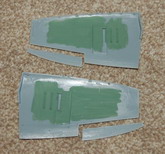
a guide to the position and shape of the camo itself. So; on my model, I wanted
the roundels to be masked out. I couldn't just paint the model as the panel
lines would show through the paint, so I needed a layer of something to
represent the brown paper used to mask out the area. So I got an old kit out and
had a practice by painting the roundel area with a thin layer of PVA glue. The
brown paper and masking tape colours were then painted over the PVA glue. It
looked fairly good so I went with it on the Spitfire.
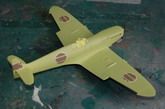
The whole model was
sprayed in a yellow/green etch primer first, followed by drawing on the roundel
and fin flashes. They were painted in the PVA and once dry, the brown paper and
masking tape colours were applied. The underside grey followed, slightly
overspraying onto the masking. Some companies spray the whole airframe in one
go, others paint wings first. I decided to have the wings painted and the
fuselage still in primer, with the fuselage masking having just been removed and
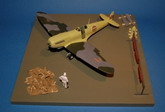
lying on the hangar floor.
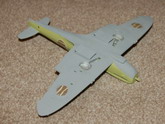
The camo was marked
on lightly in pencil and the grey painted freehand. The grey was then masked out
with sausages of 'Blu-tack' for the edges, and wet tissue for the space in
between. This is the first time I've used wet tissue to mask with and I was
really impressed how quick and easy it was to apply and remove.
So, how to simulate the ripped off paper masking on the floor? I used tissue
paper, crumpled up and wetted out with dilute PVA glue. Once set, it left a nice
hard lump that could be painted. After the base coat of brown dried, several
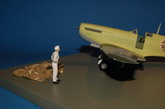
lines of cream were painted to represent the masking tape. A 1/48 Preiser ground
crew figure was painted in white overalls surveying his handy work. The scene
has been compressed a little to fit everything on the base. In real life of
course, everything would be much more spread out. I could have gone further with
the detailing, but the B-17 Group Build was rapidly approaching, so I decided to
wrap it up and move on.
Stephen A. Carr
Click on
images below to see larger images
|
|