|
AMI TF-104G 20°
sqdrn Grosseto Hi
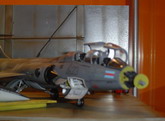
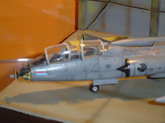
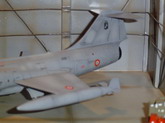
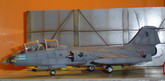
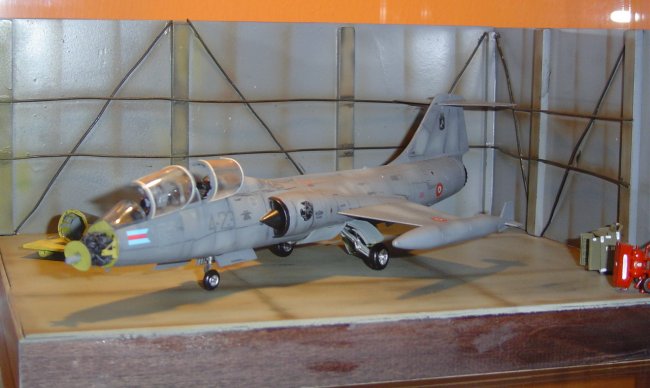
to everyone. This articlet is about my third F-104. It is a two seats version
of the 20th sqdrn Operational Conversion Unit based in Grosseto. The
quality of the kit is good as usual from this Japanese company. For my first time ever
I tried a full aftermarket kit made by Verlinden. The Belgian company
offers you 4 resin seats; right side resin avionics bay/rat (ram air
turbine) compartment/oxygen compartment; resin radar reproduction and a
resin engine vane for the bottom part of the tail plane. All these items
added to a complete sheet of photo-etched parts for the cockpit consoles
and instrument panels, rat propellers, avionic doors, gear doors, wheel
brakes, exhaust pipes, canopy frames and internal parts of nose/radar
compartment. I
was a bit afraid to start this challenging building. It took several
months to complete it, based on a not so great experience with resin parts
plus photo-etched parts in this scale. Everything started with the
cockpit and seats (I chose the Mk 7Q for the Italian version, Verlinden
provides also the C2 seats), the fuselage and wings plus tip tanks. For
painting I wanted to try the pre-shading technique, so I started with a
first coat of XF-1(matt black) Tamiya, then covered with XF-63(German grey)
highlighted with some spots of white. After a couple of days I used the
XF-53 for all the plane trying to paint panel by panel to not cover all
the darker paint I airbrushed earlier. I repeated this twice.
|
Click on
images below to see larger images
|
|
|
I then sealed everything
with two coats of gloss varnish. Also at this stage I tried a new
technique (at
least for me). Instead of using the X-22 clear (or other stuff for plastic model)
I bought a big can of gloss and one of matt varnish for artists paint. It works
really well and it isn't dangerous for plastic, paint and also
decals.
I took one day off to
let the clear coats on the model dry, then I started decaling using Skymodel decals sheet that
offer you different options for the F-104. With decaling completed, I sealed
with gloss first and then finally with the matt to give it a semi-gloss look.
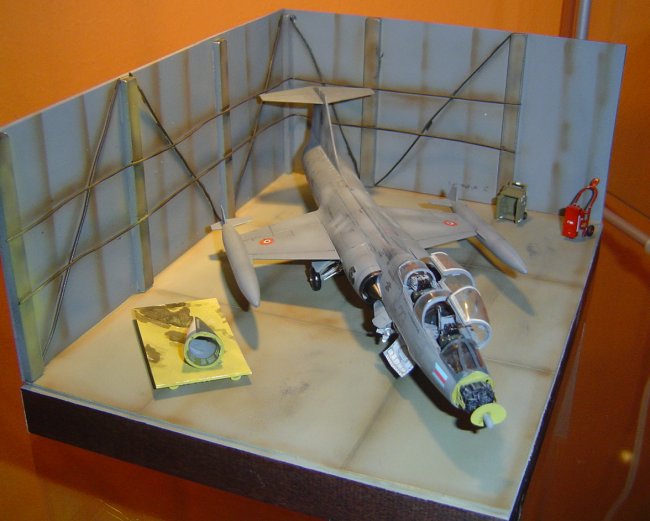
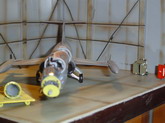
I built a diorama for it in the corner of
a hangar with a fire-extinguisher and a tool-box.
Hope you enjoy the pics.
Greetings from Italy.
Fabio Bongiorno
|
Click on
images below to see larger images
|
|
|
|