|
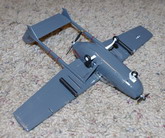
Here is my next submission. A commissioned build of a Cessna O-2A. The O-2 started life as a standard private passenger plane, the Cessna model 337. The Air Force was looking for a new observation platform for Vietnam and this Cessna fit the bill. The only major changes to the aircraft was the addition of hardpoints on the wings and the removal of all the civilian "admenities" like passenger seats. Another version of the O-2 (O-2B) was used as a psychological warfare platform. The O-2 could carry rocket pods to mark areas that needed to be eliminated.
After the war, a few O-2's were sold to the civilian market, this brings us to where I come in. I was
commissioned to build a model of the real deal by the wife of the owner as a Christmas present. The O-2 in question was the last one made.
|
Click on
images below to see larger images
|
|
|
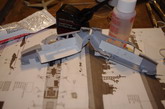
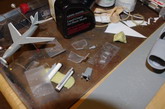
I started with a Testors O-2A kit. This kit started life in the 60's and as the civilian Cessna Skymaster. Soooo.....no interior and it looked like the civvy. In talking with my
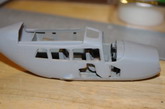
commissioner, she wanted every detail. No problem... or so I thought. My first task was to get an interior built. That
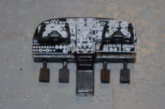
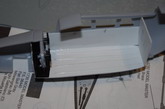
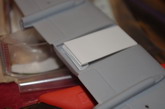
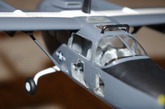
wasn't much of a problem. I took sheet plastic and lined the walls up to the windows. After I saw what the seats looked like, I remade floor and chairs too. The instrument cluster stayed from the kit, but I did make some rudder pedals since the kits were the triangle types on the floor. The floor also got a rail system just like what is in there now. This also meant I needed to add legs to the seats. Then it came time to work on the ceiling. Here was my first hurdle to overcome. My first thought was to glue in a piece of plastic sheet to make the cabin a square, but then I remembered, I had to cut 2 windows out in the wing that the USAF had put in. I would've had to add about 3/8 inch
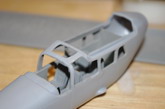
in-between the wing and my ceiling. And it wouldn't have looked right either. What to do..... I angled a piece of sheet to fill in the aft part, but was flush with the fwd wing. All I had to do was cut the holes. About 1 sheet thickness is all I had to fill in. The next hurdle (or should I say mountain) was that enlarged port window. The USAF had the window extended up and curving
through the wing. The kit... not so much. I contacted a friend on what to do. He gave me a few suggestions. I chose an option that seemed the easiest. and modified it slightly. I temp glued the kit window in to make a form. Then I took some clear sheet plastic, heated it over the stove, then moved it over to the kit and molded it to the side. That was the plan. Actually, the title of this article could be, how to try and burn the house down. After many, MANY tries I got a form that sorta had the shape of the window and the wing. It kinda looked like a vacuform part, but MUCH cruder. The good news is, I didn't burn the house down, nor did I ruin any of the wife's equipment. I had cut out the holes for the 2 windows on the starboard side and the 2 wing windows earlier. Fortunately, Testors gave me templates for the 2 on the port side and the 2 on top. One of the last major construction items was the cutting out of the port window. I traced the outline on the
fuselage with a pencil and put a piece of tape over it. That transferred a bit of graphite onto the tape, a perfect template. Then I cut out the part of the wing that was to become window. I was then able to put that tape on my window glazing and cut out the rough size, then I did a final fitting to the whole in the wing. During the build (good thing I had
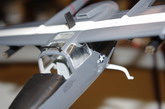
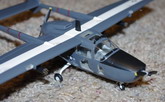
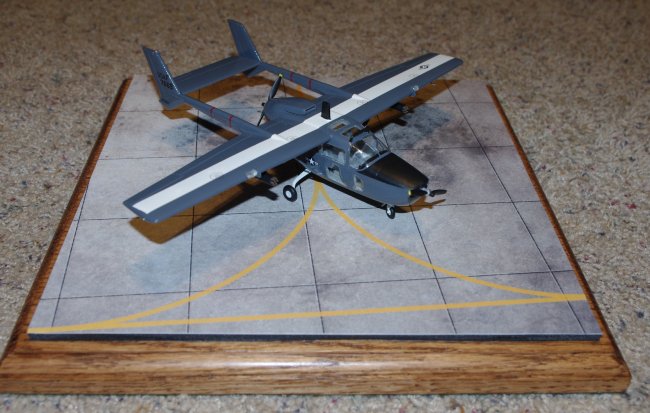
references), I realized the wingtip lights were all wrong. I sanded off the kit lights and glued on a bit of plastic to represent the beacons. Another thing I noticed was the light blocks on the wings. Fortunately, I realized those before I painted. I took some plastic card and made the light blocks. Whew, lots of custom stuff..... then it was off to the paint yard, the easy part. I learned that the owner was going to have his new O-2 painted just like it had been back when it was property of the USAF. Simple enough. I primed the whole aircraft with white and used the primer as the ID stripes on the wings. I then blew the grey. No problems there, just standard painting. A big help to me on this build was the guy that was restoring the real deal. I emailed him several times to get the scoop on what color/location/how many/etc. Without him, this project would've not happened as soon as it did.
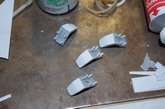
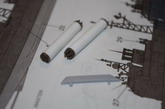
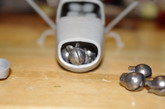
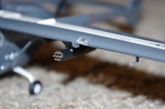
The owner was/is going to have dummy marking rocket pods installed on the hardpoints. Well, with a civvy kit, guess what, no rocket pods. I was able to get them through the ARC forums from a fellow that has alot of extra
armament. They started life in a Huey kit.

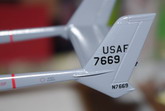
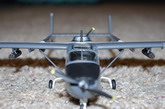
It seems every kit I build, I do some new technique. This build was no different. Not only did I learn how to not burn down the house, but I also printed my own decals. I knew the tail number code and registration number would have to be custom, so I picked up some Testors decal paper (just as a test run). Note to self, make sure you buy the right kind of paper for what type of printer you have. I did not do that, so I had to go to a friends and borrow their ink jet. The decals were really thick, not at all what I thought they would be. Now I know. All the other decals were from the kit.
The base is a piece of walnut with a printed taxiway from 3 Wire. Great product! The image is printed on a foam board. It was glued down onto the walnut with normal wood glue.
That seems to be about it. Please email me if you've got any questions of comments.
Thanks for looking and don't throw
rotten tomatoes!
Douglas Conrady
|
Click on
images below to see larger images
|
|
|
|
|
|