|
The Sopwith Camel in World War I was one of the most famous
planes. Frankly I have to confess that I am not particularly attracted to World War, and planes, however, sometimes occurred to me - you should try to build a biplane.
At one model competition I bought one these Korean Academy products for myself.
And then it rested on my shelf for a year. Then one day a child on the history of flight, book leafing. The images were presented in museums
of machines sitting in airplane operation from the beginning to today. There he saw the Camel engine, pitot tube, petrol pump, contemporary governments pedals, etc.. I remembered the little box on a shelf, whoop make a plane out of it, without the factory improves! I examined the contents of the box and
my feelings like a little faded. It was a really simplified something that is broadly similar to the famous plane.
I tried to plan, everything that we need to fix it or build it. Finally, hardly any parts that did not have to fix it.
|
Click on
images below to see larger images
|
|
|
The main wings canvas imitated, but not stabilizers.
Profile grater abrasive papers and I added the deficiency. The government agencies operating wires drilled at sites on the trunk and on the wings.
The barns and the elevator are cut out and saw razor blade made cyan acrylic adhesive I set.
Moving copper plate control stuck. The strain at the top, right side drilled by sanding and the fuel port.
Cover plate, a frame pieces cut disc. The big toe on both sides of oval discs were blurred edges.
Sharp scalpel and corrected them. The round and square openings cut aluminum foil frames.
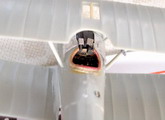
The next step is construction of the cabin interior, because it is completely absent.
Styrene sheets cut floor, back and front walls. The side walls were drawn fiber tube reinforcement.
Dashboard of Avia B534 prepared as described in Article glue tube. The steering rod replacement pedal drawn fiber, as well as a stick, wrapped in aluminum foil.
The pilot's seat tube of adhesive material formed lead foil the straps, the buckles in thin copper wire from.
Raw canvas and painted with different shades of light brown with a full cabin interior.
Glued to the sides of two tribes, the alignment marks eliminated.
The "cockpit" running around the edge leather cover, unfortunately, missed a lot of headaches caused by the implementation.
A wide variety of waste materials include, and then came across a possible solution.
Lead plate, and I was thinner cylinder of the resulting lead-foil, glued to the opening edge of the trunk (instant glue) intermittently along.
When you get around, carefully recovered the inner surface, also intermittently, only one small part attached.
Sharp scalpel in the outer arc of approximately aligned. 1mm in width, and the insulation of copper wire glued to the edge of the slot machine gun the structure.
The bond ran pill.rag.val line several times, resulting in a smooth transition to the trunk.
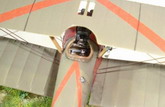
Lead is a riveting imitated with a needle and then painted it skin color. The cabin I thoroughly mask and then migrated to the engine retrofitting, that book of pictures.
The cylinders, made casting frame - one end of the spherical and circular needles densely I have to scratch.
Then I saw a vertical split, I cut to the desired size and you had two (half) cylinders.
After all those things, and clean up the firewall model and affixed to the motor circuit basis.
Black and silver-painted it with a mixture of the engine and the firewall, then I dry brush silver.
The thin fibers the thicker exhaust (brass colored) from the thin valve controllers were tailored to.
I have the mask ready for engine and propeller shaft made the needle and a thin brush painted wood grain.
The wing support struts struggled a bit with the profile of the accession of their lead-foil strips glued rings.
Running to support forceps had to be adjusted a bit to shape and strengthen the two brace.
Next, I created a machine gun, in part because the box could be anything, but it is not.
I cut two thick hypodermic needle is the same, whatever the size of the box.
Thus, in parallel with both of them made. Lead foil strips glued to the tube rings on both ends.
The two are among the thin-drawn fiber length and glued a little windy, but it is round.
The thin fibers include acrylic adhesives cian. The machine gun tubing thin needle, which was prepared to cover one side gluing.
The gun machinery made from chopped rubber. The finished machine guns painted dark gray, metallic silver color and I dry brush.
From injection needle, candles film, sprue, and rubber slices prepared a special double pitot tube, and also a petrol pump.
The Revell wing mounts some glue into place I then took a long positioning.
Finally, cyan acrylic adhesive I fixed them, and after complete drying of the adhesive used to hide the clues.
The latter operation is glad to have missed, because the struts between grinding seemed an eternity.
Suddenly the end for me, and slightly alcoholic paper towel were canceled the mock-ups.
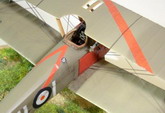
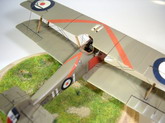
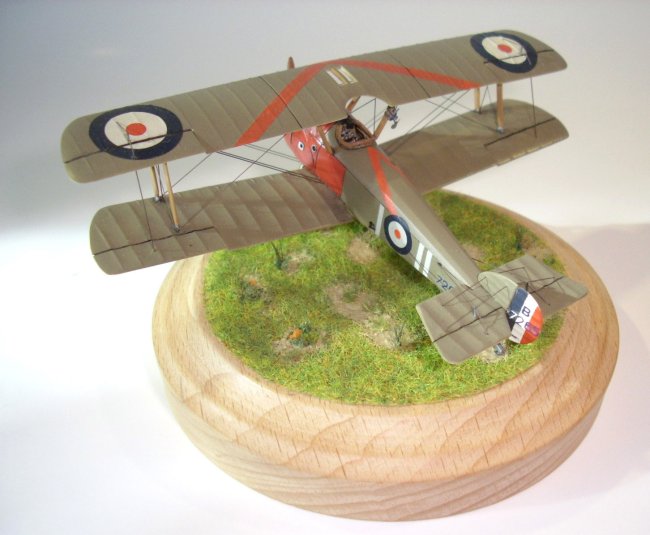
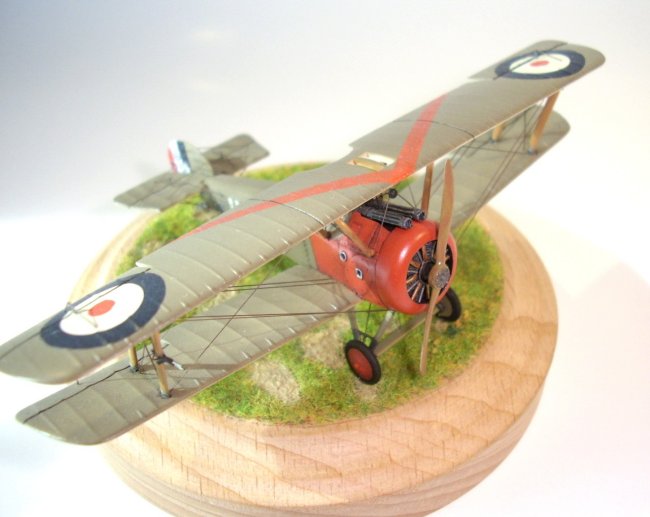
Humbrol paints mixed the colors. First, the red nose and blew the wheels of the dial, and when cured, I carefully mask.
The upper khaki followed, then two days of drying and after masking the bottom color.
The dependent. colored also blew tail, painter masking tape, white, red, blue order.
A thin layer of glossy varnish Revell decals after attaching it. Unfortunately, I was useless in my inventory, so the rest of them together I matricáimból scissors.
The wing and the red bars at the top of the trunk is now more blow. But then I cut them decals.
The stickers after paint layer model adjusted the lights, and then removed after the drying of the cabin, and. the motor masks.
In their place was fitted to the machine gun, the pitot tube and the fuel pump.
Lines, black painted steel pieces. The preparation of wire braces black drawn fibers were used. And lengthy task requiring concentration, but it's worth.
Overhead film "windshield" I cut a thin wire is glued crosshairs. The tail skid is made from tin solder material.
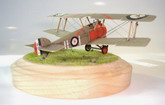
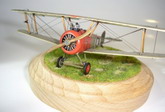
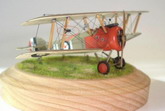
Finally, the dependent. tail is in place and completed the Korean red-nosed camels
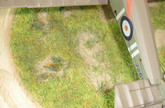
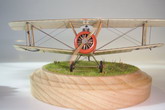
The little biplane, I glued artificial turf pedestal. Here and there grass clumps tore off with tweezers, place the glue is mixed with fine sand in with glue.
The "land" after the color of dry plants and flower little longer I put it grass clumps scattered to avoid
"turf" nature of the soil. From the looks has also maintained a slightly worn nose to I World War glass display cases of the famous the world over.
Robert Serfőző
|
Click on
images below to see larger images
|
|
|
|
|
|