|
Grumman J2F-5/6
History
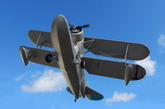
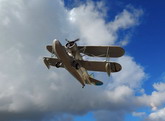
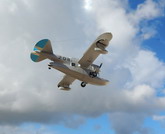
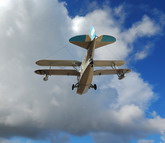
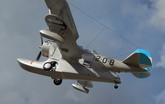
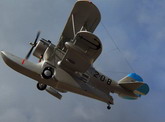
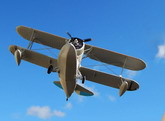
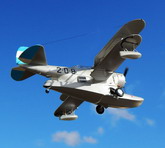
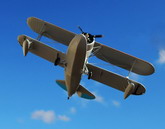
The Grumman XJF-1first flew in May 1941and it was intended for use as an observation and general-purpose aircraft with the US Navy. The XJF sea plane as the early version was designated has a beautiful design with biplane wings of equal span made of light alloy covered with fabric. The fuselage had a conventional structure skin light alloy structure and the large monocque central float housing the main wheel unit when retracted a small stabilizing float was strut mounted beneath half of the lower wings.
A crew of 2 or 3 could be carried in the tandem cockpit. The pilot is in the forward seat and the observer aft as standard. A radio operator could also be accommodated in the observer’s cockpit. The final version to be built by Grumman was the J2F5, 144 of which were ordered by the US Navy. The main difference between the J2F5 and the previous versions were the use of Wright–1820-50 radial engine. When the USA entered WW2, a further order for 530 was placed with Columbia Aircraft Corporation of Long Island. These were known, as J2F-6 with the only significant difference was the use of more powerful Wright R-1820-54 engine.
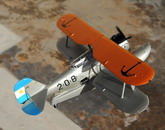
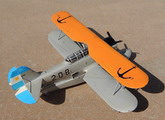
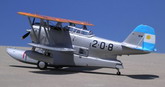
The main production Duck variant, as the aircraft came to be known, had a broader chord cowling than the earlier aircraft. Stronger bomb racks for 2x325 Lb depth bombs were also fitted when use as patrol aircraft while no forward firing guns were installed and a flexible rear-firing gun was available. Most J2F Duck sea planes remained in service throughout World Was II, operating both from carriers and shore bases in a variety of roles, including search and rescue, photo-survey, and target towing. The type was also exported to Argentina, with G-15 aircraft made to J2F4 standard and 20 G-20 machines to JF2 standard. Colombia also received three ex OA-12 and Mexico two ex J2F-6 aircraft.
|
Click on
images below to see larger images
|
|
 |
|
 |
|
 |
|
 |
|
|
|
|
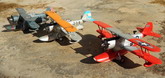
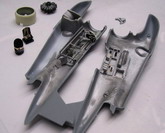
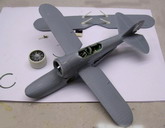
Duck Airfix kit modified
|
|
|
|
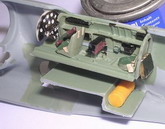
Duck
interior
|
|
|
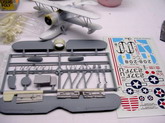
Kit: Grumman J2F-5/6
Make: Octopus/Pavla Models
Scale: 1/72
Type: injection moulded with detail resin parts & vacform canopy
Comments: Short run kit with decal for 5 options to choose from.
Cost: 27.96$
The kit:
This is another Octopus/Pavla kit and it caters for two versions of the Duck amphibian. The kit comes in colourful cardboard pack with attractive colour side views of 4 out of the five offerings and the other one appearing on the box end cover. These are the J2F-5, which basically has a short engine cowling, or the J2F-6. The kit consists of 46 medium grey plastic parts mounted on two sprues. There are also 49 cream coloured resin parts mounted on 19 cast blocks that need careful parting and sanding prior to use. Two styles of cockpit canopies are supplied as vacform, these come in duplicate so that there is a spare one of each and are very clear. Side windows glazing is also vacform and I found them to fit very easily at the fuselage aperture on both sides of the fuselage.
An A5 size 16-page instruction booklet contains history, 27 stages of construction complete with clear line drawings and 10 pages of colourscheme drawings for a good selection of paint and decal reference. The kit has fine surface detail as well as high quality resin parts. It is essential to make a thorough study of the instruction sheet and check the placing of the variety of tiny resin parts several of which go on the fuselage and central float. Other items as the dorsal radome and arrestor hook are not intended to fit on all versions, as also is the air intake part, which should fit if the shorter cowling version is chosen to do. As the kit provides parts for either the J2F-5 or the J2F6 version, there are two different lengths of engine cowling issued with the kit. The shorter cowling of the F-5 version also carries a small air intake carried over the top of cowling and is supplied in resin. There are also two different styles of canopy framework hence the reason why there are two different styles of vacform canopies.
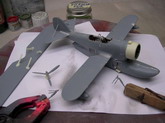
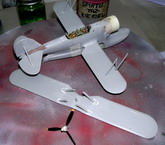
Construction
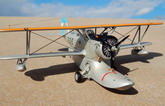
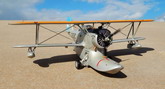
The first thing to do is carefully remove the resin parts from the casting blocks and then proceed with the first 18 stages of the instructions that are well illustrated and also gives clear placing and colour information to a comprehensive cockpit with respect to the version you decide to build. The cockpit detail goes down to show that there are two different type of seats, an interior radome loop item, control column, rudder foot pedals, instrument panel, side detailed panels with cast-on instruments, a staggered floor with a fuel tank fitted at the rear of the compartment, a highly detailed radial engine, bulkheads, gun sight and other fine detail all well represented to correct scale. The screw propeller is also supplied in the usual short run style of having the blades coming as separate items from the resin spinner. Perhaps one should say that this is one of the exceptional cases when this style of construction is justified in preference to produce the prop in one piece. This is so because there are two styles of propeller spinners to choose from.
It is best to paint the items connected to the cockpit in cockpit green as well as the two fuselage halves, then add the other detail colours correspondingly. The Argentine version had however silver dope cockpit. The square vacform windows glazing which also has embossed horizontal frame needs to fit in the early stages. The kit is not free from minor problems, which could only be sorted out after reference to other sources apart from the instructions. The presence of a front view would have helped to sort out the angle of dihedral of the lower set of wings which are butt jointed to the fuselage, while the tail planes are to fit level. There is also insufficient detail to show exact placing of rigging between the wings and also to the outer float struts. Another item that requires serious attention is when fitting the main wheel leg to the fuselage wheel well interior. This you have to glue at some point to the upper interior of well and best to fit the two simultaneously to ensure correct alignment and setting in order to avoid finishing with a kit tilting to one side when standing on the undercarriage. One this is attained then the lower wheel side struts are then fitted on. I also did a little bit of working to the lower cowling exhaust pipes. This merely consisted of drilling the outlet end of the exhaust pipes with a small twist drill down to a depth of 1/8 inch. I also replaced the two short overawing aerial masts to provide a strong end to the wireless that I made from transparent thread.
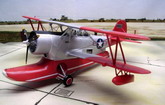
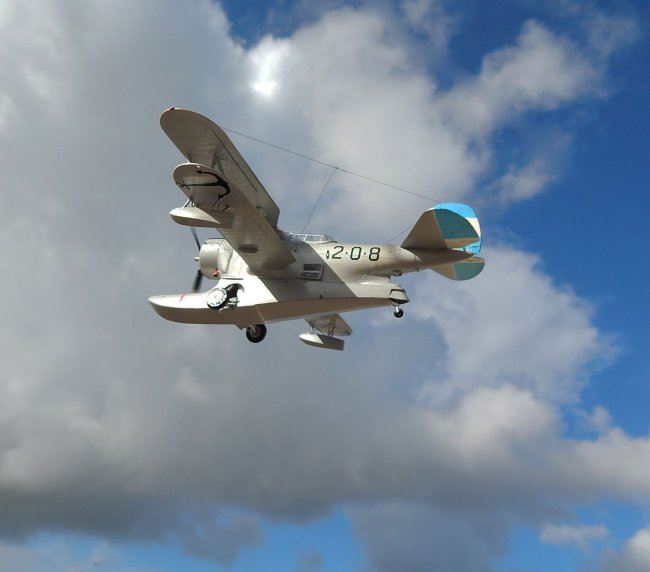
Painting the Ducks
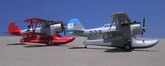
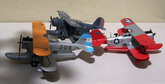
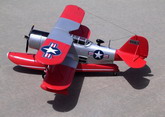
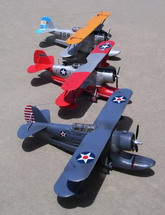
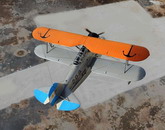
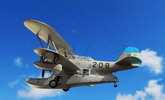
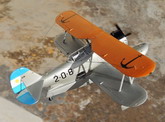
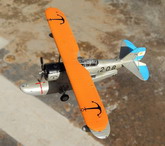
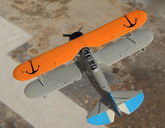
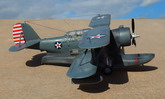
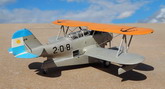
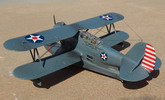
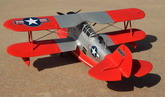
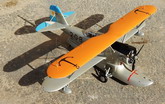
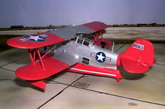
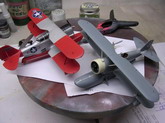
Whichever one you want to build there is a Humbrol paint reference numbers on Page 3 of the instruction sheet. I have also found that on areas where there are bright colours it was best to paint semi matt white, so that the bright red arctic markings, or the chrome yellow upper wings colour of the Argentine Duck will stand out better. Both the USAAF and Argentine AF amphibians were painted silver and I also added a few drops of white to give the silver the duralumin sheen, which forms when it comes in contact with seawater environment. The US Navy version is completed in standard blue grey upper and light grey undersurfaces. The interior of was cockpit green as indicated earlier. The wheel wells were greenish zinc chromate. Prop blades were matt black with yellow tips and manufacturer stamp painted on each blade.
Applying decals
The decal sheet is absolutely attractive and in fact keep you thinking which version you want to do, as the varieties on offer are
colourful. In spite of all in my kit the decal sheet proved to be of somewhat discouraging quality in the way that if by chance you leave the decal in water longer than necessary it becomes brittle and start to disintegrate. However I found that if one gives the decal a coat of clear Revell varnish it would strengthen and allow one to work without difficulty. I like to make an observation that in the event you devise to make the post war OA-12A, based in Alaska with bright red arctic markings then you need to first fix the star and bars, USAAF legend, as well as the tail fin serial number on silver decal background before you transfer these on the bright red areas on the wings and tail fin. There was also absence of decal that goes on propeller blades, for which I had to resort to hand paint, these. I also noted that in case of the Argentine Navy version, the light blue decal that fits on tail elevators and rudder areas were slightly oversize and needed trimming by a small amount. Incidentally these areas were first painted white using Humbrol gloss white. After placing the decals, the outer periphery of elevators and rudder were touched with a little light blue paint mix to match decal
colour.
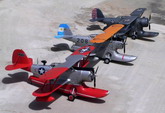
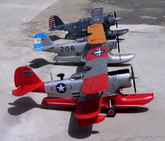
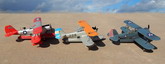
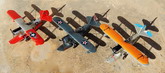
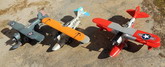
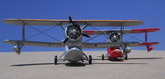
Conclusion
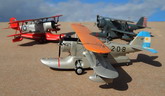
It is good to have the Octopus kit of the rather pretty design of the Grumman Duck and the company has selected a good variety of operational colourschemes for the aircraft. If it is difficult to decide which one to choose, there is only one way out. Build as many as you can and in doing so you will do like I did. It builds into a really nice little kit.
Carmel J Attard
|
Click on
images below to see larger images
|
|
 |
|
 |
|
 |
|
 |
|
|
Duck no 2
|
|
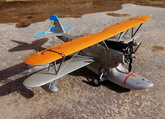
Duck Pavla kit
|
|
Duck Octopus-Pavla kit
|
|
|
|
|
|