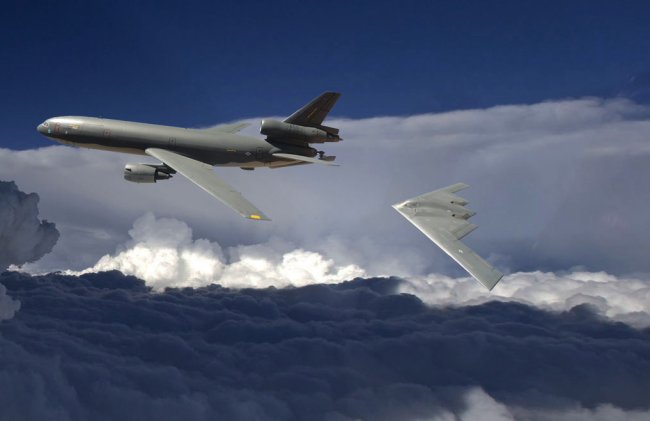
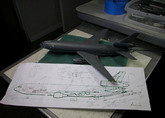
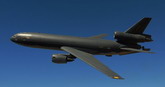
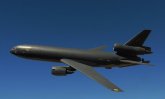
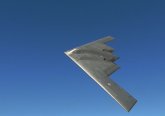
1/200 Hasegawa KC-10 Extender (DC-10 conversion) and 1/200 DML B-2 Spirit
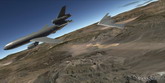
These models were both impulse buys that languished on the shelf for years until I saw a picture of a KC-10 landing on
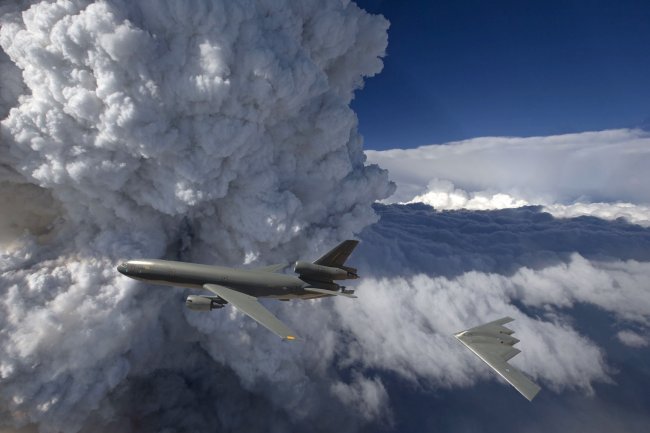
Airfighters.com. That photo shows a gunship gray KC-10 Extender with a lighter gray camo underside. I was intrigued by the no-nonsense gray paint scheme and minimal external stenciling. Further research often showed these tankers refueling B-2s. The image of a B-2 being refueled by a KC-10 stuck in my mind. I decided to tackle a simultaneous build and convert the Hasegawa DC-10. After some online research collecting KC-10 and B-2 photos, low res 3 views and particularly the walk around photos of a KC-10 on ARC air, I was ready to go. This project would necessarily involve (gulp), some scratch building.
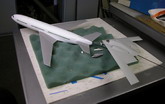
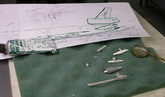
I usually build my models OOB in flight configuration, with zero internal detail. I call it sport scale. I will cop to an addiction to aftermarket decals. The refueling boom, boom operator’s station, and engine exhaust cones were the extent of the scratch building but that is a big deal for me. Using laminated sprue and thin styrene card I was amazed to find I could construct a reasonable looking refueling boom. Further photo research resulted in a best guess as to how the boom operator’s station was configured. That was good enough for me. I cut and glued some styrene and moved on.
|
Click on
images below to see larger images
|
|
|
The
kits
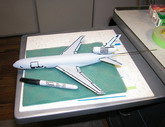
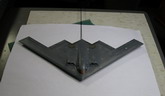
The Hasegawa DC-10 kit went together easily with few fit issues. No need to elaborate here. I puttied up most of the windows. I made a pattern and sort-of-scribed the front cargo door on the KC-10. The photo references of the KC-10s showed engine exhaust cones that were not part of the DC-10 kit. I used 1/72 scale Mk 82 slick bombs cut down to simulate the exhaust cones. Multiple engines are fun.
Building the DML B-2 is even easier. Since I like my models in flying configuration, I spent some time closing the gear wells and fussing with the windscreen. Eventually I ended up with a small B-2. I think there were 6 parts from the kit that I used.
The Finish
It was time to concentrate on finish. Online research yielded some photos of B-2s and KC-10’s that were used to develop the finish strategy. After copying 3-views in the appropriate scale, I used online photos to develop a pencil sketch of the variations and details on the two aircraft I was aspiring to model.
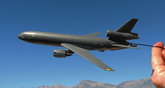
I decided to try a combination of quick and dirty finishing techniques to create the tonal variations shown on the full-scale aircraft. After painting the KC-10 and the B-2 with a Light Ghost Grey base coat I masked to accent lighter colored panels. I then chose a Sharpie permanent felt pen for darker tones to accent control surfaces, recent maintenance over-painting and other darker details that are shown in the reference photos. I started spraying light coats of Gunship Grey. After removing the masks, I planned to soften both the light and dark tones simultaneously with the careful continued application of Gunship Grey for the final finish. Model Master metalizers Burnt Metal and Jet Exhaust were used for the bare metal engine exhausts. Model Master gloss coats followed.
Decaling, one of my favorite jobs, was accomplished with the sheet that came with the B-2 while the KC-10 markings came from the spares box. I used lots of artistic license with the decals for the KC-10. There were not enough decals on either of these models to satisfy my craving. After more gloss coats, a light wash of dilute oil paint was applied and largely removed to accent panel lines and control surfaces. Testors Flat Clear was used for the final finish.
I was unable to find any gallery archive on ARC for the KC-10. Do I get to claim first summit Steve? I enjoyed this project more than I thought I would. When it comes to more kits I guess it proves that impulse buys are a good thing, even if it sits in the kit stash for a while.
Dennis Brackett
|
Click on
images below to see larger images
|
|
|