|
The Fokker Eindekker was the first airplane the be fitted with a fixed synchronized machine gun. All sorts of stories are out there about whether Anthony Fokker, the Dutch airplane designer, "invented" the synchronization gear or borrowed from existing patents. Regardless, once a synchronization gear was introduced on the Fokker Eindekker, aerial warfare was changed forever. Roland Garros had been flying a Morane-Saulnier Parasol with deflector blades attached to the propeller that allowed him to shoot straight ahead, hoping that the deflector blades would divert the bullets from shattering the propeller. It worked pretty good and Garros shot down 4 German airplanes before shattering his propeller. He landed behind German lines and the Germans turned over his system for using a machine gun to Fokker. Fokker realized the system was primitive and thought a better solution would be to allow the machine gun to only fire when the propeller wasn't in the way...a simple mechanical problem. According to Fokker, it took him 2 days to figure out a system that only allowed the machine gun to shoot when it wouldn't hit the propeller. The success of German pilots was immediate once the machine gun was attached to the Fokker E.I monoplane. While the airplane itself relied on wing warping to turn, the sting in its nose made the Fokker deadly.
|
Click on
images below to see larger images
|
|
|
I was
thinking about doing the Wingnut Wings Fokker, but decided to work out any kinks
in the rigging, etc. by doing the Eduard kit first. The Eduard kit, in its Profi-Pac
version gives a nice choice of decals for 5 different E.IIIs. Not a whole
lot of differences between the E.I and the subsequent E.II and E.III. Anyway,
most of the decal selections were clear doped linen overall and I wanted
something more colorful. Austria-Hungary purchased some Eindekkers from Germany
in June of 1915. They were designated A.III and given serial numbers 03.41
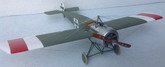
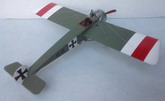
to 03.50, 03.53 and 3.54. According to most references they were painted a light
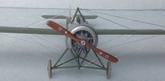
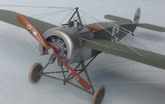
green. I decided to use Model Master SAC green. The cowlings on both the German
and A-H Fokkers were aluminum with a machine tooled swirl. The swirl was way
beyond my skill level so I just went with Flat silver from the Testors small
bottle. What sold me on the A-H A.III was a picture in Christopher Chant's Austro-Hungarian
Aces of World War 1 on page 37 showing 2 Fokker AIIIs being transported with
their wings removed and attached to the side of the fuselages. The wings did not
have the typical Iron Cross insignia. Instead the A-H national colors of red and
white were painted in broad bands. I wanted something more colorful and
there it was. On most A-H planes using the red/white bands, there is one
white band between 2 red ones. In this photo, it was reversed, 2 white
bands separated by one red band. I chose the serial number 03.53 because I
couldn't see the serial numbers on the 2 airplanes in the photo and the
serial numbers of all the other A.IIIs I had pictures of had the Iron
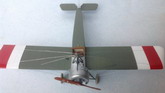
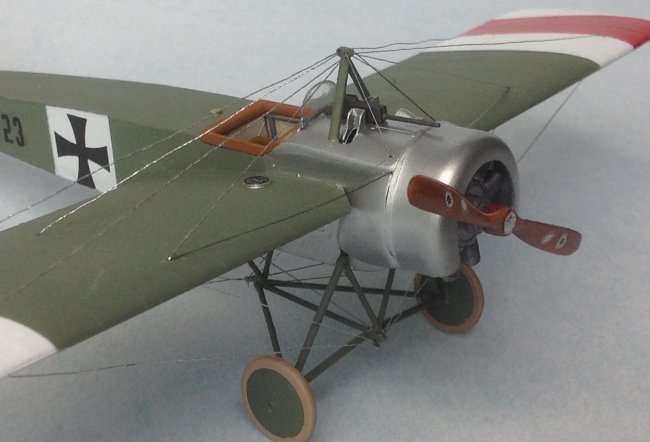
Cross. No pictures of 03.53, so that's the number I chose. Instead of
the typical Spandau machine gun, 2 A-H A.IIIs used a Schwarzlose machine
gun. Using this machine gun with the Fokker synchronization gear took some time.
The photo of the A.IIIs in transport shows their machine guns were removed. That
gave me license to be creative, so I used the kit provided Schwarzlose gun.
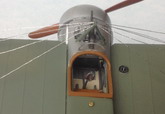
The kit itself is a
breeze. The cockpit even has a map provided. While there is a lot of stuff in
the cockpit for such an early airplane, it goes together pretty simply. A number
of parts can't be seen once the fuselage is closed up, so I didn't bother with
installing them: C27, C25, C16 and C9. I also glued the gas tank cap (C11) to
the fuselage and discarded the fuel tank since it can't bee seen once the
fuselage is closed. Eduard supplied a pe part to represent the lacing that
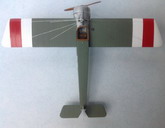
appears on the bottom of the fuselage. I left this off. The tail skid is
attached to 2 pe parts that have to be glued to the bottom of the fuselage. I
was leery of this but it worked out ok. The landing gear is a little fiddly but
aligned itself pretty well. As for the rigging, I drilled holes in the wings and
in the top rollover inverted V shaped bar. The pe that Eduard provides for
the pulleys is beyond my skill. I did cut 2 pe parts for the landing gear
rigging to allow the silver thread to be passed through. 2 long pieces of silver
thread took care of the wings. For the rest of the rigging I used ceramic wire
painted silver. While not the same thickness of the thread it is easier to use
for the rudder and the cross-members on the landing gear. If you are fearful of
rigging, this wouldn't be a good WW I airplane to start with. On the other hand,
there is only one wing, so no bi-plane alignment concerns.
Mike Muth
|
Click on
images below to see larger images
|
|
|
|