|
For over 30 years, I was heavily obsessed with building radio controlled aircraft, the largest being a 1/6 scale B-17 spanning over seventeen feet. In 2004, I got a chest infection which got worse, triggering asthma and a wood dust allergy. Realising I was going to have to lay off the balsa wood dust, I put the R/C flying and building on hold, and looked for another hobby.
Growing up in the 1970's, my childhood was filled with war films and TV shows like M*A*S*H, and Willys Jeeps featured heavily in many of those films. That's it! I wanted a Jeep. There were three makes of Jeep; Willys, Ford and Hotchkiss. The Willys MB and Ford GPW wartime Jeeps numbered over 600,000. Postwar, the French Hotchkiss company built Jeeps under licence as the M201, producing around another 30,000 vehicles. Wartime Jeeps commanded a higher price, but the Hotchkiss M201 was within my price range. The hotchkiss looked identical to the uninformed observer, and is
arguably a better vehicle due to being younger, more modern manufacturing and built without the pressures of wartime economy and material saving.
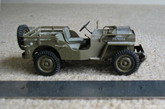
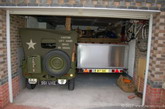
The big question was, would it fit in the garage? With my big six feet wide B-17 trailer against one wall, there was only a little over five feet of space left on the other side of the garage. I didn't have access to a Jeep to measure, so did the next best thing, bought a 1/35 scale Italeri model. It was built purely as a model to measure, and wasn't even painted. Calculations from the model suggested there would be about 2 inches clearance each side, and based purely on that information, paid a deposit on an M201 found in Scotland in February 2005. Fortunately, the model was accurate, and I did indeed have a couple of inches to spare when brought home in April; but I took the precaution of lining the wall with some old carpet. For the next three years, the Jeep appeared at shows in a standard olive finish, until in
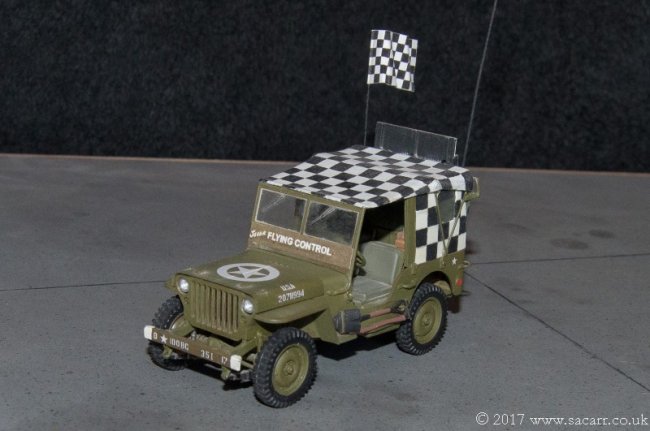
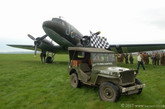
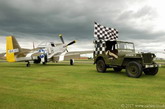
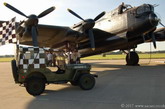
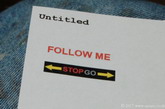
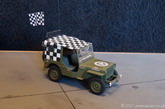
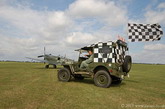
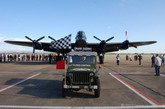
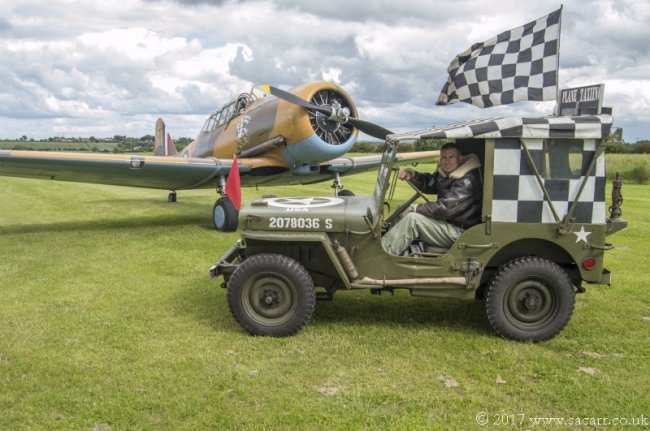
early 2008, I began to convert it to an airfield "Follow Me" Jeep. This gave me the opportunity for some great photo shoots with aircraft.
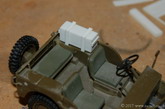
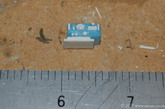
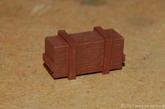
It was two years later that I noticed the 1/35th model abandoned on a shelf, and decided it too needed to be converted to match the fullsize example. Yes, three paragraphs in, and we finally get to the modelling! I'd built some wooden sides and doors for the real Jeep, to keep the winter weather out, and that's where I started on the model. This was followed by a wooden crate which carries spares, and a radio, both of which sit on the rear wheel arches. The radio was only half an inch long, and tested my patience and tweezers, with several small buttons making the rapid journey from the tweezer's points to some distant corner of the workshop!
|
Click on
images below to see larger images
|
|
|
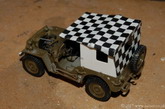
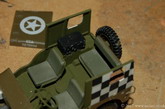
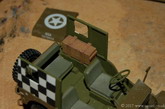
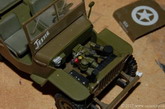
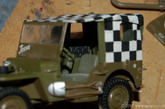
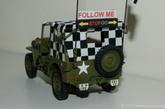
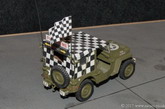
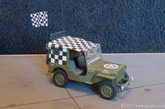
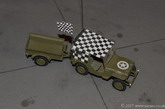
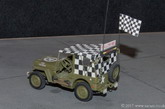
The interior of the Jeep was painted while working on the accessories for in the back. Once the canvas roof went on, it would be inaccessible, but that needed to be fitted before the roof support bows and light box on the back. The checkers were all just hand painted; white first, then pencil guidelines and filling in the black by brush. I wasn't fussed about neat masked edges, at the real thing is handpainted and rough, just as in wartime. Many wartime pictures show a very slapped on appearance to the checkers on Jeeps and control caravans.
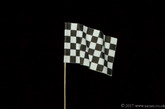
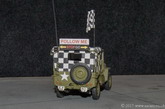
Once the rear interior was done, I moved to the engine bay, rearranging some components, as the Hotchkiss had been upgraded to 24volts in 1966. This meant a second battery in the engine bay, the air filter moved to the other side of the engine and the voltage regulator moved from the fender to the firewall. I also added a coil and HT leads. The checkered flag on the back was another paper print out.
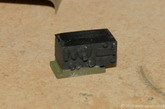
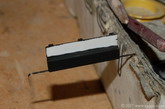
The light box on the frame on the back of the Jeep was a block of styrene and a support frame from thin nickle/silver strip, soldered together. I didn't have any decal film at the time, so just printed the signs for the light box on paper, which was then glued to the model. The rear bumperettes are inverted on my Jeep, and so the model was modified to match. It was a common feature on airfield Jeeps, and the only reason I've found is that it was a useful step into the vehicle, and inverting it lowered it, making it easier to use in heavy flight clothing.
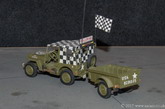
The Jeep was painted in touch up paint left over from the real thing and remaining markings hand painted as I had no suitable decals. Since finishing the model, I've made a few minor changes to the fullsize Jeep, such as the red warning flag on the front, but as yet, haven't updated the model. A couple of years after buying the Jeep, I got a trailer to go with it, and then modified the kit trailer to match.
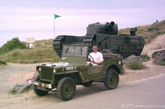
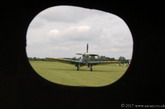
I've been to some airshows in the Jeep, turning up just to display the vehicle, but then ending up having a working weekend, leading Spitfires and Mustangs etc, up and down the flight line. This has resulted in some great shots through the rear window. Who would have
thought a 1/35 scale plastic kit would have put me on a path to do that?!
Stephen
A. Carr
|
Click on
images below to see larger images
|
|
|
|