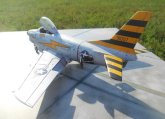
F-86D Sabre: 94th FIS
I almost shed a tear when I learned the line of
Revell/Monogram ProModeler kits was being discontinued years ago, due to profitability issues of the modeling firm. Every one of those kits was impeccable with regard to scale, detail and ease of fit. This F-86 "Dog" Sabre was no exception.
|
Click on
images below to see larger images
|
|
|
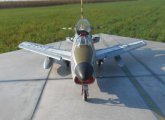
The cockpit parts are very good; so good that I couldn't rationalize spending needless dollars on replacements. The seat has molded seat belts and restraints; the instrument panel has recessed
gauges; the side consoles has raised knob locations. Just add some white or gray color, and the detail starkly stands out.
Even the instruction booklet is in a league of its own: actual photos show how kit parts are to be placed in construction. There's even discussion about how parts and areas were painted, with historical reference to different colors used.
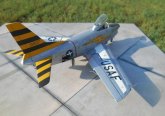
The fit was very good; minimal filler and sanding was all that was needed. I held off pre-shading because of the natural aluminum finish: from my experiences, all pre-shading seems to get covered by the silver/aluminum paint. As for painting, I used both Testor's chrome silver and buffing aluminum plate. I used Black Detailer for wear indication after completing all assembling and decaling. The excess water-based black ink was easily wiped off using Q-tips and/or a small sponge. I put a coat of Future on the assembly to seal the surfaces.
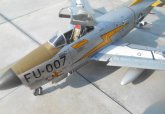
I was struck by Eagle Strike's Part III decals for F-86D Sabres, so I bought a sheet and used one of the offerings in place of what came with the kit, although the kit decals were no slouch. As for the black edge lines on the wings, neither the kit nor after market decals had the number of steps (individual lengths) involved. So I broke out my sheet of black decal and scaled the strip lengths needed, then applied those to get the final result. I also did the same with the red "no step" lines on the trailing flaps.
I added one flair: I used the engine air intake part to outline the opening onto a piece of sheet plastic, then cut and sanded the new part to fit the intake contour as a cover. After painting it the usual red, I got a piece of .020" wire, cut it to length and bent the ends to fashion a handle on the intake cover. Using a micro drill bit of the same diameter, or just a bit larger, I hand drilled recesses into the plastic cover part where the wire handle was to be placed, then super glued it at the drilled recesses. I used a scale 'Remove Before Flight" tag and wired it (using very small diameter wire) to the handle.