|
|||||||||||||||||||||
|
|
|
|||||||||||||||||||||
|
|
|
|
|||||||||||||||||||||||||||||||||||||||||||||||||||
|
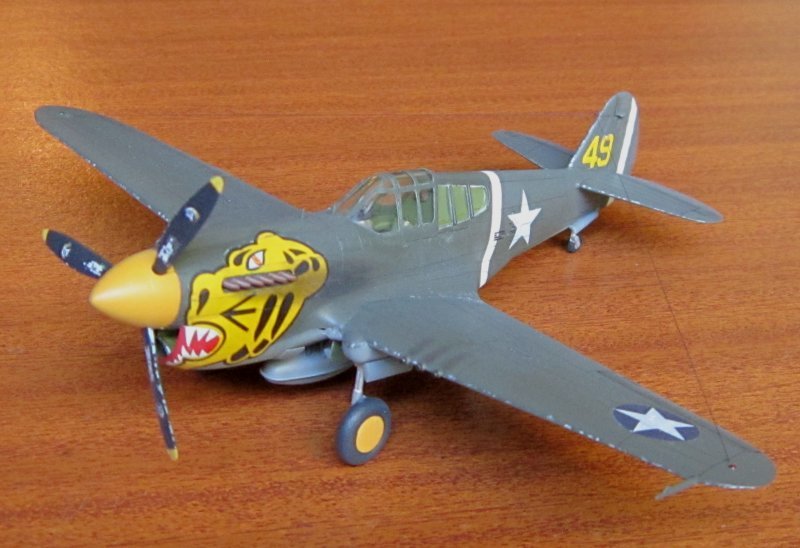
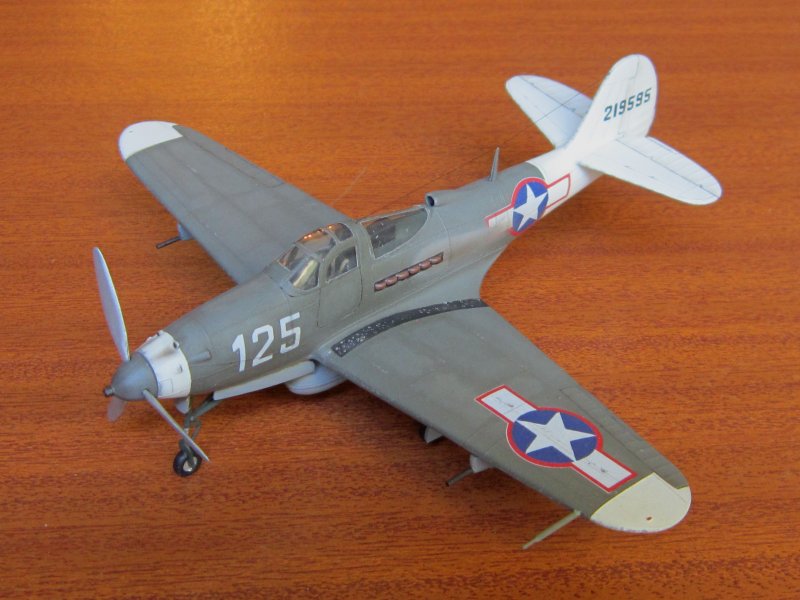
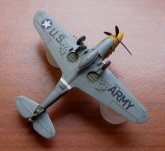
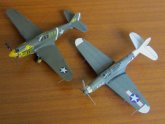
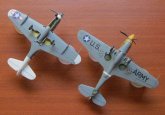
Hello, fellow modelers and readers! This time I'd like to share with you two recently finished kits of two US aircraft that served in the WWII, perhaps the only two originally designed as fighters that carried official designations in strict sequence, the Bell P-39 Airacobra and the Curtiss P-40 Warhawk. I decided to show these together because they shared the same basic camouflage colors, Dark Olive Drab 41 over Neutral Gray 43, so I finished both simultaneously. Speaking on the kits, the Heller P-39Q kit is an old tooled one with raised panel lines, little detail in the cockpit and the wheel wells, and with a very good fit for a kit of its age. I purchased it more than 30 years ago. The Academy P-40E Warhawk kit was purchased shortly after its introduction in the market. It has beautiful recessed panel lines, well detailed cockpit and wheel wells, and a very good fit. I started the P-40E kit long before the P-39Q kit, because I planned to replace the P-39 with a newer kit. The P-40E kit came with optional decals for three versions, one Australian and two from the U.S. My initial plan was to build the Australian option, a P-40E flown by Squadron Leader Dick Cresswell from the 77 Sqn. of the RAAF. I researched the Internet and found information on the accurate camouflage colors and markings of this particular aircraft, and I found that the kit's decal sheet missed a decal for the flag that go over the starboard side of the nose, and also decals for the serial A29-113. Although I believe that I would have painted the flag, I thought (and still think) that I'm unable to reproduce the small sized serial on both sides. Then I considered finishing the plane as "Texas Longhorn," another popular P-40 subject, but after some Internet research I found that the real aircraft carried this decoration on both sides, but the decal sheet included just one "Texas Longhorn" decal. At this point only one decal option from the kit remained, for an "Aleutian Tiger" of the 11th Fighter Sqn., fortunately the decal sheet was complete for this version, although it still had a mistake: the direction of the white band located ahead of the fuselage insignias, as I could check with a black and white wartime photograph of the real aircraft.
The building process of my P-40 was almost straightforward, and I almost didn't use any filler for this model. I just added two little pieces of thin guitar steel chord wire to represent the gunsight that go a little ahead of the windshield, and drilled thin holes over the spine, the leading edge of the rudder and near the wingtips to attach antenna "wires" made from human hair. I also added seat belts made from thin strips of masking tape in both the P-39 and the P-40 models. As the decal for the fuselage white band had the wrong direction, I decided to paint both the fuselage and rudder white bands to avoid a difference in color between the painted white and the white of the decal for the rudder white band. The first step in the painting process was priming the places where the bands are to be located, together with the wheel and propeller hubs, which are going to be painted yellow. Later I painted the white bands and the yellow parts. Then I masked the white bands before painting any other color, it wasn't an easy task because the masks should have a 2.5 mm constant width, and because of the angle of the fuselage band. When the masking was complete I used a 8:3 mix of Humbrol 156 and 166 grays to paint Neutral Gray 43 on the underside of the plane, and then masked it to began painting the upper surfaces. Although I've seen on the Internet kits of the Aleutian Tiger finished with many different degrees of weathering, I decided to apply my weathering on the light side, following the argument of modeler Tom Cleaver from Modeling Madness, who states that there's almost no sun to fade anything on the Aleutian Islands. For painting Dark Olive Drab 41 the IMPS Stockholm page recommends Humbrol 66, a color that fortunately I already had, although I bought it perhaps 40 years ago. The first coat went without trouble, but when I tried to paint the control surfaces with a lighter shade I found that the paint was damaged (the pigment separated from the solvent,) and I was unable to buy a replacement (persons who live in Venezuela cannot purchase anything from abroad on the Internet since 2014.) I then had to find a replacement among my paints. Fortunately I found that one of the equivalence tables included in the "Modeler's Technical Guide" book, from Model Master, states that Humbrol 66 is equivalent to FS34031 US Army Helo Drab, a color that I also had. To check it, I compared the color of my P-40 with the color of the AH-64D Apache helicopter I built earlier, but I found that Hu 66 is a little greener than Helo Drab, so I had to try a mix. After several trials I chose a 8:1 mix of Helo Drab and FS34151 Interior Green for the base OD 41 color. After painting the OD 41 base coat, I masked around the top of the control surfaces and airbrushed a 8:1:1 mix of the abovementioned colors and white to get a slightly lighter shade. When the painting was done, I highlighted the panel lines with an F drawing pencil, and later I airbrushed gloss varnish over all the model in order to prepare the model for decal application. The decals were another source of problems, specially the tiger faces that go around the nose, surrounding the exhaust stubs. Decals were thick and didn't conform to curved surfaces, and their adherence was not so good. Even on flatter surfaces I had to cut over the decals with a sharp No. 11 knife to reveal the panel lines underneath. In the case of the tiger faces, I had to make several cuts with the knife, and although I applied generous amounts of two different decal solvents and finally a bit of Elmer's white school glue diluted with water, the decals remained somewhat lifted from the surface at several places. After many trials I decided to stop the decaling process as it was, then I removed excess decal glue with a moist cotton bud and applied the final flat varnish coat. The model was further weathered by applying pastel chalk smoke stains and some paint chipping. The final step included adding the undercarriage and the antenna wires, and painting the navigation lights.
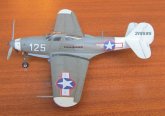
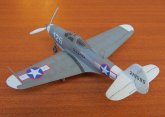
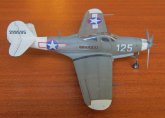
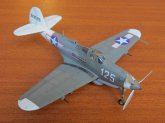
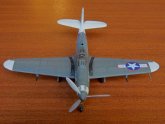
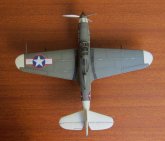
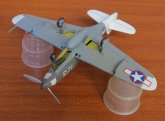
By the time I started building the P-39, I had already finished the PBY-5 Catalina that was published here on ARC the past year, and I had the idea of modeling at least one aircraft wearing each one of the different insignias that the US aircraft carried over the WWII (five in total.) In the context of this project, the Catalina had the first kind of insignia (a white star over a dark blue circle, with a red dot in the center,) the P-40 has two variations of the second kind (the first kind without the red dot, and the fuselage insignias also without the blue circle,) the P-39 the third kind, which lasted just one and a half months in 1942 (the second kind with two white rectangles added at both left and right sides of the roundel, and a red edge surrounding all), a Dauntless that is now being built the fourth kind (the third kind with the red edge removed,) and many others (including the Avenger and the B-29 published some years ago here in ARC) with the fifth and definitive kind (the third kind with blue replacing the red edge.) For building my P-39, which had an US and a french option on the decal sheet, I therefore chose the US version from the beginning. From information gathered on the Internet I found that the P-39 is different from many US WWII aircraft concerning the painting of the cockpit, the wheel wells and the undercarriage legs: it didn't use Interior Green anywhere. The cockpit and the undercarriage legs were painted with a 4:1 mix of Hu 75 Bronze Green and Hu 27 Sea Grey, the wheel wells with Hu 81 Pale Yellow, which is equivalent to Yellow Zinc Chromate primer. The battery that's visible on the rear part of the cockpit was painted with Interior Black and drybrushed with flat aluminum paint. I had to scratchbuild my battery because I lost the kit's one. According to the kit's painting instructions the specific P-39 I was building was based in California, so I decided to weather it more than my P-40, knowing that it operated from a sunnier place than the Aleutian Islands. I began the painting process by priming and painting the white of the tail, the maing wingtips and the nose aft the propeller hub. Then I masked the white and painted the underside of the aircraft with the same Neutral Gray 43 mix I used previously on my P-40. I used lighter shades of OD 41 on my P-39, mixing the same three colors that I used previously on my P-40: a 16:2:3 mix for the base coat, and a 8:1:2 mix for weathering. In order to spend the minimum amount of paint and solvent, I weathered my P-39 by dry brushing, and I will do the same on future kits. The step of decal application was similar to the one described for the P-40, but the P-39 decals, although being older, behave a lot better. The raised panel lines of the P-39 were highlighted also with a drawing F pencil, this time used in a different way. I paid special attention to the smoke stains of the P-39. I found a wartime color photograph of a pair of P-39 flying, and I tried to replicate the smoke stains pattern shown in the photograph by first airbrushing light gray mixed a bit with tan paint, and then by applying some powdered pastel chalks. Notice that the smoke stains in this case partially cover the front part of the insignia on each fuselage side. I had to paint the exhaust stubs after the smoke stains. The final step in the building of this kit was similar to that of the P-40. Well, despite all the troubles I had with the Dark Olive Drab finish, with the P-40 decals, and despite the fact that I didn't match the yellow I painted with the one of the P-40 decals, in overall I enjoyed the building of these two kits and I'm satisfied with the final outcome. Thanks for watching and reading. I dedicate these models to my 31 year-old son David, who have enjoyed seeing photographs or illustrations of aircraft decorated with teeth since he was a little kid. Greetings from Caracas, Venezuela, a country where, even having 912 Km of coasts and mighty rivers like the Orinoco (the one that inspired Jules Verne's novel The superb Orinoco,) and having the tallest waterfall in earth, thanks to our inept government only 1/6 of the homes of the country receive water on a permanent basis, according to recent statistics. For an example, my home receives just 15 min, in average, of water every day, with a strong tendency to decrease (the day I finished writing this text my home didn't receive any water.) Orlando Sucre Rosales
|
||||||||||||||||||||||||||||||||||||||||||||||||||||
Photos and text © by Orlando Sucre Rosales