|
As
a patriotic Brit, the little ‘Wooden Wonder’ was one of my favorite aircraft
for World War 2. It had the grace, speed and endurance to be successful at a
good variety missions over
Europe
– reconnaissance, bombing
and night fighting. I’d initially though to do one of the well known
fighter-bomber or recon variants. While these popular subjects are certainly
more attractive, I was interested to build something a little different and
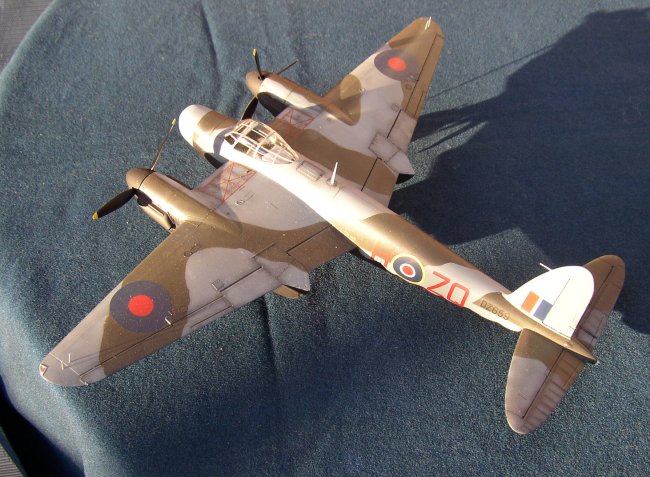
ended up doing the black/grey/green scheme of the stub-nosed radar night fighter
Mk XIII. As usual with Tamiya, the kit was very easy to build. Eduard
do a photo-etch set for the Mk.VI Mossie,
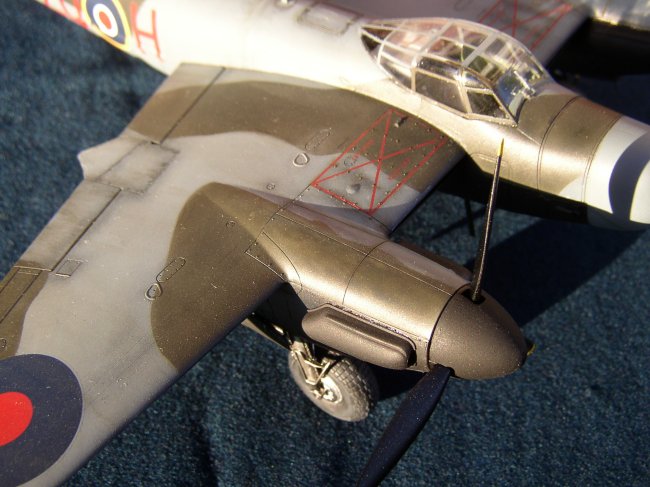
but nothing specifically for the Mk.XIII. While the
kit detail is great, there are a few parts – such as the air intakes for the Merlins
would be nicer with photo-etch detail.
|
Click on
images below to see larger images
|
|
|
On
my Mossie, I tried another new (to me!) technique
that I’d read about and seen the results from on ARC: pre-shading. I
airbrushed all the panel lines, details and underside with Tamiya XF-1 matt
black, before steadily airbrushing sea grey on the upper surfaces. The grey was
airbrushed from the middle of panels towards the outside, taking care to blend
in the grey to the black panel gaps. Wow: it works! Next I laid a raised mask (I
cheated and bought the three-color camouflage mask from Eduard)
over the upper surfaces using blue tack. The blue tack raises the mask edges 1mm
or so to slightly blur the edges of the camouflage between the grey and the dark
green. Again, I took care not to down the dark panel lines with too much green.
It was a hot summer’s day (Yes, I know… a distant memory) and the blue tack
caused some anxiety, as when I raised the mask blobs of blue tack stubbornly
stuck to the model. None of the tips I’d read on using tack to raise
masks warned me of this nasty surprise! Using a bigger blob of blue tack to
tease the smaller blobs off didn’t work, but I tried brushing white spirits
from a paint brush which dissolved the tack without damaging my acrylic paint
scheme. Brilliant!
One
great detail on the latest Tamiya kits is their clear wing tip lights: they have
a small bulb shaped indent inside which you dab a spot of clear red or clear
blue into. Clear blue is not a mistake as I thought at first, because the
starboard navigation lights have blue tinted bulbs which only glow green when
switched on. They look great on the model. And I tried Microscale’s
Kristal Kleer white glue
to fix the lights and the other clear parts on this kit. Recommended – it
works great.
It was easy from there: a couple of coats of Johnson’s Clear, kit decals, an oil wash and some Tamiya smoke and Tamiya matt varnish.
Simon Wallis
|