|
This is the
third and last article about my A380 project. The three parts allow me to go
into some details which I think make this build a little different from
traditional “out-of-the-box” assemblies.
- Part 1:
Scratch-built cockpit with illuminated instrument panel. Cabin, taxi, icon and
NAV lights. Body assembly.
- Part 2:
Engines with custom-made etched fan blades. Landing gear.
- Part 3: Paint job, final
adjustments. Display base, with illuminated taxiway.
PAINT
JOB
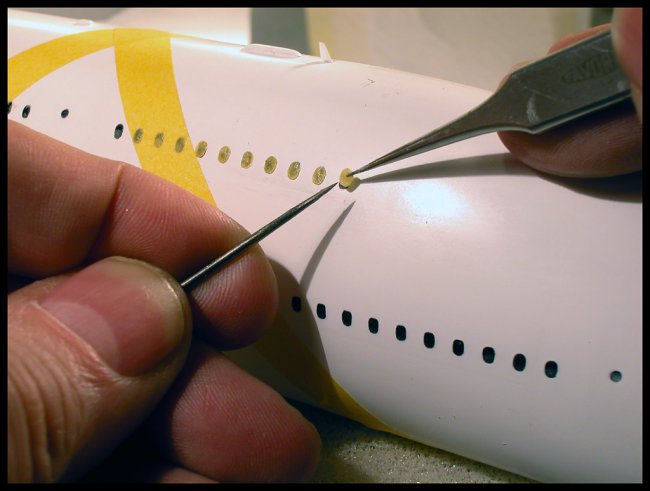
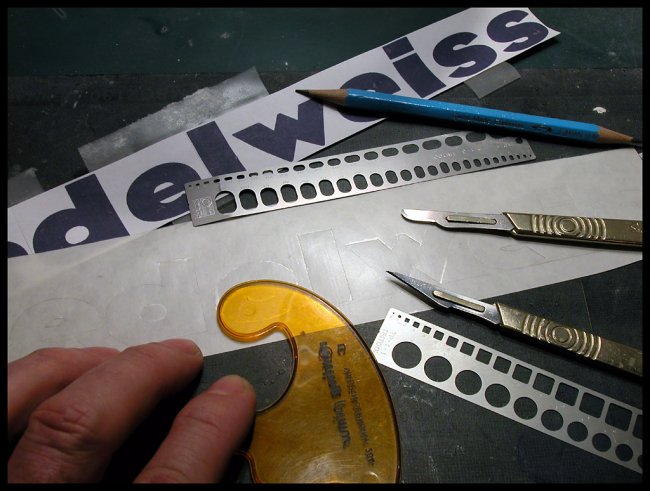
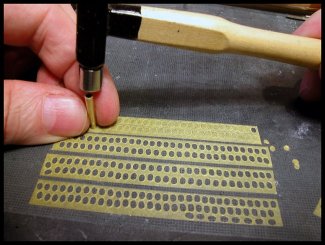
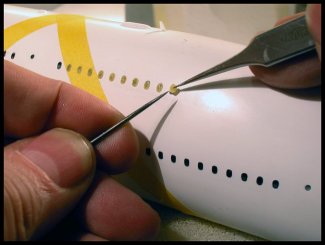
The most
tedious job was to mask the 220+ windows before painting. I created an
appropriate punch with a brass tube, which end I sharpened and hammered into an
oval shape.
|
Click on
images below to see larger images
|
|
 |
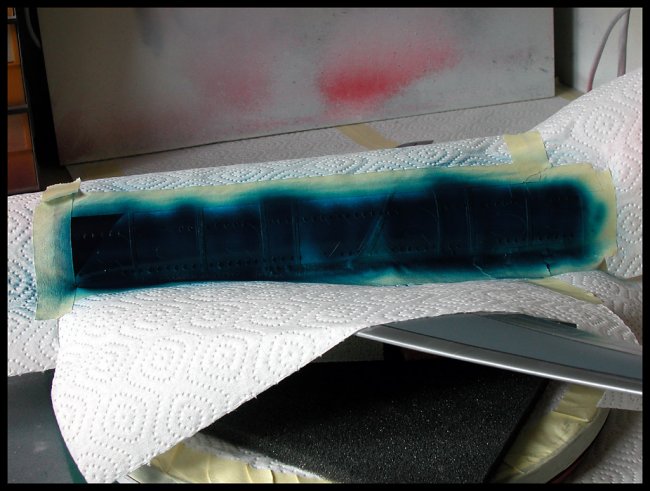
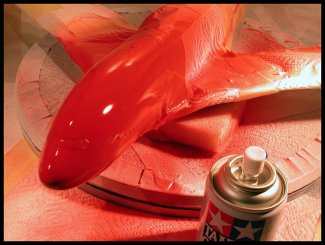
After
I applied a coat of gloss white, out of a Tamiya spray can. I found out that
this pain levels out smoothly into a brilliant coat of paint. Red was next. I
had to carefully cover all unpainted areas, because red paint particles fly
around into any unprotected space. Again I got a smooth surface “out of the
can” 
|
Click on
images below to see larger images
|
 |
 |
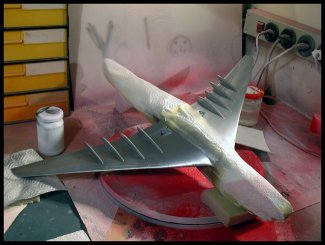
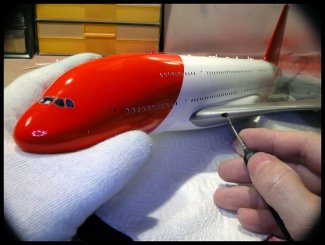
The
wings were next. They received several thin layers of Alcald II Duraluminum. I
paid much attention to having a smooth, dust-free surface before applying this
very sensitive paint. A few touch-ups to the landing lights, et voilà a
wonderful paintjob. I wear cotton gloves to protect the fresh paint from finger
prints and sweat smear.
|
Click on
images below to see larger images
|
 |
 |
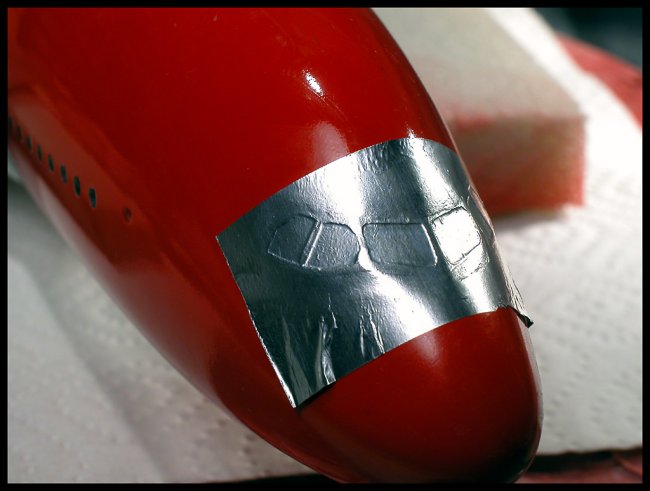
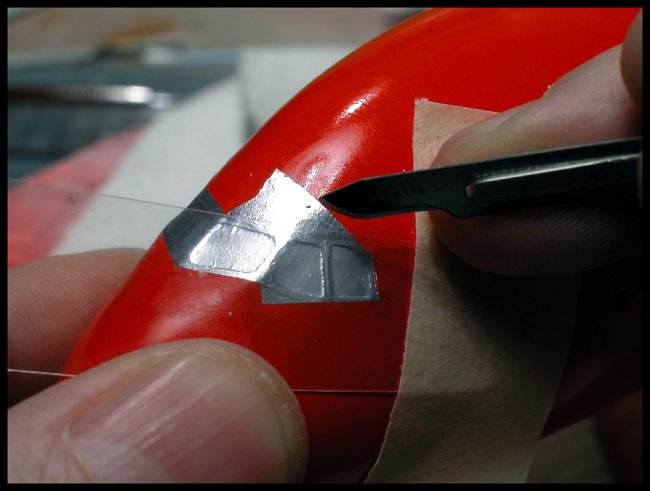
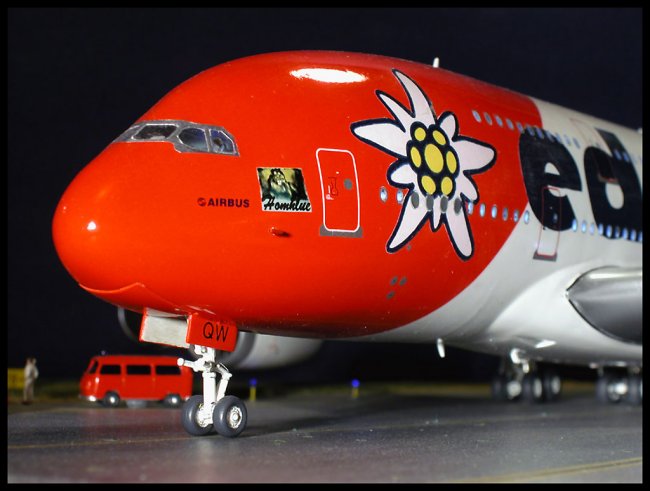
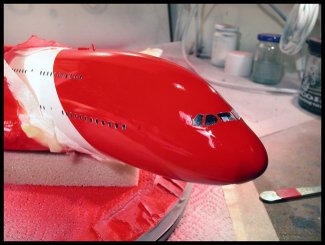
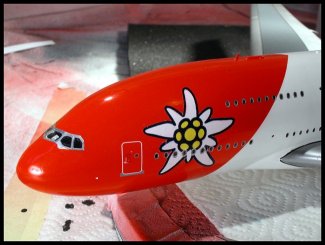
A
special area I had to take care of was the cockpit windows framing. I applied a
foil of Bare Metal, smoothed it down with a toothpick and cut along the frames
with a new surgical blade. To trim the outer frame, I used a piece of
transparent plastic as a ruler and guide for the blade. The result looked
convincing, and at the same time hid the imperfect masking delimitations between
the window and the paint.
The windows
and door framings came from the kit’s decal sheet. Again I had to apply each
of the 220 window frame one by one, to compensate for the minor inaccuracy of
the paintjob in this area (white primer showing through at the borders of the
red paint, masking not applied exactly on the window’s center, etc). I printed
the Edelweiss on a piece of white decal sheet, and protected it with a layer of
transparent sealant.
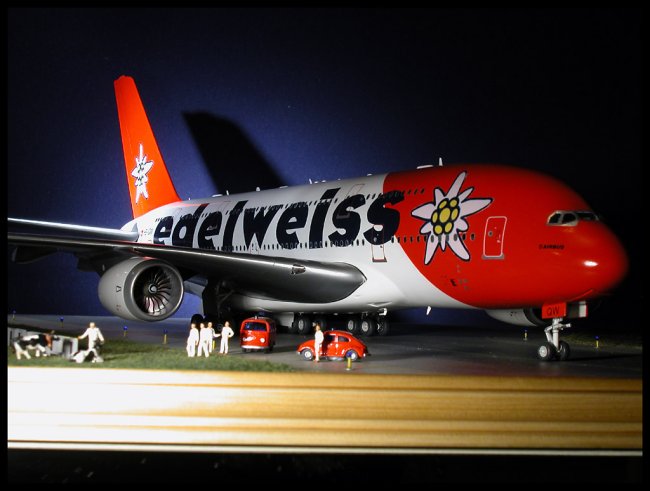
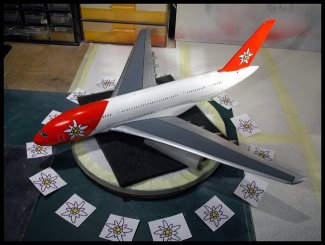
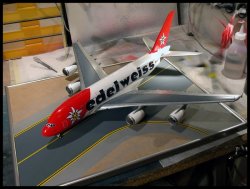
The A380 model
now approached completion. I thought it would make a pleasant picture to have
her sitting in a circle of printed Edelweiss.
|
Click on
images below to see larger images
|
 |
 |
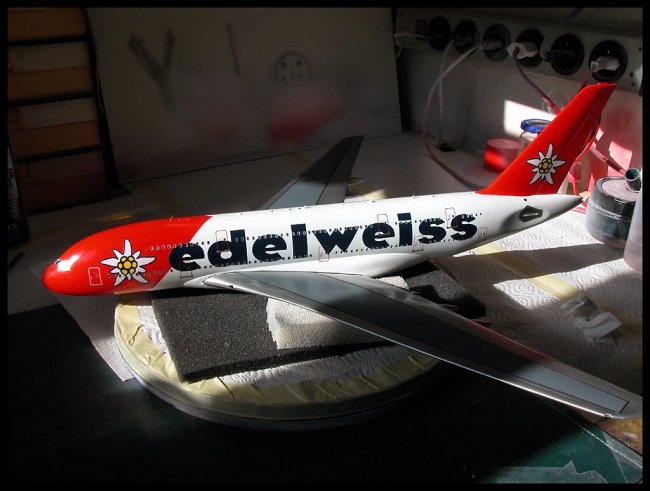
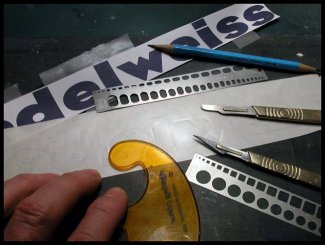
The
last major step in the paintjob – which could still ruin the entire build –
was to apply the company logo on the body. Of course no decals exist, so I
decided to design my own masks and actually paint the lettering on both white
sides. This was not a risk-free decision, but the result met my expectations. I
received the exact letter font from Edelweiss Air, as I received the Edelweiss
logo. I printed the name on paper, overlaid it with a layer of transparent
Friskett mask, and cut out the letters. Then I aligned and applied each letter
individually (the entire mask was too large to be laid down in a single pass).
|
Click on
images below to see larger images
|
 |
 |
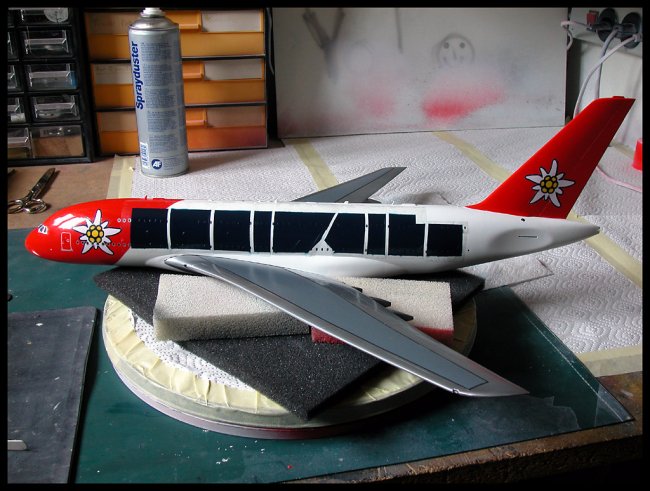
Several thin
layers of dark blue paint later, and with great fear, I started removing the
masks. Surprisingly everything went according to the plans, with no major leak
under, nor liftoff by the masks. Here and there a couple of paint-brushed
touch-ups fixed the small glitches.
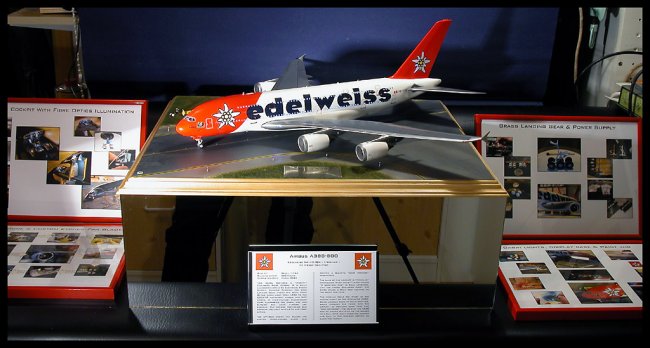
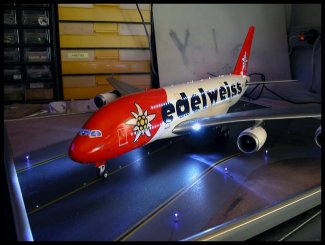
Nothing else
could go wrong now, to my big relief. The airplane started showing her bright
beauty in the gorgeous scheme, carrying a typical flavor of
Swiss atmosphere. I was about to reinforce this feeling even further,
when building the taxiway.
| DISPLAY
BASE
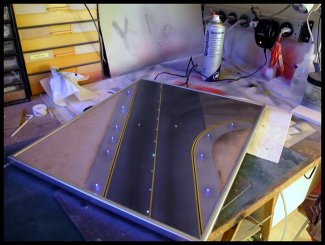
To build
the display base, I used a photo-frame, large enough to accommodate the
model, and offer some space for a personal addition. The wooden base is
MFD. I spent a lot of time on the Net, and harassed my friends, to find
information about taxiway widths, marking colors, central RWY light
colors, and outer edge border lights. Later on I would change the aluminum
frame to a nobler, scratch-built, wood frame.
|
Click on
image below to see larger image
|
 |
|
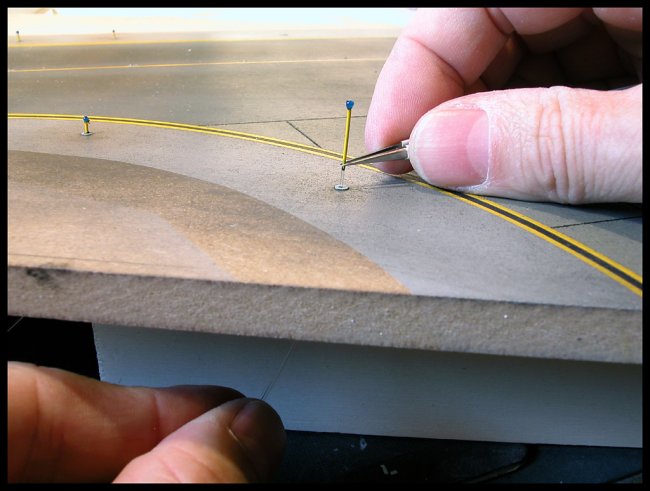
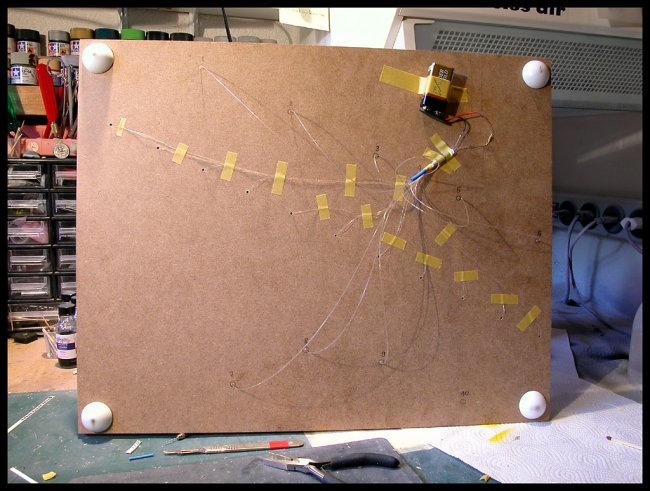
Again I
crafted the taxiway light out of fiber optics (FO). I flattened out (mushroomed)
one end of a FO, dipped it into Crystal Clear to accentuate the bulge and
painted the FO accordingly. Then I pulled each FO into place, through a
carefully drilled hole. On the last photo below, you can see the back-side of
the taxiway, where all FOs connect to a single light source: a regular white, 9V
powered LED
In the center
of the taxiway, you will notice the two small springs, acting as connectors to
the model’s landing gear strut, and powering up the aircraft’s lights. A
full-scale try with the model sitting on the taxiway made me now feel certain
that the build was approaching a bright and happy end
|
Click on
images below to see larger images
|
 |
 |
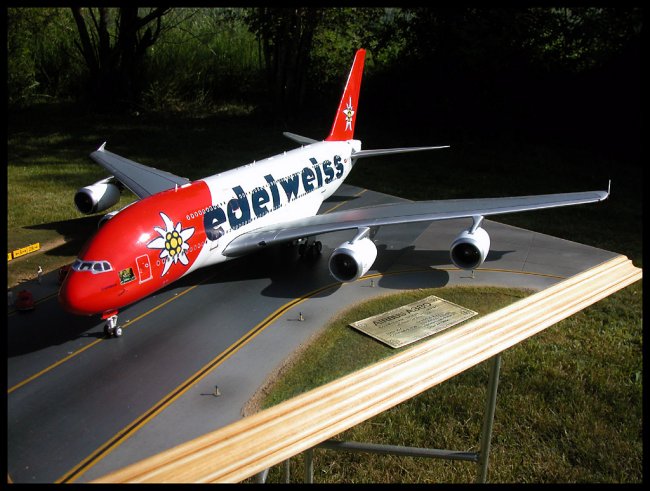
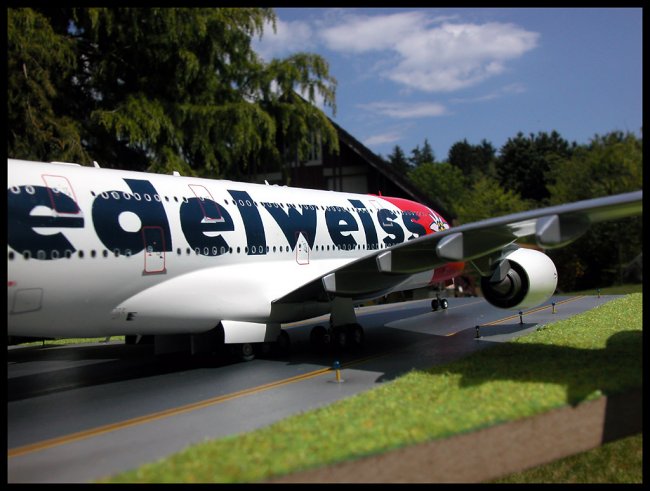
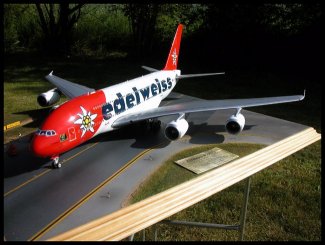
In
the bright sun outside in the garden, the red-white Edelweiss scheme stands out
particularly well in front of the dark greens of the garden. The second photo is
an earlier close-up: I still had to weather the diorama grass, which I made with
model railroad scenery grass.
|
Click on
images below to see larger images
|
 |
 |
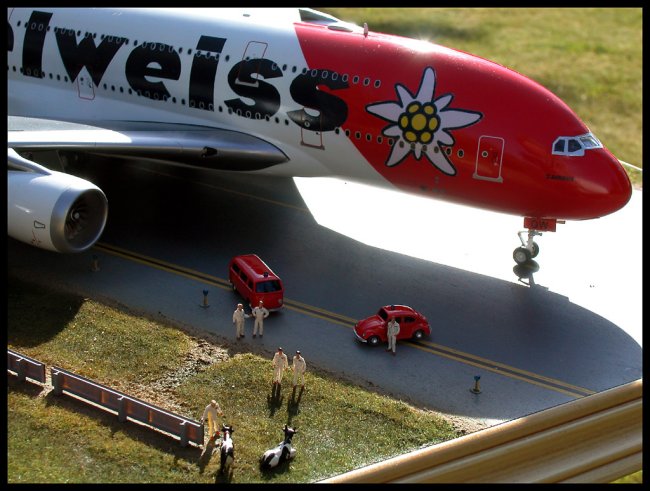
THE
STORY OF THE COWS
I wanted to
add a funny story to this “high-tech” built. So I came up with a humorous,
although mostly unlikely scenario.
Swiss
cows are well known for their milk, hence the famous Swiss chocolate. All cows
of the world are famous for their natural pleasure in TRAIN SPOTTING. The two
specimens in the diorama however are a little bit different: They couldn’t
have missed the maiden flight of the Edelweiss’s first A380. So they broke
through the fence at Zurich Airport and went in for some BIRD SPOTTING. The A380
pilot had no other solution but to step on the brakes, bring the aircraft to a
full stop and kill the engines. On the diorama, the security staff tries to
convince both stubborn cows to clear the way… please!
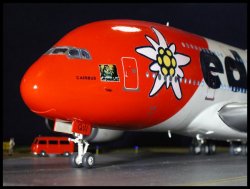
| A
final picture of my model gives a clue of the sheer size of the A380. The
red minivan could drive safely under the belly of the aircraft…
|
Click on
image below to see larger image
|
 |
|
FINAL
NOTES
The model won
a Gold Medal and Best of Show at the recent model contest HISTORIA 2004 in
Switzerland.
The paint
scheme is both REAL and FICTITIOUS. Reality is that Edelweiss Air is an actual
Swiss charter company, performing well for many years now. The current fleet is
comprised of three A320s and a single A330. The fiction is that there is no A380
on order.
I was happy to
“upgrade” their fleet with my model, which I could not have achieved without
the help of my friend Leander.
My family flew
Edelweiss Air several times to Sharm-el-Shek and Mahle. I shared many evening
chats with the crew at the crew house. Neighbors - who were lucky to escape the
tragic Tsunami events - confirmed the friendly and efficient help the Edelweiss
crew provided to tourists trapped in the South-East. I must confess Edelweiss
Air is a top-notch company
Pierre
|