|
Revell
is one of the model manufacturers that have always been rather active when it
comes to expanding their range of products. On one hand there are reissues of
their own kits and those from other manufacturers, swapping molds with other
companies and on the other hand completely new own kits. The community of 72
scale modellers just got the MiG-21F-13 when it became known, that Revell was
planning the Hunter. The possibility of swapping molds has increased further in
the past years and Revell never hesitated to use this. So the expectations of
modellers concerning the hunter are quite high - considering this type is only
represented by very old kits.
To my great pleasure I had the honour to get a "test-shot"
(pre-release kit) of this model. The following are my observations made during
the build.
The
test-shot I had, consisted of the sprues and a photocopied pre-release
instruction sheet. This is completely sufficient for a trouble-free assembly and
leaves no question unanswered. Decals weren't included yet. All parts are molded
in good quality and don't have any flash on them, the panel lines are finely
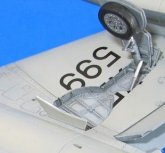
engraved. I immediately noticed the superb detailing of the wheel wells and the
three separate airbrakes. Dryfitting fuselage halves and wing parts leads to the
conclusion that the fit is great.
To foreclose the obvious: There isn't a lot to report - everything fits just
great.
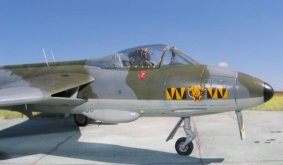
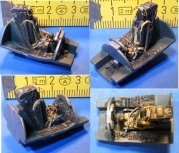
The first step consists of constructing and painting the cockpit parts. The
raised cockpit tub and dashboard detailing really stands out once painted. After
adding ejection handles made from wire, seat cushions and seatbelts made from
masking tape, the ejection seat is good enough to make a resin seat (in my
opinion) needless. The cockpit assembly fits flawless in the fuselage halves.
Those can be glued together then. The seams just had to be sanded down a bit -
no filling was needed. I changed one small detail: Revell provides a clear part
that looks more like a modern HUD - nothing ever installed in a Hunter. I
rebuild the sight with some plastic sheet using a photo as a reference. Revell
obviously prepared the installation of such a sight on the instrument panel.
|
Click on
images below to see larger images
|
|
|
 |
The
fit of the windscreen is very good - I only closed a small gap at the front with
liquid putty. The movable canopy part fits great as well. Since the real
aircraft has a canopy that slides to the back and because this was modelled by
Revell correctly, the canopy can be positioned open or closed at any time
without the use of glue. I fixed the canopy to the fuselage with some maskol
after masking it which makes masking the cockpit interior swift and simple. The
rear part with the exhaust pipes can be glued right on, it also fits very well.
The front of the fuselage is represented by the gun cover and the nosecone,
which fit flawless as well. I only drilled open the gun muzzles. Before
assembling those, add some weight - the available spaces should be filled
tightly with lead weight.
The wing halves fit without any problems either. After assembling, the "saw
teeth" and the wingtips have to be mounted. Slight sanding will do the job
at this point.
Normally, now wings and fuselage would be joined. Because of their great fit, I
decided to go the rather unusual way of painting wings and fuselage separately
and assembling them afterwards. This makes masking and painting easier, because
the camouflage paint continues into the air intake, where also separately
painted guiding plates are located.
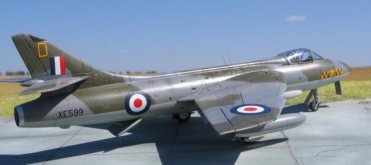
The Hunter was used in many countries and accordingly there are various color
schemes and special paint schemes. I wanted to build a typical RAF Hunter right
from the beginning. Usually those were painted with RAF Light Aircraft Grey on
the bottom and a camouflage pattern that slightly varied from aircraft to
aircraft and consisted of RAF Dark Sea Grey and RAF Dark Green on top. I used
the well-proven Xtracolor-paints (X15, X4 and X1). Before painting I applied a
black preshading. Then I painted the complete bottom of the aircraft. Now the
demarcation line along the fuselage was masked. The upper side was completely
airbrushed in Dark Sea Grey. The camouflage pattern was masked off with paper
templates. By using preshading some "life" is put in the paintjob.
Further discreet effects were added by simply painting again certain areas like
panel lines, hatches and covers.
I
didn't add any further weathering effects - most photos of these aircraft
picture them in a pretty decent appearance, although there are some "used
and abused" looking exemplars. The wheel wells weren't painted separately:
I just airbrushed them in the same color as the bottom of the aircraft,
highlighted them with some black water color and "fogged" them with
aluminium paint. After successful painting and unmasking I painted the smaller
parts like grilles and airscoops with a brush.
Finally I added the wings and the elevators. This parts actually fitted exactly
like they were supposed to - without any further corrections or sanding the
correct geometry was met - I was pretty relieved at this point.
As I already said, my kit came without decals. To my pleasure, the company Aero
Spezial came to my aid - years ago, there were numerous decal sheets for all
kinds of Hunters (not all of them are still available though) and Aero Spezial
sent me the sheet from Xtradecal I had been looking for. With this sheet
(X046-72) seven Mk.6 can be marked, including an overall black and a red/white
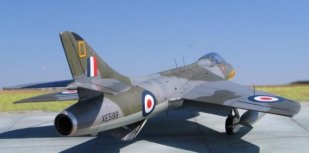
painted aircraft. I decided to build XE 599 of the 74th squadron in the
appearance of December 1957. The Decals are great to work with and absolutely
adapt to the underlying surfaces and panel lines when some decal softener is
used. The Hawker Hunter was painted (as almost every other British aircraft of
that time) with glossy paints. So my model was supposed to be glossy as well. To
gradate the gloss effect I added some semi-gloss clear varnish to the gloss
coat.
At the very end, the separately painted gears, airbrakes and external stores
were mounted.
This unusual trouble free build came to an end when I put the ejection seat into
the cockpit.
My
commendations to Revell! - a Hunter OOB straight from the box: everything fits,
everything's right, nice detailing that makes resin useless. An authentic model
for beginners as well as for "spoilt" advanced modellers. I didn't
find anything to complain about, not even by searching for it.
Arne
|
Click on
images below to see larger images
|
|
|
|
|
|
|