|
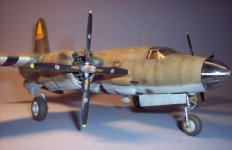
This is the first
B-26 I have built to completion. Oh, I've tried before. Only to fail
close to the end. This one almost suffered the same fate. Built right out of the
box using Floquil Railroad Line enamels and Aeromaster Decals. This project was
built over a five day period and presented interesting challenges. The
trickiest part of this build was jostling the turret into place. I carefully put
into its hole in the fuselage and feeling pretty smart began gluing
the fuselage together. As soon as I turned the thing up, the turret fell into
the fuselage and started laughing at me. Lucky for me I came to this site and
found a build article on it and the builder did about the same thing yet fished
it back into position. Intentionally, preplanned! He knew he had to place the
assembly into the model before continuing. Thanks whoever you were!
|
Click on
images below to see larger images
|
|

|

|
|
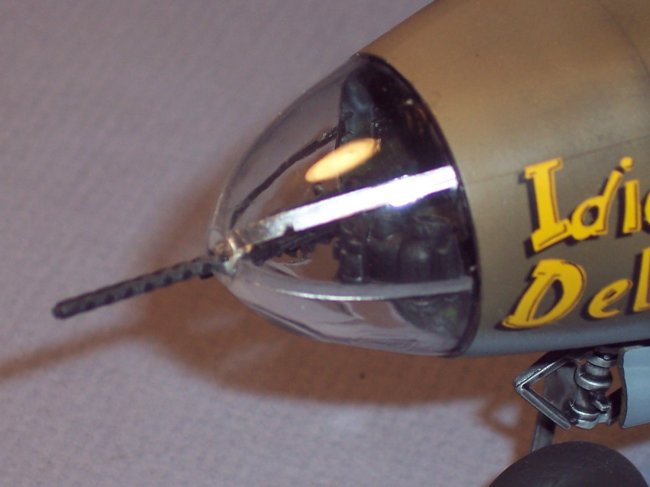
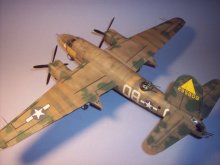
The nose framing was
accomplished by cutting thin strips of Bare Metal Foil and carefully placing
each on top of each internal frame inside the nose cone and pressing into place
with a toothpick. Two attempts me I make, as Yoda would say.
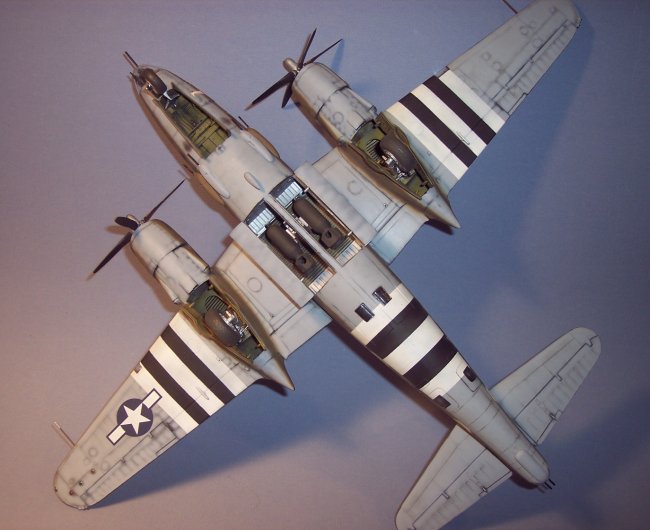
Not a bad kit to build when one
learns the little tricks to it. The engine nacelles give many a problem. The
fit will be terrible if you assemble them first then attach to the bottom of the
wing. I glue each half to their slots in the wing bottoms to get the best,
closest fit. I then squeeze the opened seam running along the bottom
of each nacelle together and glue. I actually used a minimum of filler
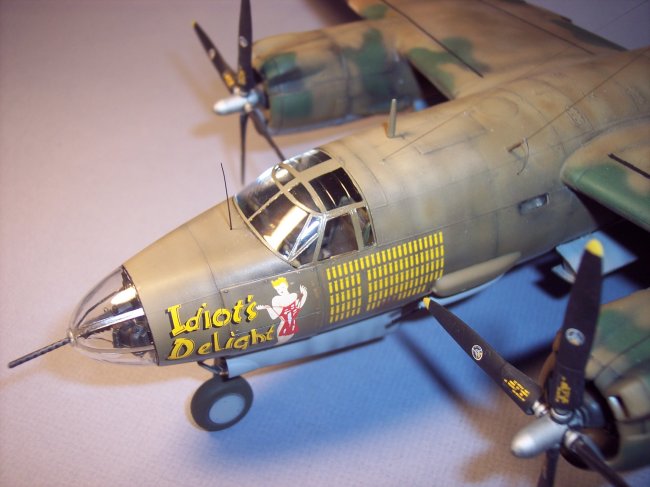
on this build. The biggest disappointment with this project was the hose job
Aeromaster did with the nose art. It's oversized for the model. But as I
can't do a better job printing my own decals, I'll accept it and move on.
Kevin
|
Click on
images below to see larger images
|
|
|

|
|
|