|
With
my interest in Special Operations aircraft, I thought it would be neat to
build one of the aircraft of the 160th SOAR.
I really wanted to build a MH-6, the troop carrier version of the AH-6
Little Bird attack helicopter. The
AH/MH-6 helicopter is based on the MD-500 series helicopter.
If you haven't seen Blackhawk Down you are probably familiar
with this type of helicopter from Magnum PI.
Recently, Dragon re-released their
1:35 AH-6 and many people have begun to build it as an MH-6 using the Cobra
Company conversion set. Since I
didn't want to build the same thing as everyone else, I decided on a different
route, converting Italeri's 1:72 AH-6 to an MH-6.
The original kit comes on three
sprues with parts to build three different aircraft, an early 1980's AH-6
(without mini-guns), a Japanese version or the Israeli MD-500 Defender.
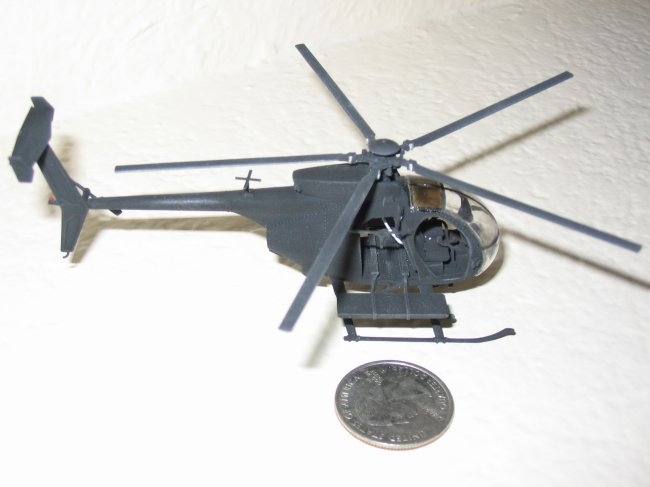
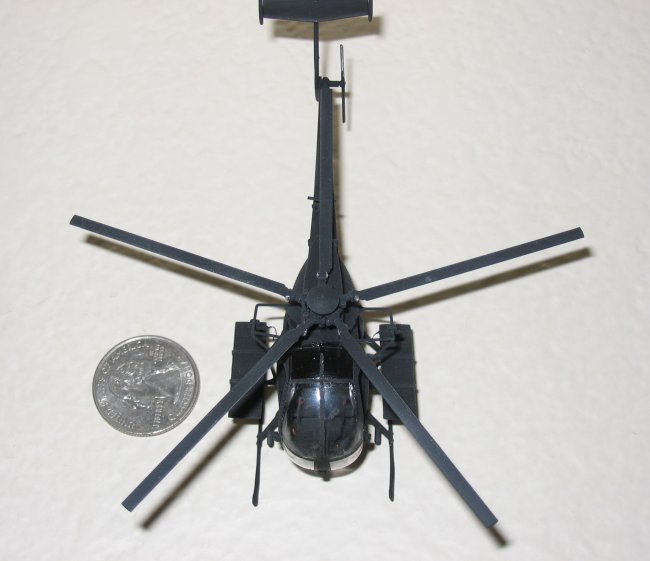
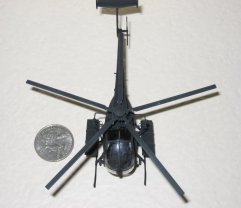
The first thing you will notice is how small the kit is.
We all know that 1:72 aircraft are going to be small, but this one is
about as big as your middle finger. Since
there are three variants you can build with the kit, many of the parts are
specific to the type of aircraft you want to build.
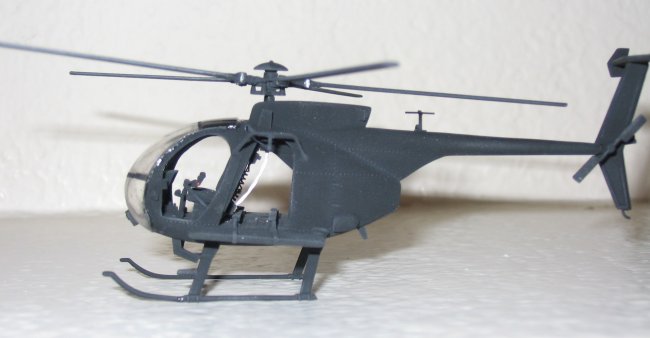
The first thing I did was remove
the doors from the fuselage. All
photos I have seen show the doors removed.
I also plugged up the windows above the rear compartment with sheet
styrene and putty. Since the kit
version is supposed to have one set of doors open, I had to fill in the areas
where this was supposed to be.
Working
on the kit interior was fairly simple as there were few parts.
However, I decided to spice things up a bit and add detail.
I enlarged in the front console by adding styrene to the back of it in
order to make it larger. I added
a box between the two seats and detailed it with some wire.
Also, I added two sets of control panels, one between the seats and one
below and in front of the console. To
these, I drilled out several holes and inserted fine wire to represent
switches. One thing to be aware
of though is that the collective between the two seats is two big.
Photos I had showed it that the collective sits flush with the seats
and instrument panel, not higher like the kit piece.
I cut the piece down to the proper sides and placed it next to my added
instrument panel. Also, I added
two small instrument panels to inside of the fuselage by the pilot/co-pilot
doors. To these, I added wire
running from the main instrument panel.
|
Click on
images below to see larger images
|
|

|
|
In the rear compartment, I added
several radio and electronic boxes made out of sheet styrene and rod.
I created an extra fuel tank and attached it to the rear.
To get the proper railings for the bench seats (which were added later),
I used I beam styrene. I sanded
down the area where it would fit and then I cut the proper lengths.
Also, I added several sets of wires in the rear based on photos I had,
some leading to the cockpit and others running to the electronics.
When it came time to attach
everything, there were the usual Italeri fit problems (sensing a pattern in each
of my Italeri kit reviews?). The
fuselage halves and the cockpit section didn't fit right.
I used a lot of putty, styrene, super glue and white glue to fill in the
gaps as best as I could. The
noticeable gaps were in the rear compartment between where the rotor would sit
and the kit piece, the aft bulkhead and the sides and the area between the top
of the cockpit. Filling these gaps
was tedious work because they were in such tough to reach areas.
Once the gaps are filled and painted, you are fine. However, if you left
it unfilled, you would be able to see the mistake a mile away.
With the main sections completed, I gave it the first coat of paint.
However, I did leave off the control sticks until later.
These were painted separately. Remember,
everything is aircraft interior black so don't worry about it looking to dull in
one color.
The kit is a bit of a tail sitter
so try to add what little weight you can under the cockpit.
I even used a bit of putty to fill the gap and add extra weight.
The tail-sitting problem is not isolated to this kit.
The Dragon kit is far worse where the kit only rests on its tail.
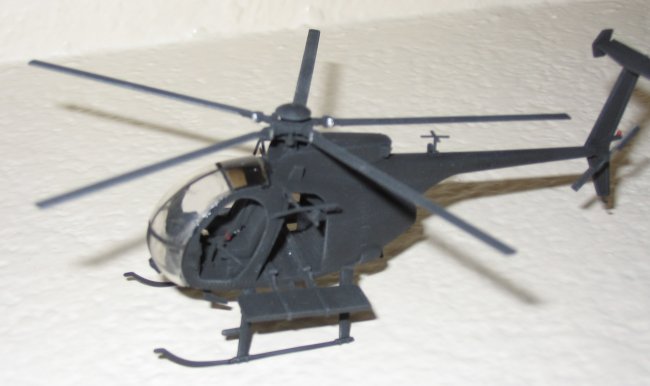
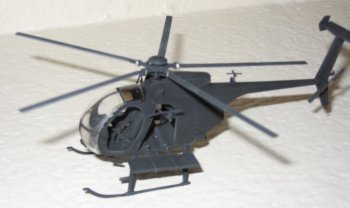
The rest of my effort was spent
adding the exterior parts and extra exterior details.
Most you can see in the photos. There
were many sensors and antennas that need to be added around the rotor and below
the cockpit. I did use some thin
brass sheet to add detail to the exhaust. One
downside of the kit was that the landing skids were not molded with locating
pins. This would have really helped
in making sure they went in at just the right angle.
I had to use the tiniest drop of glue to attach the skids before making
the final adjustments. The kit
comes with air scoops, which they want you to place near the rotor.
For my conversion, I took drilled them out and placed them near the
exhaust.
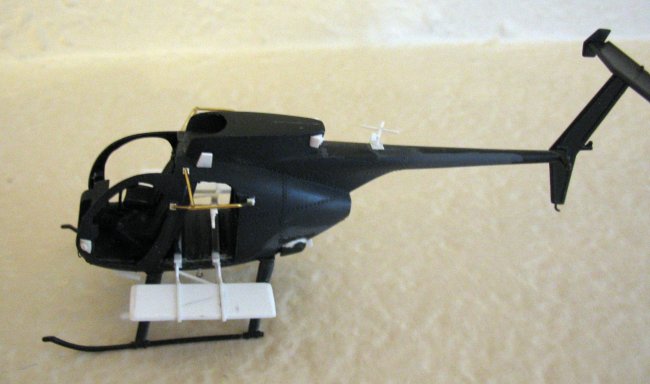
The
toughest details to add were the FRIES system and the bench seats.
I could only find one good shot of the FRIES system so duplicating it
took a bit of guesswork. I used
brass rod to construct it and made the attachment points and rigging from
styrene. The bench seats were made
from .040 styrene. To that, I added
thin styrene strips to give detail and sanded down the edges to make the proper
angle. Developing the attachment
pieces from the bench to the interior railing took some work.
It took a bit of work to get the pieces cut with just the right angles.
I later added styrene rod to give it the proper support.
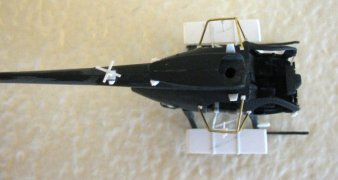
Lastly, I masked off the canopy
and painted the canopy braces black. Later,
I used Tamiya Smoke to give the top windows the proper tinting.
The control sticks were then added.
I painted the rotor and the aircraft again with Aircraft Interior Black.
However, as I was seconds away from finishing my painting, it slipped out
of my hand and crashed to the ground. After
my heart started beating again, I noticed that only a couple small pieces were
broken which were easily fixable. I
let the paint dry for a couple days and then hit it with Testors dull coat.
After that, I dry brushed with lightened aircraft interior black to bring
out the raised details. There must
be something with AH-6 canopies because neither this kit nor the Dragon kit fit
properly. I had to shave off some
of the canopy to get it to sit correctly. Once
this was done, my MH-6 conversion was complete.
I was pretty happy with the way
my first conversion turned out. The
work involved wasn't too bad and I think it was a good first project.
The kit itself was about what you can expect from Italeri, but being the
only maker of 1/72 kits like this, you are kind of stuck.
This kit took me 3 ½ months to build.
I could have finished it earlier, but I was getting ready for the birth
of my first child. I would suggest
this as a simple conversion if you enjoy the subject and you can find the kit.
Pros
- Good first conversion project
- Fairly easy to construct
Cons
- Usual annoying gaps that need
to be filled
- Tricky
time attaching of the skids at the proper angle
Mike
|
Click on
images below to see larger images
|
|
|
|
|