|
Tornado
GR4s are few and far between in model form, it’s a shame, the Tornado or
‘Tonka’ is a beautiful aircraft, and the latest and greatest version of this
kit is only available in 1/48 by Airfix, and as fond as I am of good old Airfix,
their Tornado GR4 kit is not one of their finest hours.
After
a bit of research It was very apparent that the only option in 1/48 is by
Italeri, and I chose to go for the Desert Storm IDS version (be advised if you
want to pick up an Italeri Tonka, they are few and far between) Once the kit was
safely in my grubby mitts I secured the Airfix GR4 kit for a reduced price off
Ebay, From the Airfix kit I plundered the FLIR fairing (which Tornado GR4s have
mounted on the Port side ‘chin’ position, the huge twin 2250 litre
‘Hindenburger’ fuel tanks, and the Paveway III Laser guided bomb (which
required new and thinner fins made from styrene card ) Also the decal sheet from
the Airfix kit is outstanding, (watchout for misaligned backing on some decals
– this is typical Airfix).
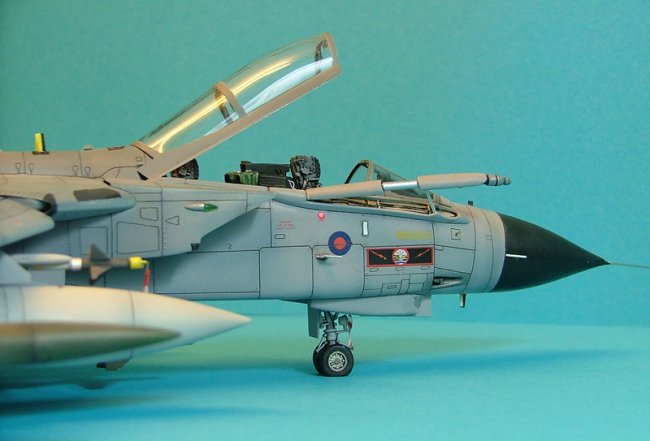
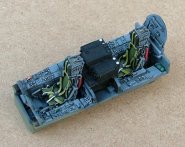
Additionally
I purchased the superb Neomega Tornado cockpit, and some truly wonderful resin
parts from Paragon, including the dropped flaps set (including wing seals),
afterburners, weight-bulged tyres, and resin fin correction.
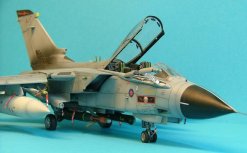
The
cockpit had to be slightly altered to resemble a GR4, namely by replacing the
front circular moving map display with a square CRT screen (made from styrene
card)
|
Click on
images below to see larger images
|
|
|
 |
|
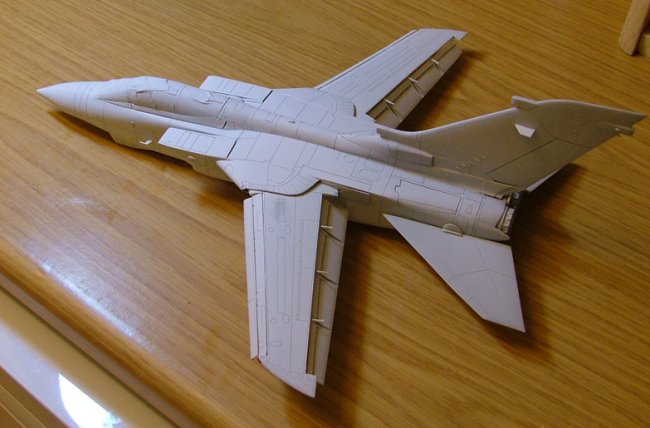
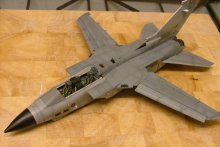
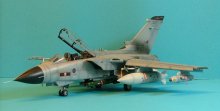
The
Italeri kit builds up quite nicely, it gets a bad press in a fair few instances
but unlike other incarnations it has the basic ingredients for the desired
result, namely recessed panel lines, and apart from the lower fin, the right
shape. The paragon fin correction part corrects what is a minor flaw in what is
an otherwise very well proportioned Tornado. The cockpit is basic, but not bad,
however the Neomega cockpit dropped in to replace the default pit, and to my
delight, with very little effort.
With
the basic fuselage assembled I performed some minor surgery on the wing seal
area to drop the Paragon bits in, these come as a nice additional extra with the
Paragon Flaps, which I’m also delighted to report build up superbly, be
prepared to remove quite a bit of plastic from the kit wings to get the flaps
and slats (the latter is also included) to fit, but TAKE YOUR TIME and follow
the instructions, the whole process took me a little over 2 hours.
The
Airfix FLIR pod is a little challenge to fit to the Italeri fuselage, it will
fit, but it required a lot of sanding and a lot of filler. My chosen filler is
Milliput, I swear by it, (and I use it extensively). The next challenge was the
fin. The vertical fin is probably the most prominent feature of the Tornado –
its HUGE! So the Paragon part corrects the flaw in this most important feature
of this plane. Naturally I made a complete pigs ear of the vertical cuts
required to fit the resin section, so a lot of cursing and milliput (and
rescribing) resulted in a fit that I was finally happy with.
One
of the more fiddley and less impressive features of the Italeri GR4 is the air
intakes, they just don’t fit together well, and they required extensive filler
and re-scribing, but again after some TLC, we got there.
The
GR4 only has one cannon, so the port cannon fairing on the twin cannon IDS kit
needs to be eliminated – this is very easy, just a blob of filler and sanded
down, a spot of re-scribing around the area, and you would never know it was
there!
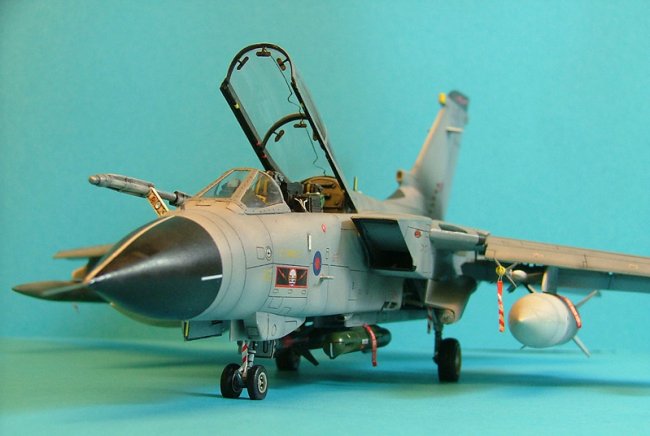
I
also opted to have my model posed with the IFR (In Flight Refueling) probe
extended, this doesn’t require much work as the kit allows you to have this
extended, however I added some small details such as the electrical wiring and
structure inside the fairing, as well as replacing the central telescopic
section with a 1cm section of steel coat hanger – it was the correct width and
chrome/metallic in appearance – ideally suited to the job.
The
wheel wells were detailed with fuse wire and styrene card to make them a little
‘busier’, and the pitot tube replaced with a section of sewing needle.
|
Click on
images below to see larger images
|
|

|

|
|
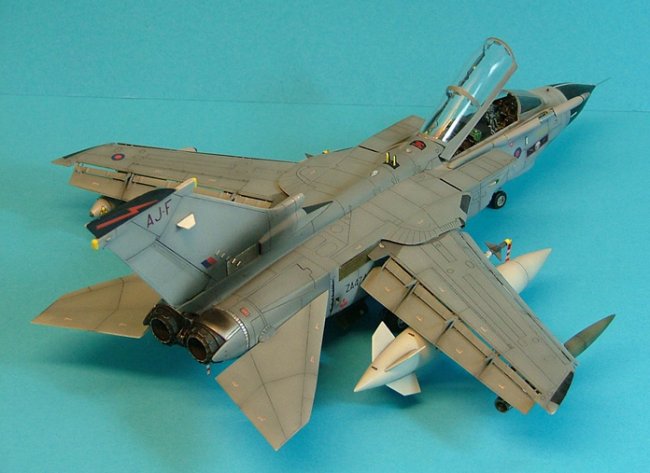
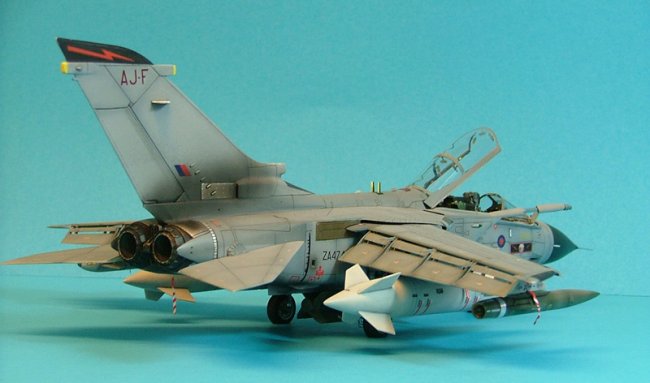
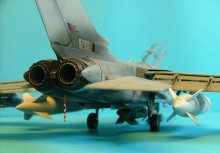
The
paint job on RAF GR4s is two-tone grey, a dark grey on the upper fuselage
surface, and lighter grey on the lower fuselage. After priming the model with
Halfords auto primer, it was preshaded and painted with Lifecolour Acrylics. The
thrust reverse buckets were painted with Alclad II and ‘scorched’ with flat
black.
The
upper fuselage surface also received some post shading by slightly lightening
the centre of each panel, this is not a effect I’d advise to over-do,
particularly on Tornados, so I kept it nice and subtle. The decals were a
mixture of the very good and extensive Airfix kit decals – (in this particular
case the 617 ‘Dambusters’ Squadron based at Lossiemouth, Scotland) and
Xtradecal roundels.
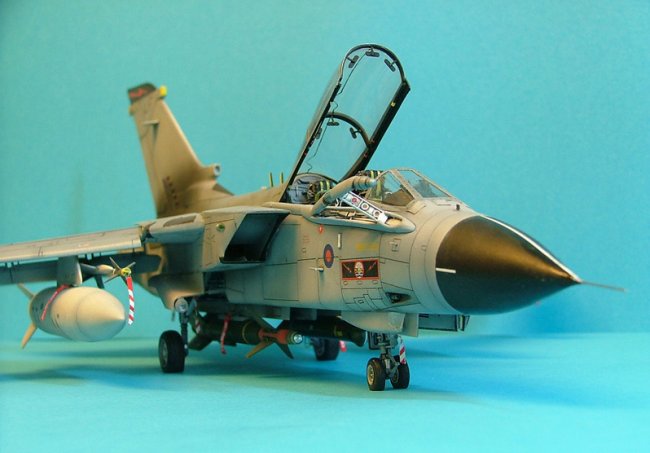
Final
weathering was done in the form of a nice rich panel line wash using heavily
thinned Artist oils over a nice even coat of Johnsons Klear, and flat black for
the fin scorch marks.
Last
but not least the paper RBF tags were added to give a final bit of detail, A
fully loaded Tornado looks ‘the business’ in my opinion, and the sight of a
Tonka travelling at full pelt ‘down in the dirt’ is a sight to behold for
anyone.
Happy
Modelling
John
|
Click on
images below to see larger images
|
|

|
|
|
|