A
retractable undercarriage and variable pitch propeller was planned for
production versions. Armament was to consist of two 7.9mm Brownings firing
through the prop disc, and two more in pods under the wings firing outside the
airscrew. It was also planned to mount two 20mm cannon in place of the wing guns
on later production aircraft. The
wing design provided for pleasant low speed handling. The signs were it would
have proven a nimble fighter, although it would still have been outclassed by
potential opponents like the Bf 109 and LaGG-3.
Events
were to overtake the I-16’s development as the Soviets invaded Latvia in 1940,
and in turn the Germans did the same in 1941, to be followed by the Soviets once
again towards the end of the war. Both of these invaders tested the I-16 and it
was flown in their national insignia.
A
more detailed history of the type along with useful photos and plans can be
found in Air Enthusiast # 48.
|
Click on
images below to see larger images
|

|

|
The
Kit
Czech
Master Resins are well known for their high quality resin kits of both very
unusual and mainstream aircraft types. They first kitted the VEF Irbitis I-16
about 20 years ago, but withdrew it from production when new and better
information on the original aircraft came to light.
This led them to issue a completely new and more accurate kit in 2005.
It is a credit to this company to take this step once new information
becomes available, rather than keep offering a less accurate interpretation that
few modellers would know had some weaknesses.
A
handy review of the new CMR I-16 kit in Internet Modeller can be found at http://www.internetmodeler.com/2006/january/first-looks/CMR_Irbitis.php.
I will not try to add to this very good in-box review here, other than to say I
was impressed with the kit’s presentation, simplicity and choice of markings.
The
Build
The
kit was very straight forward to build, with minimal cleaning up of casting
blocks being required. The biggest challenge was the very fine casting of the
roll-over bars incorporated with the cockpit tub which required some flash
removal as an unavoidable bi-product of the casting process for these types of
shapes. Some may choose to avoid
the clean-up and replace with plastic rod.
The
fuselage, wings, empennage and undercarriage are easily constructed, with just
one or two little pin-holes needing filling. In this respect the model is really
quite a fast build. Just take care to test fit the cockpit interior and
instrument panel for best results. The most challenging part of the build is vac-form
canopy. This is simply because of the way the real aircraft’s canopy was
incorporated into the fuselage top-decking, with the whole folding to one side,
plus the two curved panels at the rear have to be cut carefully to conform to
the fuselage. Fortunately CMR provide tow canopies so that you can have a
practice run first. Finally two small venturi-type pitots and aileron mass
balances need to be added to the underside, and all is finished.
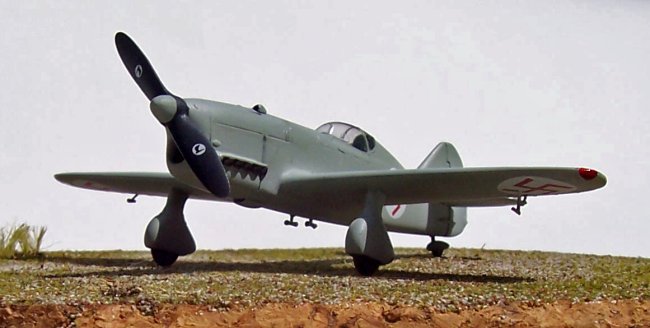
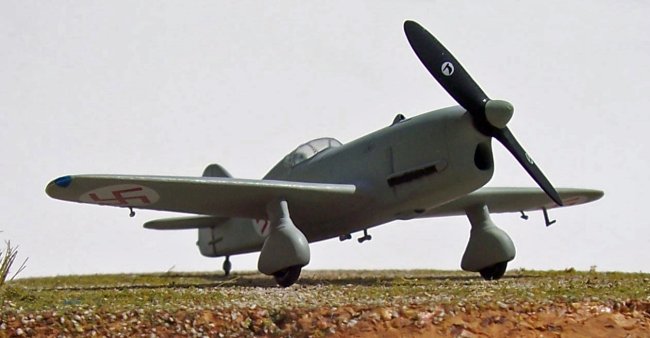
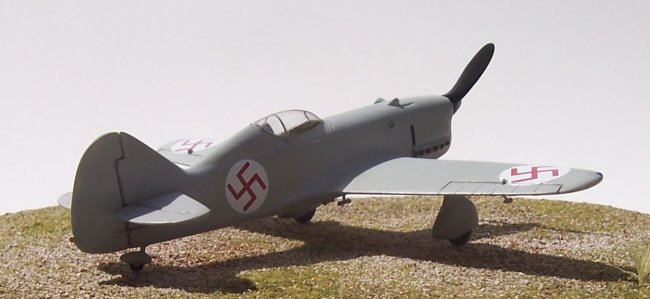
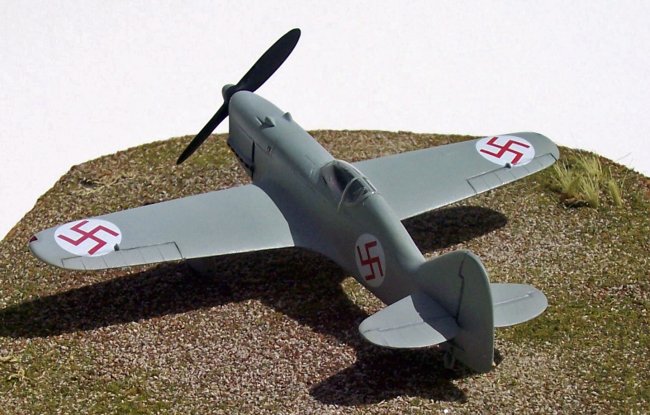
There
is some suggestion that the I-16 was finished in a bronzy-aluminium colour, but
I erred on the side of caution and kept this tint to very subtle levels in my
paint mix. Decals went on
flawlessly and now I have what I think is a pretty and very interesting
light-fighter prototype in my display cabinet.
Conclusion
This
was my fourth resin build and the easiest I have undertaken so far. I thoroughly
recommended this kit to anyone who has an interest in prototypes from this
period or just likes obscure aircraft types.
Mark