|
The Kit
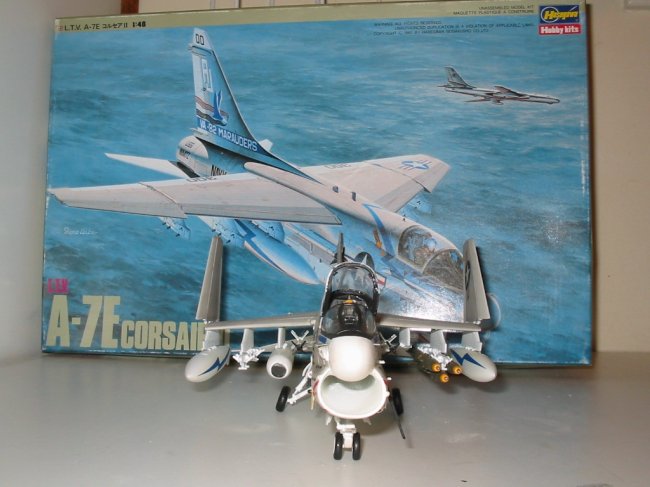
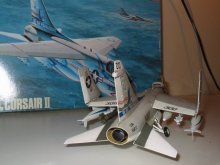
P12: 2900 Hasegawa's 1/48 L.T.V A-7E Corsair II
Additions
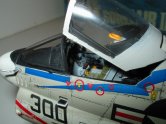
4117 Aires 1/48 A-7D Corsair II Cockpit
48406
True Details Escapac Ejection Seat
Construction
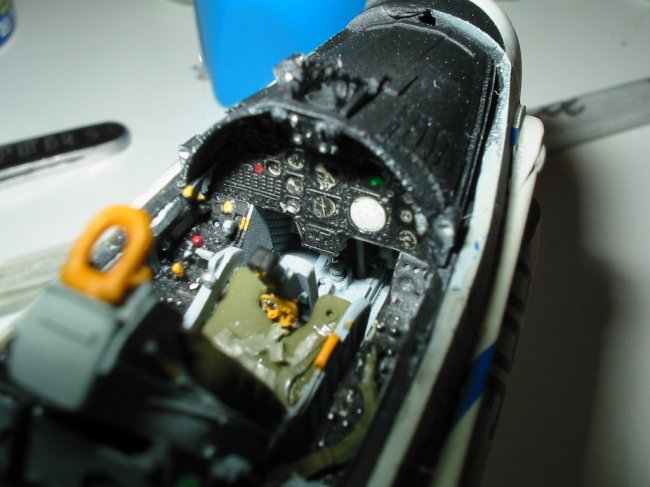
My children brought me this kit
for Fathers day back in 2002, with in a week of Fathers day passing I went to
work on assembling the kit. I started were one normally starts with, the
cockpit. However after building the kit cockpit I realised that it would not
do, not enough detail unfortunately like most cockpits that Hasegawa
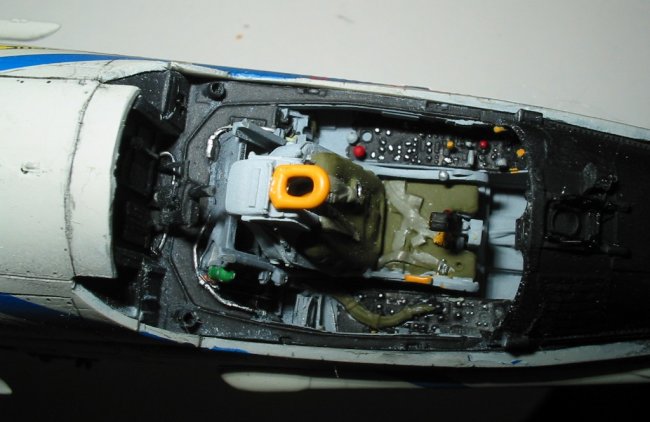
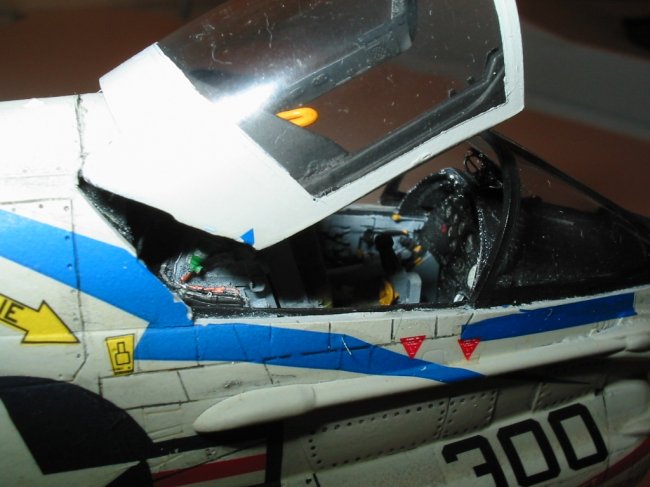
produce. The only cockpit available to me at the time was the Aires A-7D
cockpit so that was it, it had to do, but being the novice that I'am I
could not construct the phot-etched seat belts to the resin seat to many fine
parts. So I cheated by adopting the True Detail Escapac Ejection seat. Now it
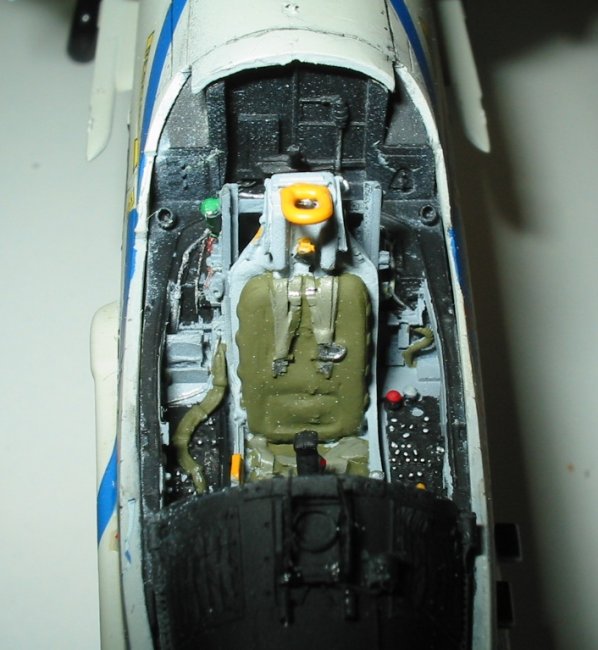
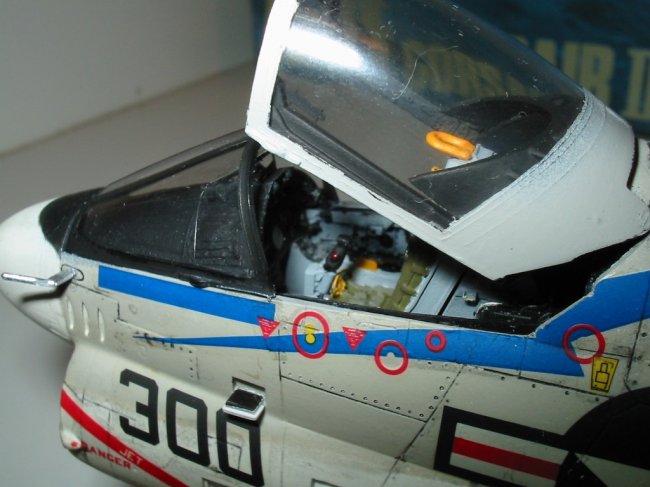
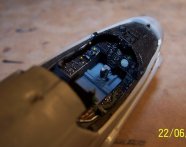
was time to paint and construct the Aires cockpit the detail of this cockpit is
beautiful and really stands out once painted. Once the cockpit was
constructed it was time to place it into the fuselage of the Corsair, I was
surprised at how easy it all went together other kits that I have constructed
or are in the middle of constructing have had heaps of fit problems with the
Aires cockpits, but not with this one very little modifications were made to
the original kit. The only modification was to shave a little of were the kit hud
sits to fit the Aires cockpit. Once the cockpit was in place I joined the
fuselage halves together the only problem I had was a miner gap in the nose
and the section behind the cockpit window, but with a little more pressure
applied to the two fuselage halves and the use of a some more Tamiya
extra thin cement whilst holding the two halves together I got rid of the gap
and was left with a seem line that was puttied up and sanded out. After the
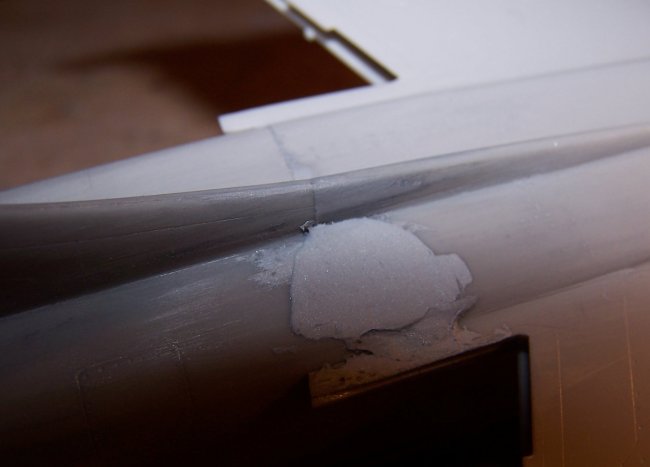
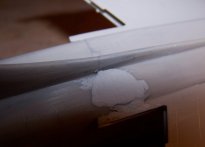
fuselage halves had set I then added the main section of the wings but
something happened, I ended up with a dent or dived were the wing section
joins with tail section on the fuselage see pic 03. So I puttied it and sanded
it and puttied it and sanded it.... 2005 after a couple of years of not
constructing any kits because of not having the place or set up to construct
any. The kits finally came back out and I pick up were I left off from
with the Corsair puttying and sanding yes I still had the problem with the
divot in the wing / fuselage section. This became a real pain to fix didn't
matter how much I filled the divot with putty and then sanded it the divot was
still there, I reckon I must have used half a tube of Tamiya putty before I
got it nice level and a smooth finish. With that done I had to re scribe the
panel lines in that section along with the rivets. Now with most of
the major parts of the kit assembled it was time to paint.
|
Click on
images below to see larger images
|
|
|
 |
|
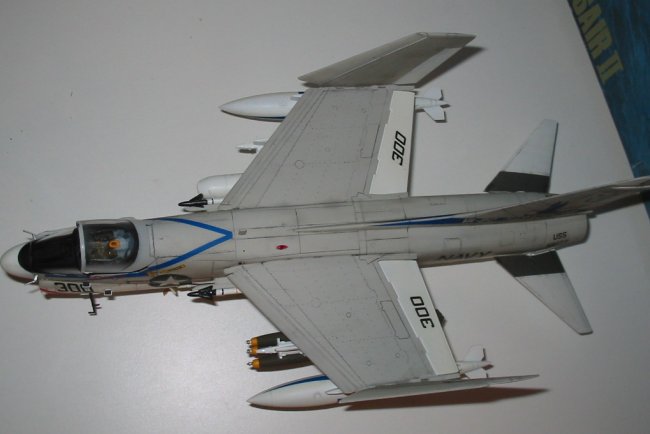
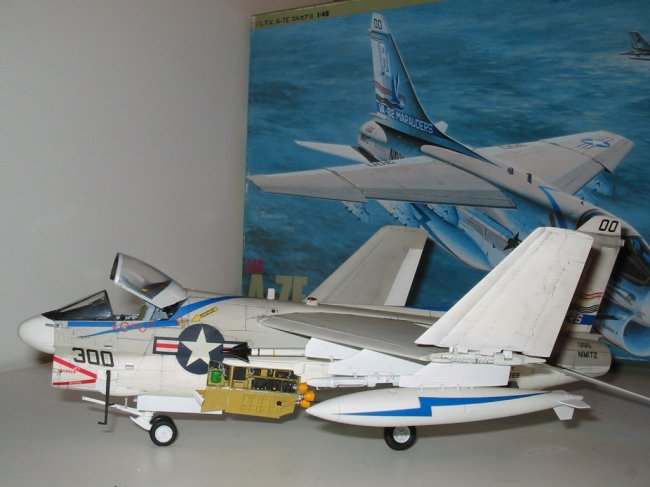
Painting and Finish
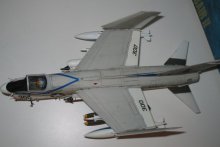
The overall kit
was painted in Model Masters FS 17875 Insign white and FS 16440 Gloss Gull Gray,
other colours used were Model Master metalizer lacquer and Humbrol enamels.
After applying the grey and white I applied the kit decals no need for a
gloss clear cote before the decals because the white and grey are gloss
colours. I had a lot of hassles with these decals in some cases even with
the decal solutions I could not get rid of air bubbles and ripples, this
was a first for me I have not had any problem like this in the past. After
trying to solve the decal situation with out much luck I gave up. next step was
to cover the entire kit in Model Master gloss paint. This actually help
with hiding some of the imperfections of the decals funny I would not have
thought that a gloss clear would ever do that. Anyhow after the gloss clear I
went to work on the pastel wash to high light the panel lines once completed I
covered the kit in Model Master dull cote.
After a couple of days /
weeks I continued adding the finishing touches landing gear and doors the folded
wing tips, ladder, weapons etc. The Mk. 82 Snakeyes are from the weapon set A
but they gave me a lot of hassle sticking them onto the rack the holes on
the bombs did not line up with the mounting's on the weapon pylon but I got
there in the end. One stuff up I made was with placing the decals on the
drop tanks I placed the wrong decals on the wrong side of each drop tank oops.
Beyond that the kit came out great.
|
Click on
images below to see larger images
|
|
|
 |

|
Thanks
I'd like to thank my
Children for bying me this kit and thanks to Craig at Aeroworks were I
get all my aftermarket parts and additions, paints, decals, cockpits etc. Craig
can be contacted at aeroworks@iprimus.com.au if
any body is after any thing or wants to know what other goodies Craig can get a
hold of to enhance your kit just drop him an E-mail.
Alan
|
Click on
images below to see larger images
|
|

|
|
 |
 |
|