|
History
What
can I say about the F-15 Eagle that hasn’t already been said? It has been the
United States Air Force’s Air Superiority Fighter since 1974. In that time it
has broken time-to-climb records, been exported to Saudi Arabia, Israel, Japan
and Korea, fought in Desert Storm and Iraqi Freedom and has progressed with the
variants F-15A, B, F-15C, D, F-15E Strike Eagle, F-15DJ, F-15J, F-15S Saudi
Eagle, F-15K Korean Strike Eagle, F-15I Israeli Eagle, and various test birds.
Without
a doubt, the F-15 will go down in aviation history as one of the most important
fighter planes of the 20th Century.
|
Click on
images below to see larger images
|
|

|
 |
|
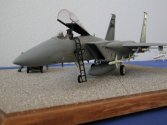
The
Kit
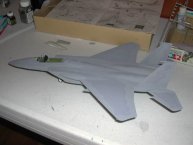
Tamiya’s
offering of the F-15 depicts a 1/48th scale of an “A” model
aircraft. Although this kit was produced quite some time back, it is still
an excellent example of injection molding at it finest. One of the more
interesting things about this kit is the landing gear. The nose and main gear
struts are strengthened with piano wire running down the middle of the strut.
Kit
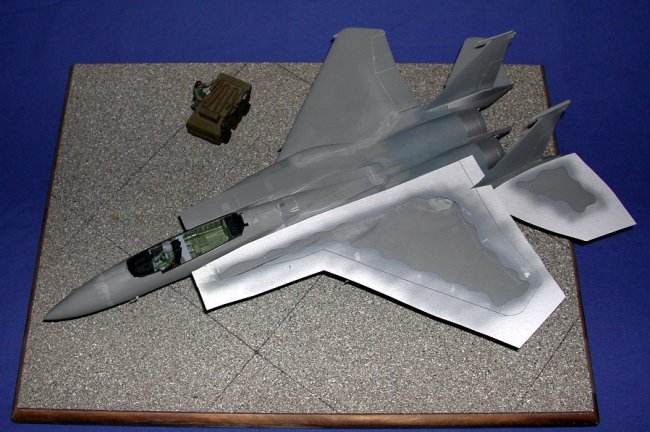
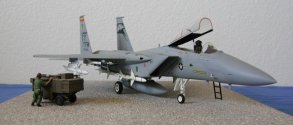
Construction
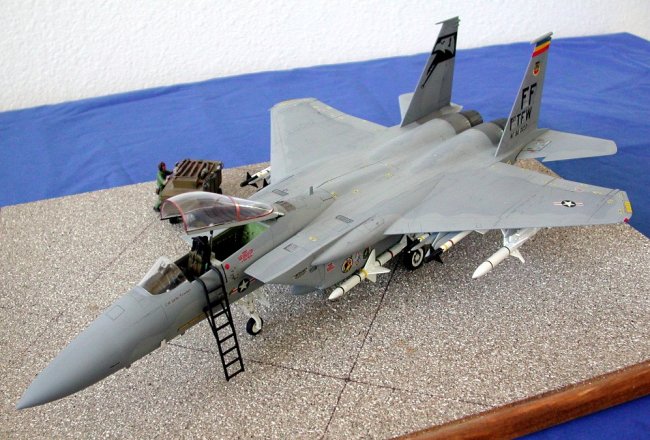
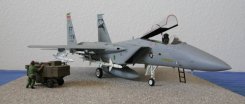
I
decided to update this kit from it original F-15A offering to an F-15C Eagle.
I had a few items at my disposal to accomplish this task. When I was in
the Air Force, I had a 1/48th Hasegawa F-15C. Well, needless to say,
after a move from
Georgia
to Texas, the Hasegawa F-15 didn’t fair so well. So, I salvaged the entire cockpit,
the landing gear, and the ladder, hoping someday I might be able to use them.
When
I picked up the Tamiya kit from a good friend in our model club, I knew exactly
what I was going to do with those salvaged pieces.
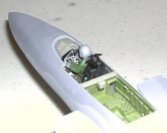
Squeezing
a Hasagawa cockpit in to this kit wasn’t too hard, although my right arm is
bigger than the left from all the sanding I had to do to get it to fit! I
didn’t like the Hasagawa ACES II ejection seat that came with the cockpit. I
had gotten a True Details seat from another club member and painted it up and
put it the cockpit. WOW! What a difference that made! It was the first time I
had used one of these aftermarket seats and I am very impressed with the detail.
The
rest of the model is built right out of the box., with some changes here and
there. Construction, overall, on this model is absolutely fantastic. It’s not
like today’s “wonderkits” that are pretty much shake and bake, but it’s
not far off. Not too bad from a kit molded in the 1970’s.
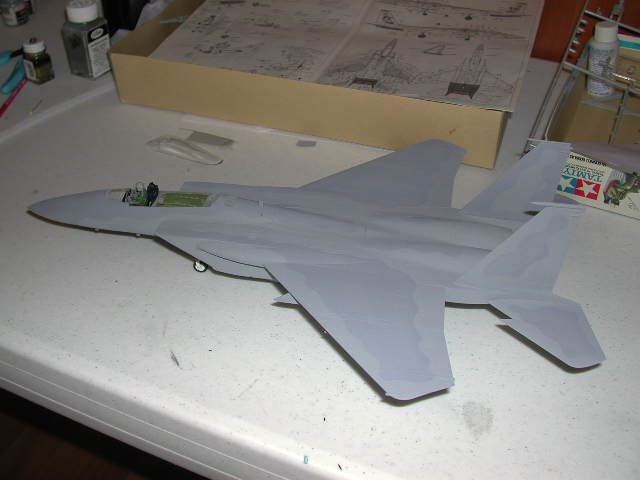
As
I progressed on the kit, I particularly didn’t care for the
“throttle-to-the-wall”, wide open exhaust nozzles that came in the kit.
These nozzles look like the F-15 is getting ready for a launch to the Moon. I
was digging through my other F-15 kits and I realized that the Academy kit
included both nozzles with and without “turkey feathers”. As luck
would have it, the ones with feathers were an exact fit to the Tamiya kit, as
well as, the insert for the nozzle. This made a vast improvement in the looks of
the finished model.
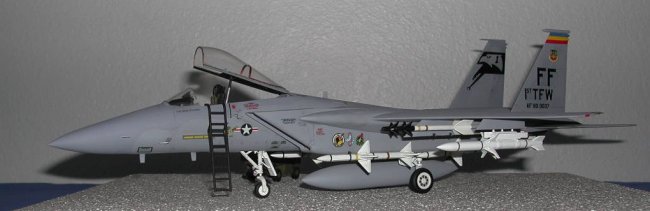
The
AIM-7 Sparrow missiles are Monogram missiles from various kits, for some reason
and old F-18A comes to mind. These missiles looked much better than
Tamiya’s offering. The AIM-9 Sidewinders are the kit missiles.
|
Click on
images below to see larger images
|
|
|
|

|
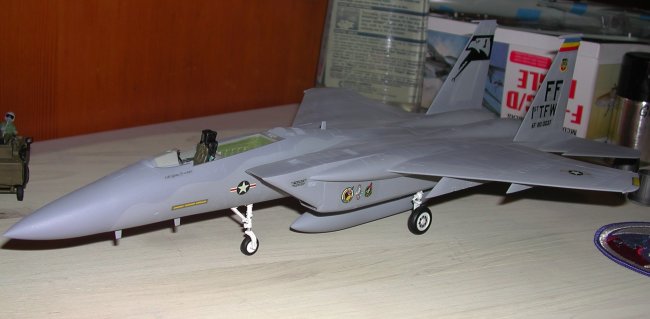
Once
upon a time (back in 1988), I recall looking at a picture of an F-15C that had
AGM-88 HARM missiles on the furthest outboard wing station. That, to me, looked
pretty cool! I knew from the get go, I was going to put HARMs on this
bird. Now, did the F-15C that I depict carry HARM missiles on it? I don’t
know, nor do I care. I just wanted them on the bird. There was only one problem
with putting to put HARM missiles on it. I didn’t have any HARM missiles to
put on this plane! So, instead of ordering a Hasegawa Weapons Kit and only using
two missiles out of it, I put out a request in a message board and got lots of
replies. I would like to say here, “Thank You, to everyone that replied and
sent me AGM-88s for my kit.”
I
used the salvaged Hasegawa wheels for the landing gear, which are very nice
“C” model wheels. F-15A main landing gear wheels are different from
the “C” wheels. The wheels fit the Tamiya struts without any modification.
After
construction was complete, it was time for paint………..
|
Click on
images below to see larger images
|
|
|

|

|
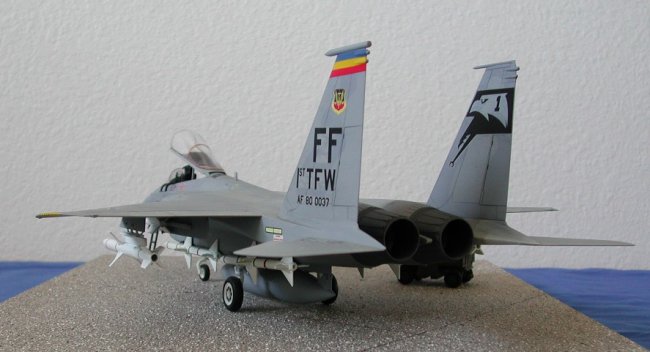
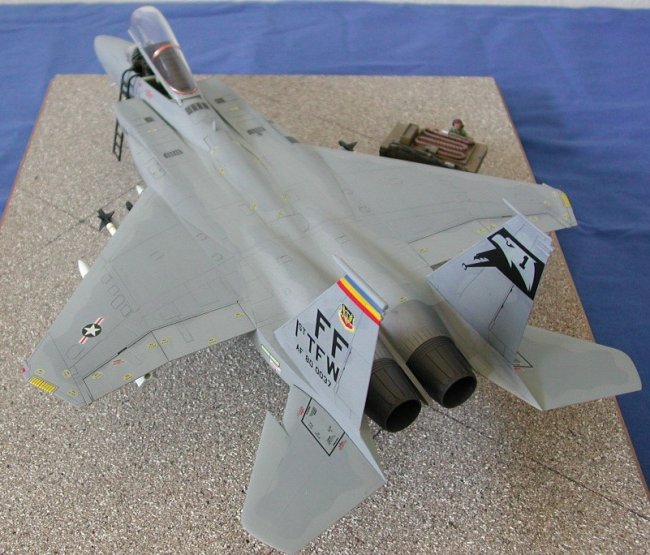
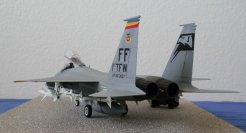
Paint
and Decals
I painted this
kit the standard two-tone Compass Gray scheme, Light Ghost Gray (FS36375)
overall and Dark Ghost Gray (FS36320). I painted the dark ghost gray using
a stencil. I did this by tracing the model outline of the wing, the tail,
the stabilators, etc..., then from that I made my stencil for the dark ghost
gray pattern. To hold the stencil in place, I used artist’s tacky “gum”.
It worked very well.
The natural
metal area on the aft part of the fuselage was painted Model Master Steel and
the exhaust nozzles are painted with Model Master Metalizer Gunmetal.
The missiles
are painted overall gloss white, with the tips of the Sidewinders painted flat
black. The missiles are decaled with the usual stripes that accompany missiles
of the type.
The decals are
from many different sources. Most of the decals came from Microscale sheet
#48-152 - 48 FIS, 21CW/43TFS & 1 TFW that I had purchased many years
ago. Other sources include the Tamiya kit decals, the Hasegawa F-15C kit decals
and the Monogram F-15A kit decals.
I had always
planned on doing this kit as a 1st Tactical Fighter Wing bird. The
biggest reason was that I had a brother-in-law that was stationed at Langley AFB
in the early/mid 1980’s in the 1st CRS in the avionics shop. These
decals fit the bill, but what I really liked was that the Hasegawa kit had the
Eagle for the inside tail. To me, that is what set this F-15 apart from the
others.
The decals
really didn’t come out like I had expected. I glossed the kit and most of them
still silvered. I was disappointed with that aspect of the kit. Oh
well…….nothing I can do about it now. Life goes on.
After the
decals were done, I post shaded the model using charcoals to accent panel lines,
moving surfaces and to give it a little bit of a weathered look. Since
this model was to depict the 1st TFW Commanders Bird, I didn’t want
to take it too far, because typically, a Wing Commander’s aircraft is kept
pretty clean.
Conclusions
Overall, I am
pleased with the result, minus the decals, but I can live with it. This was the
long way around to get the result I wanted. I guess I could have bought the
Tamiya F-15C, or built my Academy F-15C/D kit and done it that way, but what is
the challenge in that! Although, I hear there are some inaccuracies with the
Academy kit. It looks like an F-15 to me.
Steve
|