|
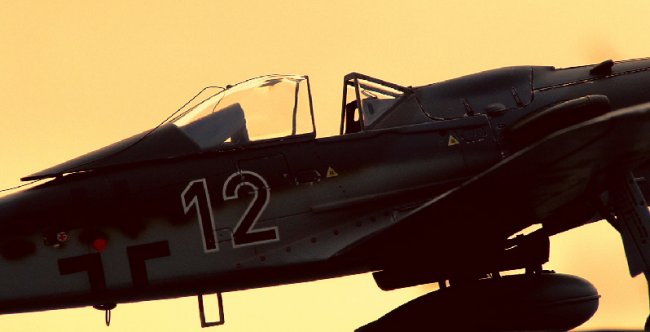
Oooo-kay,
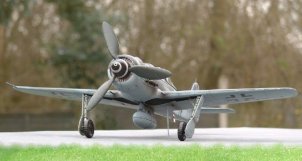
it’s another FW 190. Seems to be about the most popular modelling subject
these days, and with the quality of Tamiya kits to swoon over, no wonder. With
their kits you only have to sneeze on the sprues, and all the parts fly off and
rearrange themselves into a reasonable facsimile of the plane in question. I
felt like having a rest after my previous builds, so I went to the stash and
pulled out one of the first models I bought when I returned to the hobby a
couple of years ago. It had been sitting on a window sill in direct sunlight for
most of that time, so the box top artwork had some pretty unusual colour
renditions! Good job I didn’t need to refer to that too much.
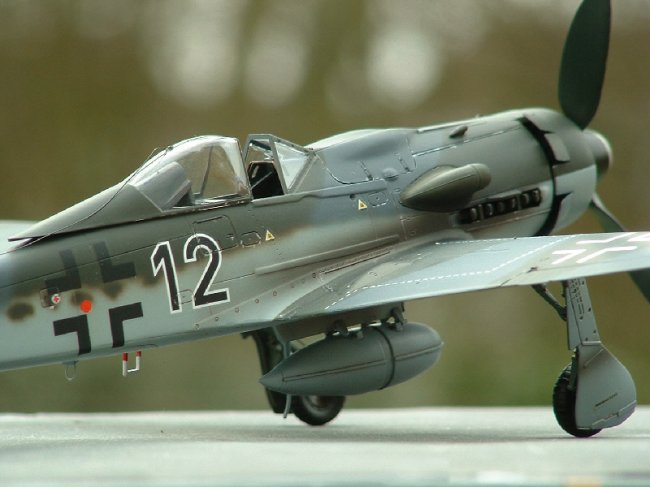
The
quality of this kit lived up to expectations, and made for a relaxing build. As
I was finishing the thing, I couldn’t be bothered opening the glue, as the
cowling, engine, propeller, cowl flaps, rear stabilisers and gear doors are a
press fit. The only problem area was with the wing root/fuselage joint, which
left a gap. I solved the problem with Milliput, but I’ve since read that
others have placed a spreader bar inside the fuselage below the cockpit to widen
it, and ensure that it meets the wing roots. Great idea, only wish I’d read
about it before I did the whole putty / sanding / rescribing thing!
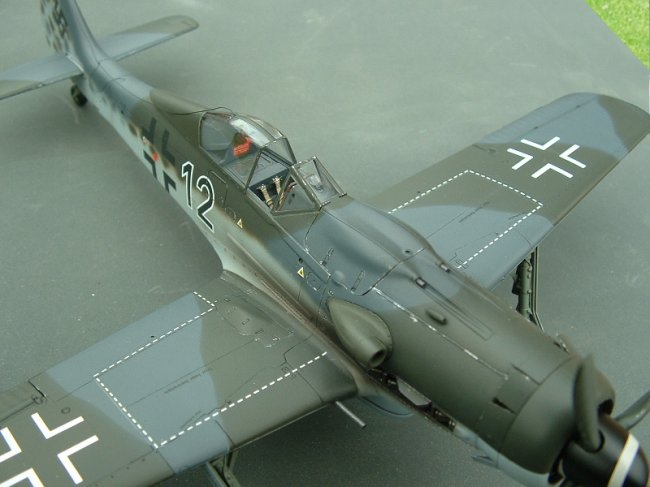
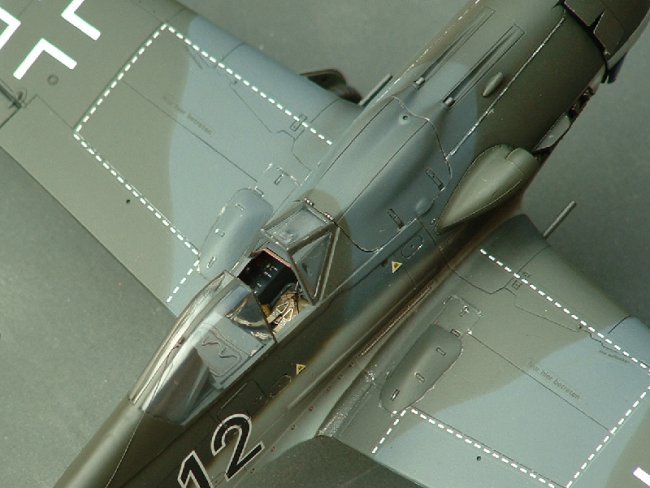
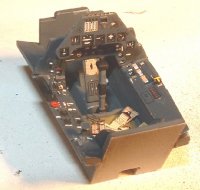
| The
cockpit was helped out with an Eduard PE set, which I thought I’d try in
the pre-painted form. (I bought this kit a while ago remember, and all the
aftermarket stuff overwhelmed me somewhat at the time.) As far as
pre-painted stuff goes, forget it! It was nice for the side consoles and
the instruments, where all the fiddly little details were a treat, but
when it came to the seatbelts – bend them into shape and the paint just
flakes off! I ended up junking them and using bare PE belts which I
painted myself. Serves me right for cheating. The cockpit was a nice job,
but when installed and with only the narrow canopy opening to peer
through, you can see precisely bugger all. I’ve included a photo of the
tub before it went inside so that my work will not have been in vain.
|
Click on
image below to see larger image
|
 |
|
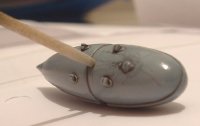
| I
tried out a new idea around the filler cap of the belly tank – I blobbed
on some black pastel wash solution, and blew it around with air from the
airbrush, mainly in the direction of the airflow. It looks like the
overspill from the fuel filling operation has run down the side of the
tank and mixed with grime. I was quite pleased with the result. I remember
doing something similar with paint and straws when I was about 5 years old
at school – amazing the stuff that they used to teach you that turns out
to be useful!
|
Click on
image below to see larger image
|
 |
|
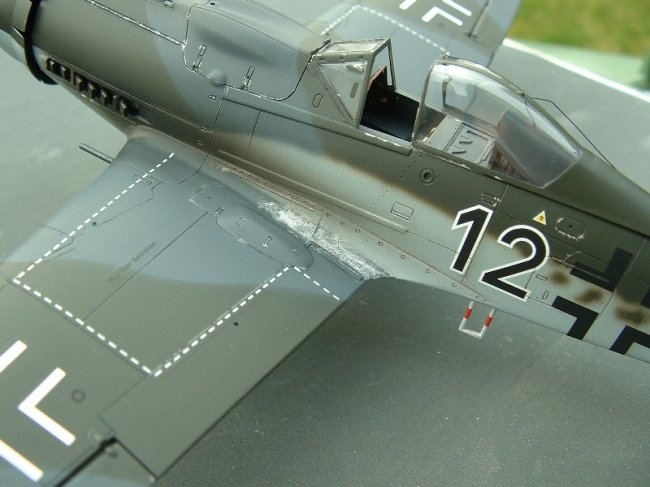
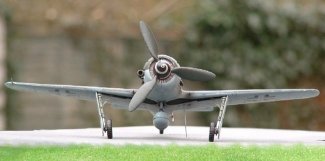
Next
on the list to experiment with was preshading. Never done that before, although
I have had problems caused by it when topcoating over two different coloured
primers. I went over all the panel lines in semi-gloss black, and then topcoated
the Tamiya recommended mixture of acrylics over this. The underside light blue/grey
responded well, and I remembered the advice I read on the web “it should not
be obvious to the casual observer that the model has been preshaded at all.”
To that end, I stopped when the effect almost disappeared, but sadly not in time
on the top surfaces. The green and grey camo pattern simply obliterated the
preshaded lines. I had the same problem on the fuselage sides when I had to
repaint them due to a self induced cock up with the mottling. The mottling was
done freehand with my airbrush, so I’m growing in confidence all the time. In
the end, I glossed the whole thing with Johnson’s, and then did my usual chalk
pastel panel line wash, black for the darker areas and brown for the lighter
areas and the wheel wells. When I was adding exhaust stains and gunsmoke residue
with the airbrush, I did lightly go over some of the panel lines on the rear
fuselage to see what would happen, and wasn’t too dissatisfied with the
result. So, this model has a mixture of preshading, postshading and pastel
washing. Talk about multiple choice!
|
Click on
images below to see larger images
|
 |
 |
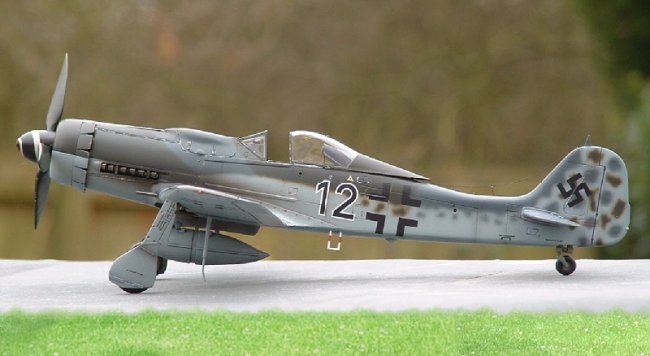
Decalling
was a problem, though. The huge decal for the fuselage theatre band was never
going to conform – a flat shape onto that set of compound curves? No chance -
I tried it both ways round, cut it into two lengthways, everything. My
admiration grows for those in the gallery pages who’ve managed to get it to
settle, although I did get the spinner spiral to work. I could have
painted the bands, but they should have gone on first, as putting them on now
over those base colours would have created such a thick layer of paint that the
step at the edge would be visible, so I decided that warplanes don’t need
bright colours compromising their camouflage schemes! I was going to do Blue 15,
but the decal sheet seemed to have been abraded somehow and the 15 was scuffed.
I went with Black 12 instead. I mean, apart from you and me, who’s going to
know...?
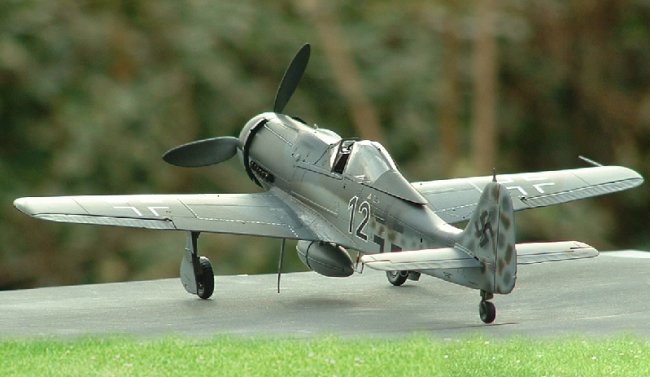
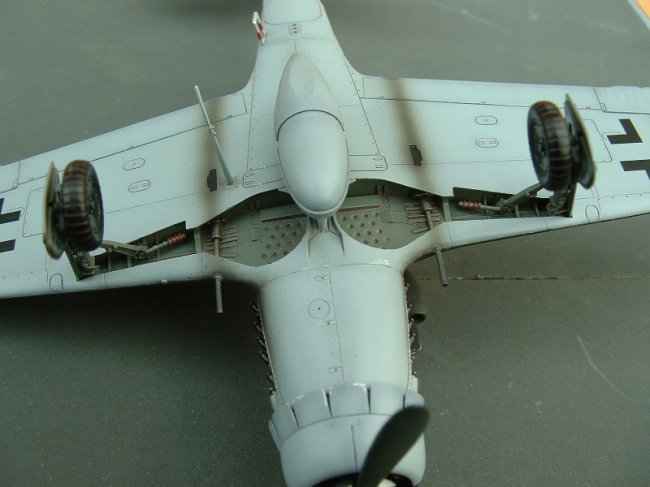
I
did the usual brake-lines-from-wire scratchbuilding, fashioned the springs on
the retract struts from coiled wire, and replaced the loop antenna with wire
too. I drilled out the ends of the gun barrels and was amazed that I went
through the entire building, painting and decaling process without breaking them
off! The radio antenna was from stretched sprue, inserted through tiny holes
drilled in the canopy, headrest, fuselage spine and the radio mast on the fin.
To get it the right length, I fixed it in place with the canopy closed and then
opened the canopy expecting the same amount of play as I’ve seen on other
Doras. Nowhere near as much sag on mine, but I’ll live with it as I know that
it’s factual. Getting the sprue to sag convincingly was hard work, and it’s
still not quite right now. There’s only so much you can do, though.
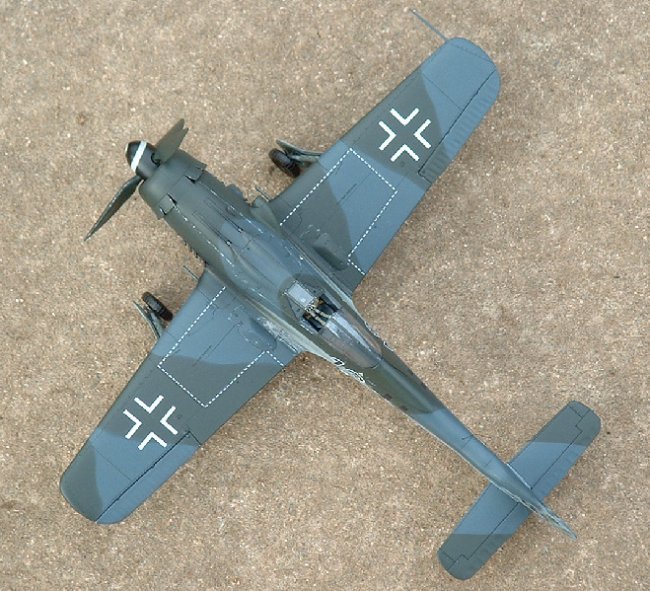
All
in all, an enjoyable build. I’ve experimented with a few new techniques, some
of which worked, some of which didn’t. I know there are LOADS of 190
afficionados out there who can pick holes in my model until the cows come home,
but please don’t. I’m the sensitive type… ;-)
Dean
|
|