|
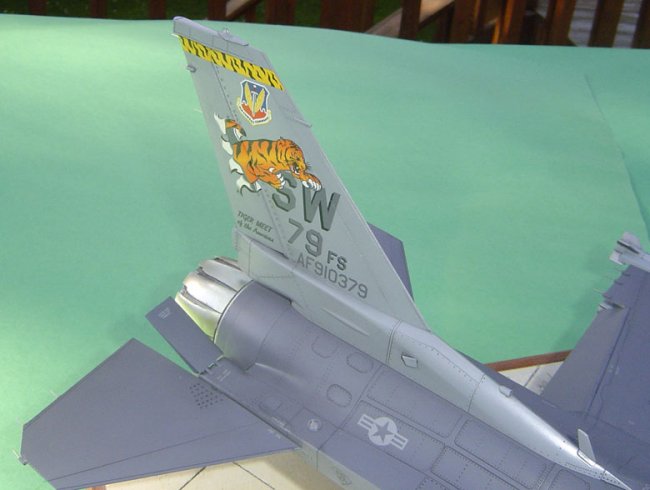
This is the new
F-16CJ from Tamiya. Although pricey, it has exquisite detail and the
engineering in the kit is marvelous. I built this kit entirely 'out of the
box'. Tamiya paints were used for the most part, Alclad paints used for
metal areas. The kit decals were used. There were no assembly
problems, the only challenging area was eliminating the seam inside the intake
duct. I normally build 1/48 and 1/72 props, so this is a bit of a
departure for me. I had previously built Tamiya's 1/32 Zero and F-15E so I
wasn't too worried.
|
Click on
images below to see larger images
|
|

|
 |
|
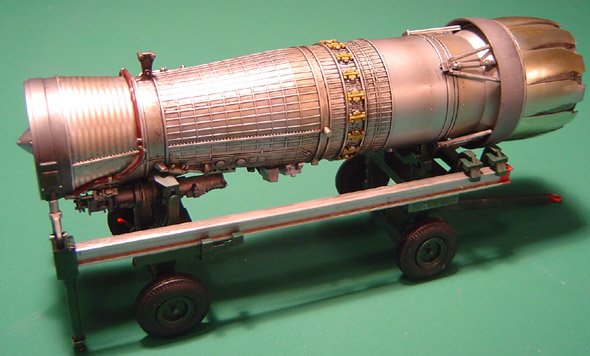
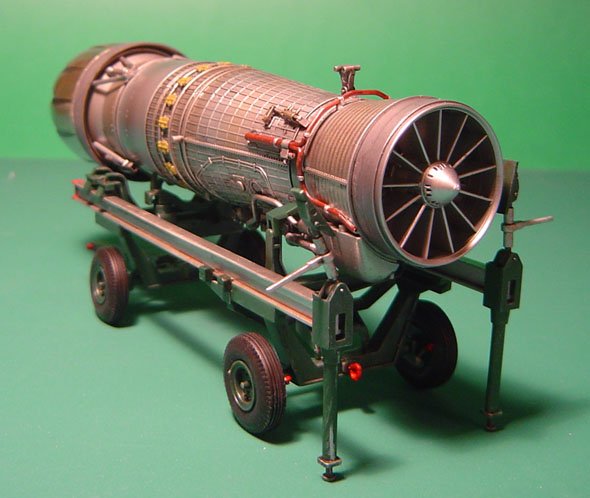
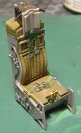
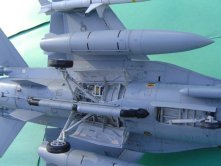
Included in the kit
are a separate engine and cart. The engine can be removed and inserted
into the model after assembly. The engine was painted in Alclad paints,
details picked out with Tamiya paints per the instructions. Tamiya 'smoke'
was sprayed in bands around the engine to add a little heat stain effect.
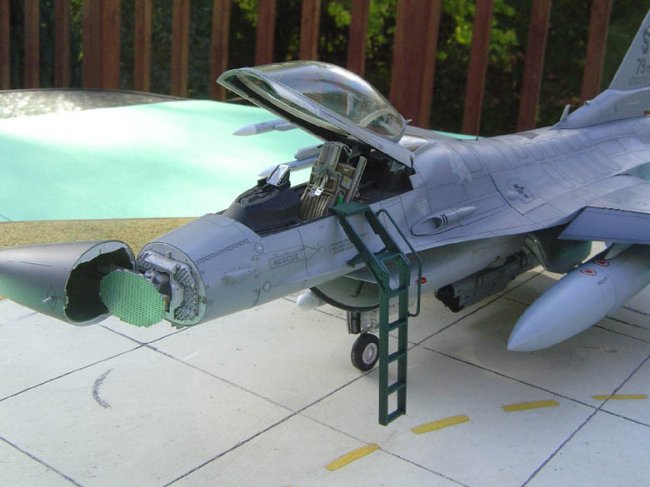
The kit seat was used and painted per instructions. The seatbelts are
built from the tape and photo-etched buckles from the kit. It looks pretty
good as is, but a resin replacement would be a real asset.
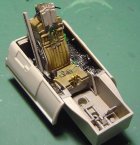
The radar dish is a photo-etch
piece supplied in the kit. The nose cone remains moveable after construction.
In addition, the flaps and stabilators are moveable. The leading edge flaps
are fixed, but you can choose extended or retracted. The canopy can be
displayed open or closed and can be changed back and forth. Two canopies
are supplied, tinted and clear so you can use either or mix them as seen on the
real aircraft. I used tinted front and back. A mold seam must be
removed, but this was a lot easier to do than I thought. I carefully
scraped the seam away using a fresh scalpel, sanded with a tri-grit sanding
stick and then polished with Tamiya polishing cream. It was dipped in
Future and no sign of the seam remains.
|
Click on
images below to see larger images
|
|
|
|

|
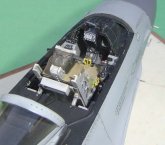
The seat can slide in and out
after the model is finished. The cockpit detail is very good and a resin
replacement may be better but IMHO is not required. The details were
picked out with drybrushing with white and then some colours added. The
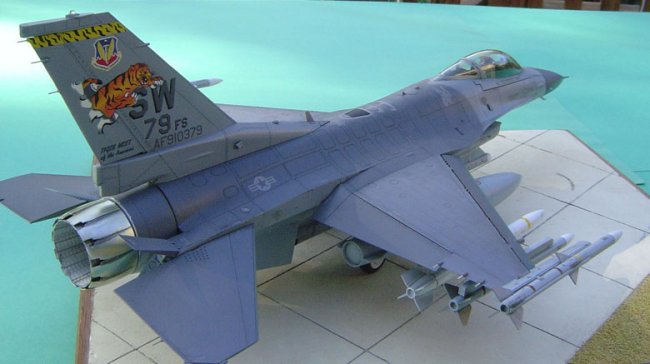
model was painted using Tamiya spray paints but decanted from the can and
airbrushed. A coat of Future was added before decaling. The kit decals
were used and I did not find them overly thick as some Tamiya decals are. They
settled very well using "Mr Mark Softer" fromGunze. This stuff
seems to be ideal for Tamiya decals and works everytime. Another coat of
Future to seal the decals was sprayed and then an oil wash was used to highlight
the panel lines and details. Final coat was Floquil acrylic satin.
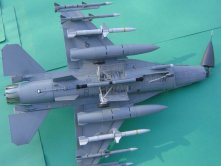
The weapons can be removed, added and moved around on the stations thanks to
poly-caps allowing you to change the look of the model from time to time.
This is an excellent model and it should present no difficulty to the average
modeller. The key is in the painting and finishing. It is large,
pricey but it builds very quickly thanks to excellent fit and engineering.
Bill
|
Click on
images below to see larger images
|
|
|
|

|
|