|
There’s something
I just love about Russian tactical aircraft. Is it the agricultural simplicity
and unconventional lines or is it the beautiful 4 tone tac camo they use ? I
think it’s both. Having just completed the Monogram Su-25, I decided it was
time to make a replica of its predecessor. I sourced a Kopro Su-22 from Linden
Hill. This arrived in the post packaged in a bag complete with decal sheet and
instructions.
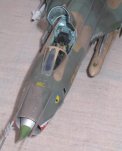
The surface detail is recessed but quite crude. The cockpit detail is very poor.
I therefore decide to go the whole hog :
-
Neomega Cockpit set added. This is a vast improvement over the kit
parts. The nose undercarriage bay is also provided with the Neomega set and is
also much better than the kit part.
-
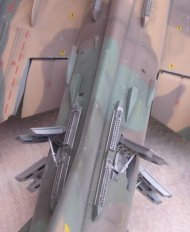
Cutting Edge detail set which includes resin outer wings with separate
slats and flaps, inboard landing flaps, chaff and flare dispensers, separate
rudder (which I did not use) and open air brakes (the housings are beautifully
detailed)
-
Cutting Edge jet pipe – an absolute must as this is a big opening to
fill – the corrugations inside the afterburner are delicately represented.
-
I added some ribbing to simulate structure inside the inner wing
section as this is quite open with the outer wing sections in the forward
position.
-
Opened the air intake bypass doors on the forward fuselage – these
are typically open when the aircraft is on the ground.
|
Click on
images below to see larger images
|
|
|
|
|
The assembly of the
kit was a bit of a nightmare as very few parts fit correctly and panel lines on
the two fuselage halves didn’t line up.
Wing to fuselage fit was good on the one side but disgusting on the other. My
old friend Milliput came into good use. The wing pylons had to be sculptured to
fit the leading edge of the wing and (for the outboard pylons) to line up with
the wing fences – again lots of Milliput. In positioning the chaff and flare
dispensers along the upper fuselage, I only realised too late (after flipping
through some books) that the forward pair are staggered whereas I had fitted
them adjacent to each other.
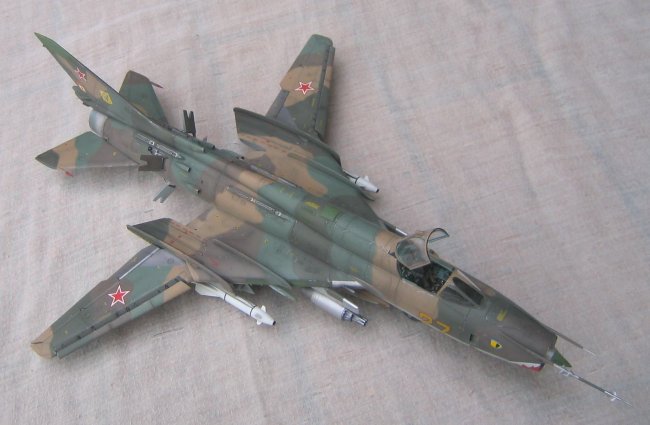
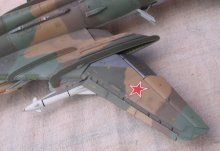
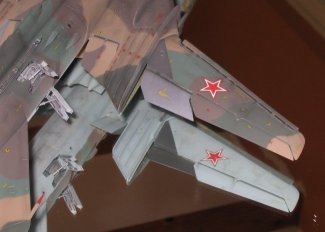
I used XtraColour gloss paints
airbrushed as follows – upper surface 4-tone camo using X618 green, X616 dark
green (+20% white), X617 tan (+1-% white), X619 dark brown (+30% white),
undersides X626 light blue.
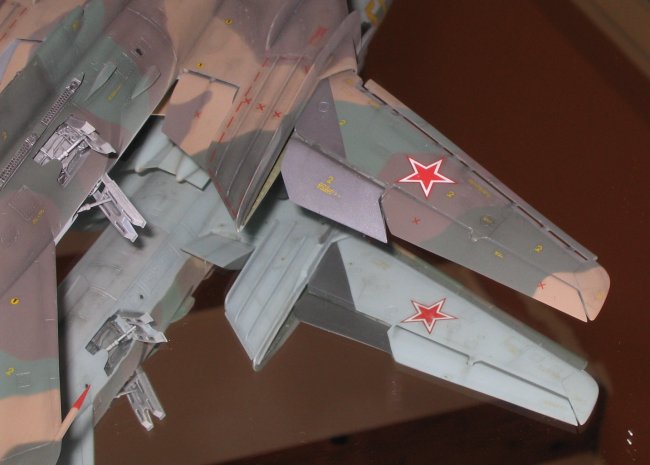
There are a myriad of various
coloured panels and bits on this aircraft – natural metal rear underside,
green antennae panels on the fin tip, fuselage spine, wing leading edges and
doppler under the nose, grey antenna on fin bullet fairing, grey fin leading
edge, natural metal wing and flap panels, steel gun blast panels etc. I had read
somewhere with some trepidation that the kit decals were very poor – these are
printed
by Propagteam – as I was going to paint this aircraft in Soviet colours, I
tried one of the Czech insignia on my trusty decal testbed (an old Hasegawa F-16
painted gloss light grey) – to my surprise this settled down beautifully with
Microsol. I attacked the Su-22 decaling with enthusiasm and was not
disappointed. Weathering was done using various pastel colours and silver
pencil. A final coat of XtraColour matt varnish toned everything down. Fiddly
bits and weapons were added.
Reference material was care of several books on Warsaw Pact aircraft
including Squadron Signal’s Su-22 In Action. There are also some
fantastic colour photos on airliners.net (this is a great colour photo reference
web site).
|
Click on
images below to see larger images
|
|
|
|
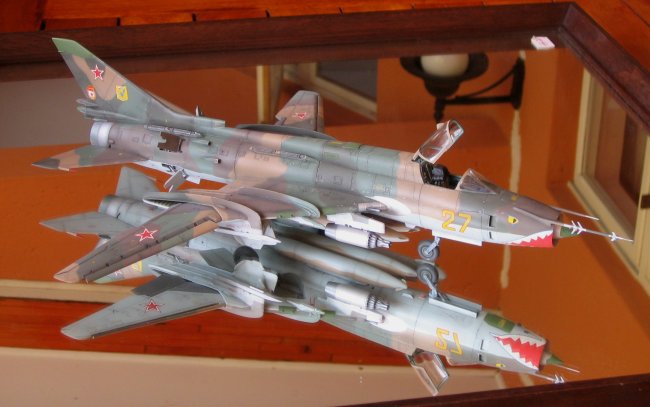
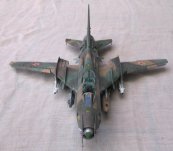
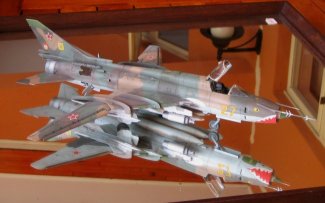
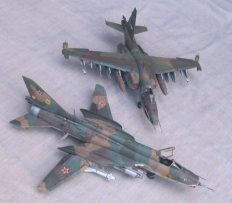
Although being quite a crude kit,
the finished product was well worth the effort – this is a very unique looking
aircraft and doesn’t really look like it should fly with those odd little
outboard swing wings and proliferation of wing fences.
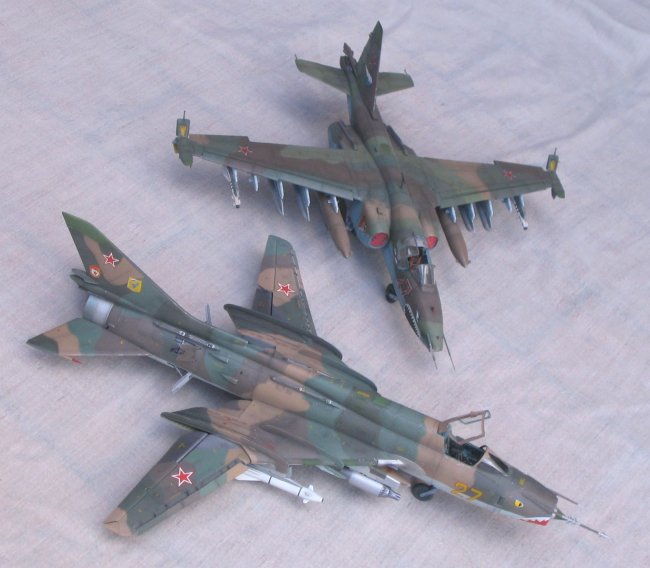
I’ve included a picture of the Su-22 with the similar scale Monogram Su-25 to
give an idea of the different configurations of the aircraft.
Malcolm
|
Click on
images below to see larger images
|
|
|
|
|
|