|
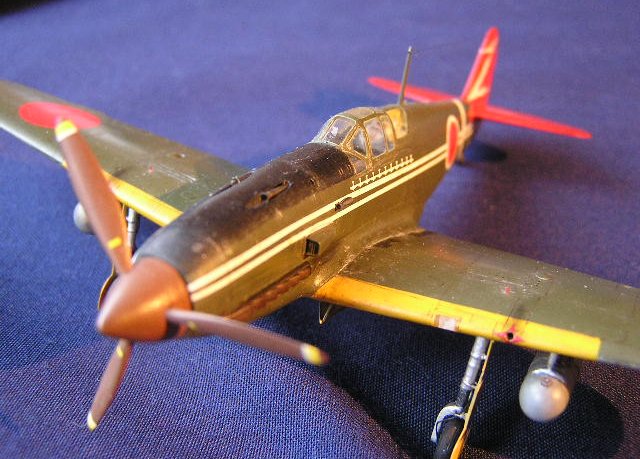
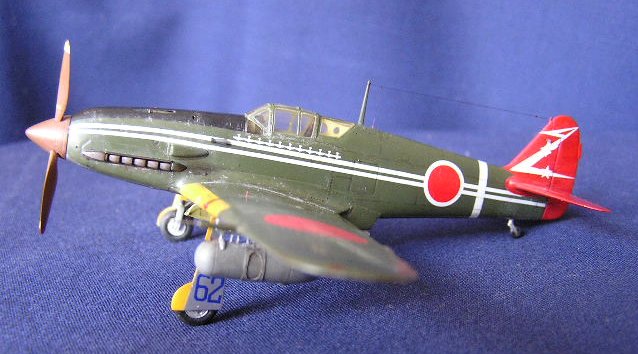
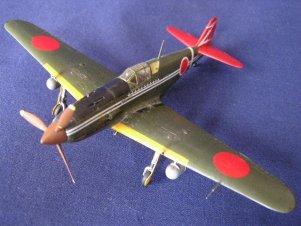
Army Type 3 Fighter
Model 1 Kai Tei (Ki-61-Id) "Hien" (Tony) #5262, Chofu, April 1945,
Pilot: 244th Sentai commander Capt. Teruhiko Kobayashi
*Kit: 1/72 Hasegawa
Photo-etched parts: Eduard
Wheels with rubber tires: Equipage
Decals: Life Like Decals “244th Sentai Pt.2”*
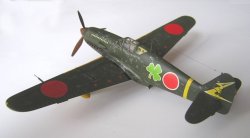
| This model was
built for the first time 8 years ago. It was finished with the Hasegawa
kit decals representing the famous "Shamrock" a/c. Well,
not bad, even though there were more colourful color schemes in the 244th
Sentai. However, as more infos on this topic became available during last
few years, the more obvious was the fact, that this particular finish is
at least doubtful. Although there is a well-known
photo of that machine photographed by James P. Gallagher, due to the angle
the picture was made from, the form of this "clover leaf" can't
be determined. Moreover, it is still the question, whether it was really a
clover leaf. |
Click on
image below to see larger image
|
 |
|
In addition there are serious
doubts, that this motiv as well as the nose victory markings were applied by
Japanese during the war and not by GIs after the hostilities as the clover leaf
is a very unusual motif for Japan and the location and alignment of the kill
markings is somewhat strange as well.
Further, even if we assume, such painting did exist during the WW II, the
Hasegawa's (and FAOW's as well) representation of this one, according to the
latest research, still seems to be inaccurate. So, the plane was reported to be
"Chocolate Bar Brown" instead of green with NMF undersurfaces (as
should have been on all Ki-61) instead of grey. Furthermore some sources suggest
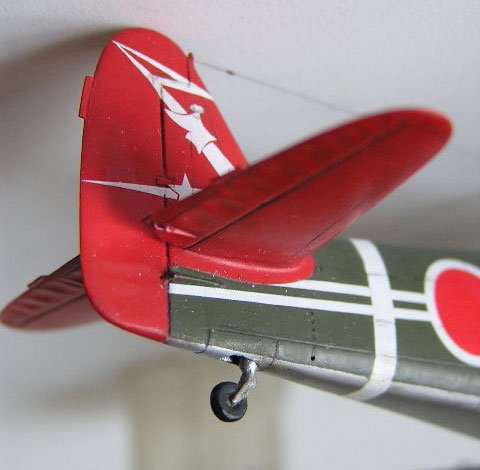
the rear fuselage band to be white and
not yellow and the tail emblem of the 244th Sentai is supposed to be red,
although there is still no info confirming it.
|
Click on
images below to see larger images
|
 |
 |
All in all, it turned out, that
my model was incorrectly painted and in addition wearing somewhat spurious
markings. As I realized it, I had no desire to have such a dubious subject in my
collection any more. The problem is, however, that the model was extensively
corrected and extra detailed and it would be really a shame just to give it up
and start with a new one, since, as far as I know, even the Fine Molds kit is
although somewhat better, however, it does still require some extra work to
bring it to the desired level. In my case it would mean several months work,
which I could better invest into another project instead.
So, I decided just to try repainting the built Hasegawa kit as it seemed to me
both challenging and less time-consuming. Some minor corrections on the airframe
were made on this occasion while some other original "features" (like
the closed cockpit canopy) just remained to live with them, as I find it not too
bad anyway.
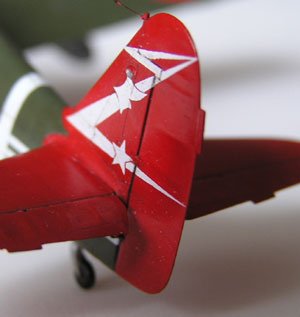
First of all, I had to select a camouflage scheme to be represented instead. It
should be the one with green upper surfaces, so that the original paint job
could be at least partially used. A good candidate for this is one of the
Ki-61-I Kai Tei’s reported to be flown by Teruhiko Kobayashi. The markings for
this attractive red-tailed "Tony"
are provided in the sheet #3 of LifeLike Decals.
|
Click on
images below to see larger images
|
 |
 |
Before I started, I
made some photos of this model in its original finish, just for the history...
After it had been done, I started removing the clear varnish coat. Luckily (in
this case) the model was sprayed with the Humbrol Satin coat thinned with White
Spirit (as it was suggested by manufacturer). For some reason this coat had
dried for a
very long time (ca. 2-3 months) remaining in the meantime extremely sticky. And,
even now, almost 7 years later, it was very fragile hardly resisting any active
handling getting thereby sticky and somewhat dirty again. The lucky side of it
was that it could be therefore easily removed from the model not destroying the
underlying paint. So, after
several evenings of rubbing with alcohol the job was finally done.
The original kit
decals (yes, that typical Hasegawa ones - thick and with the white areas, which
aren't really white) were mercilessly removed from the model using Micro Sol.
These markings will sure never be missed as they were actually one more reason
why I have never been satisfied with this "Tony".
The model was
originally painted with Aeromaster "Warbirds" enamel paints,
which were released at that "old good" time, when it was
supposed to be only 2 greens and 2 grays applied on the Japanese a/c
(army and navy ones respectively). Fortunately it turned out, that the
IJAAF Green used on the model is just a close match for Kawasaki Green and
insofar can be left as it is. The IJAAF Grey was just polished to be
used as a base for the NMF finish. |
Click on
image below to see larger image
|
 |
|
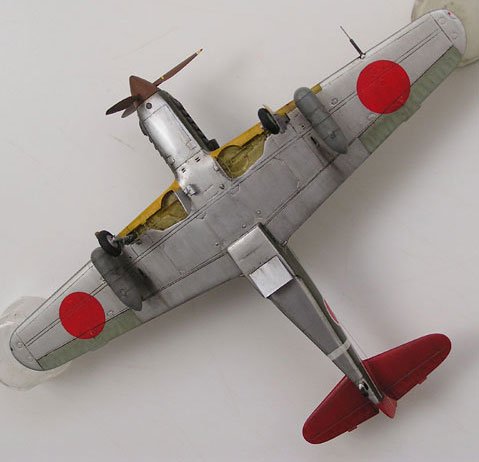
Repainting
After the Humbrol satin coat had been rubbed off with turpenoid, the lower
surfaces were prepared to the airbrushing with Alclad. I decided not to remove
the coat of the Model Master enamel "IJAAF Gray" from the undersurfaces, but
rather to use it as a base for the new NMF, as despite being an enamel, it had
enough drying time (almost 7 years!). So, the surface was wet –sanded in
some less-than-perfect places and
then just polished a bit with a piece of cotton.
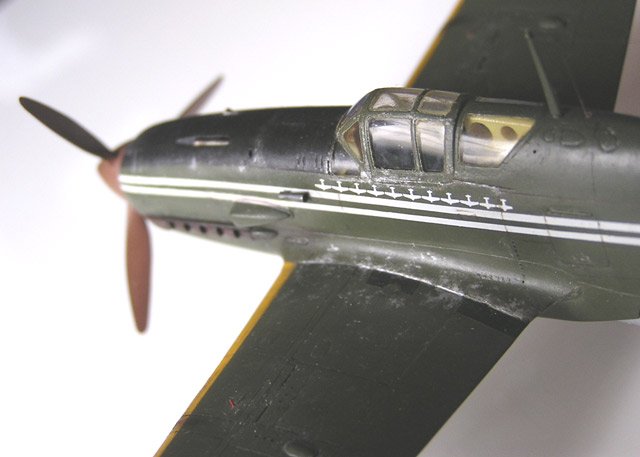
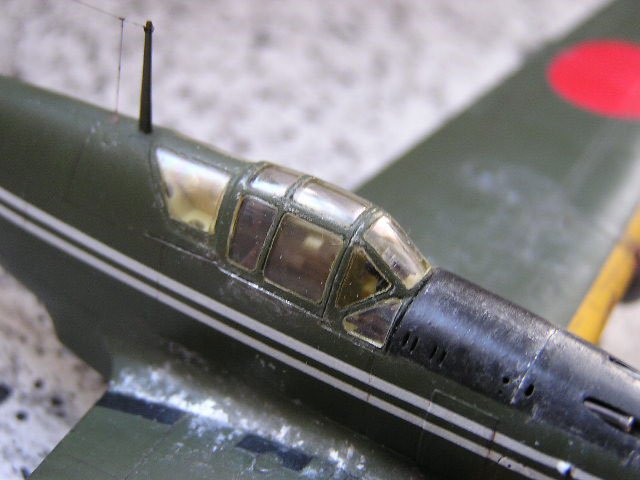
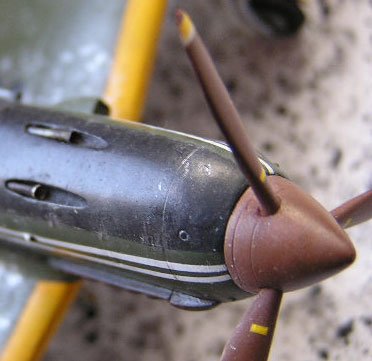
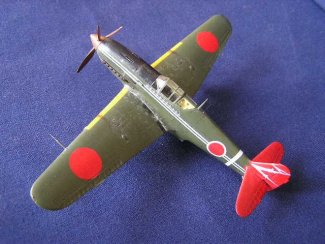
After spraying the tail with Testors/Model Master Red and a black anti-glare
panel on the top nose area of the fuselage, I tried airbrushing with the Alclad
for the first time. I selected White Aliminium considering it as a good match
for NMF of the Japanese WWII a/c. It was sprayed in 2 or 3 very light coats
absolutely without problems. The completed Alclad finish was polished a little
as well. I found no representing of the shade differences between the panels is
needed, as it really can’t be seen on the available Ki-61 photos. The key to a
more realistic look should be rather a decent weathering.
Decals & Weathering
Future (just brush-painted) was used as a gloss base for the decals. The canopy
and the landing light had, of course, to be previously masked. After the
markings from the Life Like sheet had been applied and then completely dried,
the entire model was covered with one more coat of Future and was now ready for
the final weathering. As the first step of this process, I applied a coat of
Future mixed with Tamiya Flat Base
(approximately 10:1), again with a brush. It provides still an even smooth
surface, but this way can be achieved some subtle irregularity of the surface by
getting very light streaks going: in the direction of the airflow on the wings
and tail surfaces, or rather vertically on the fuselage. Of course, they may not
be visibly raised over the underlying
coat. The subtle difference is achieved, as the streaks are a bit more matt than
the entire clear coat.
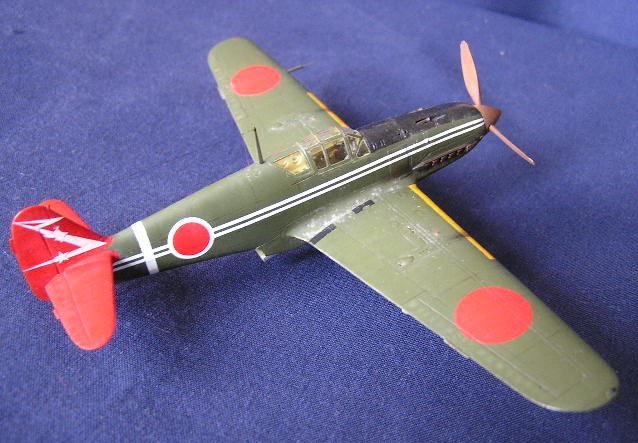
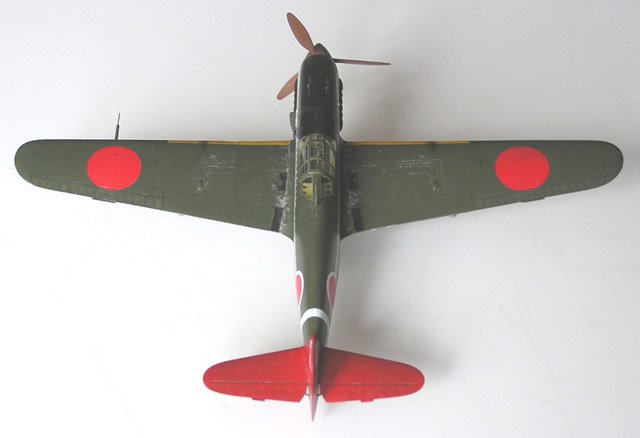
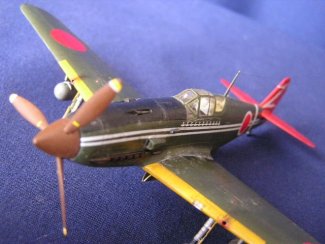
This was followed by some acrylic
washing of the panel lines etc. succeeded by applying the pastel chalks
(mainly dark brown) powder mixed with water and a drop of a dishwasher liquid
and finally the chipped paint was simulated on the appropriate areas by dry
–brushing with Testors non-buffing Aluminium. After the desired look had been
obtained, I sprayed the entire model with a light coat of Future & Tamiya
Flat Base mix just to seal in the pastels. The stains around the exhaust stacks
and shell ejection ports were represented using the natural soot obtained by
burning a piece of thick aluminium foil (f.e. from a coffee can) with a candle.
It was applied just the same way as any dry pastel chalks.
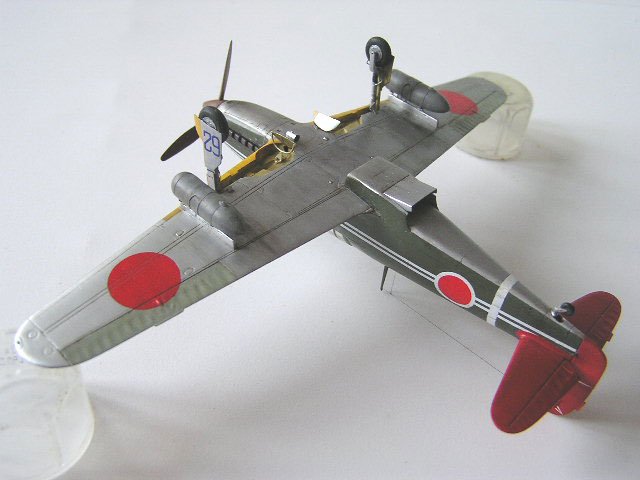
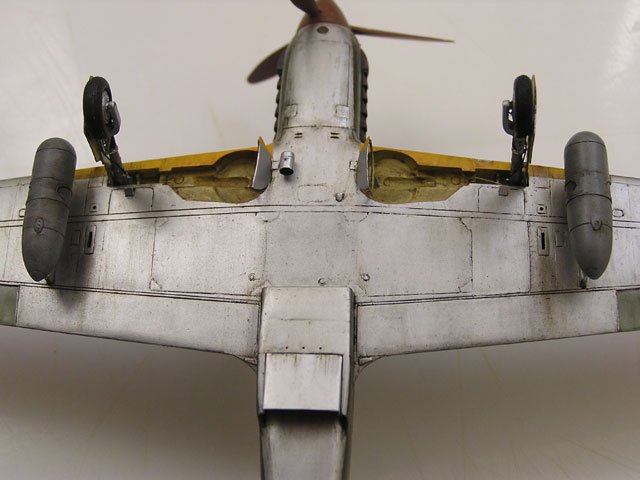
Final assembly
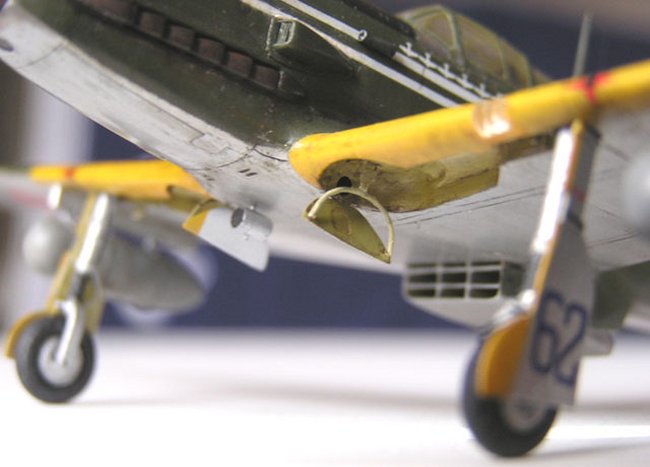
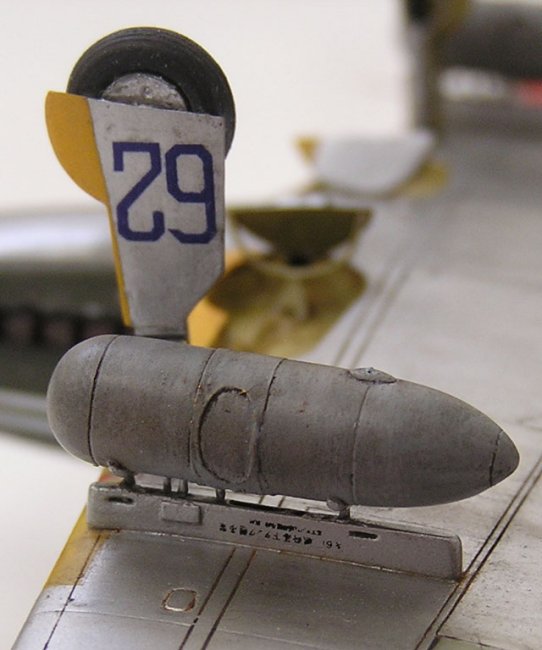
As some small parts, such as landing gear, drop tanks etc. had to be removed
before the painting, they were now mounted again onto their places. As the
selected option requires a Venturi tube (not used previously), I had to scratch
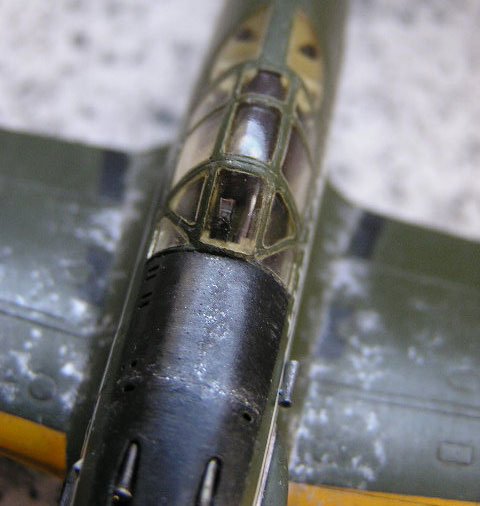
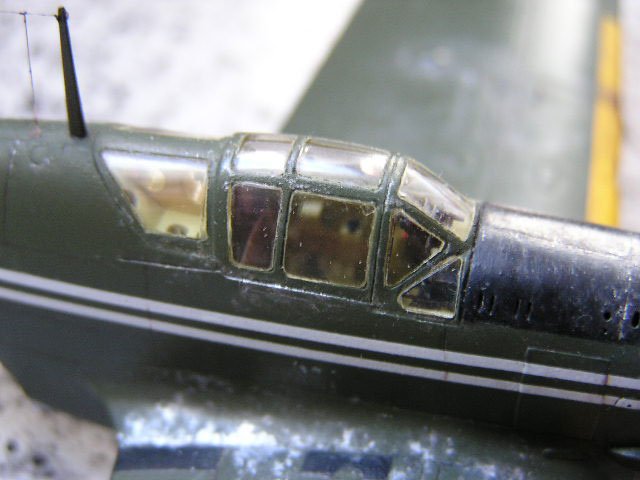
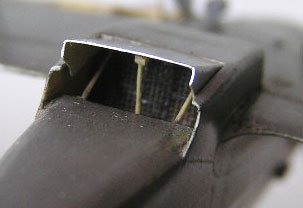
build a one. The canopy was left closed instead of being replaced with a
vacuformed one, as it would require at
least a re-painting the framing and I decided not to repaint upper surfaces in
any case, as the main idea of the project was rather an upgrade and not a new
building, so that the efforts should be really minimal and only absolutely
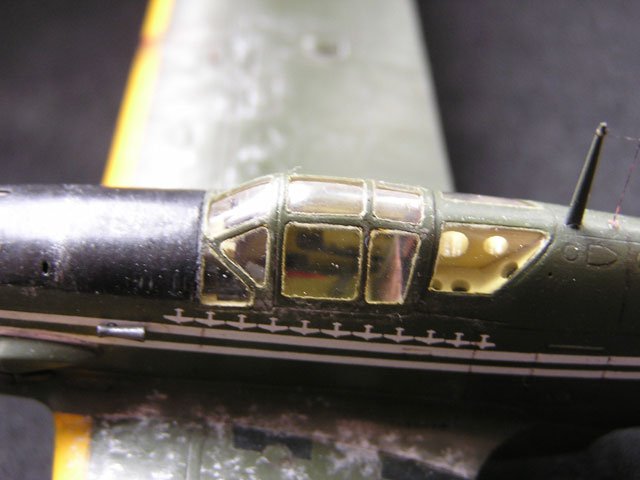
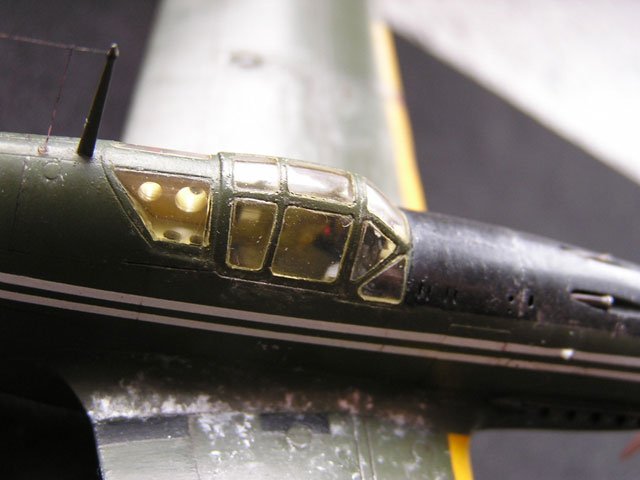
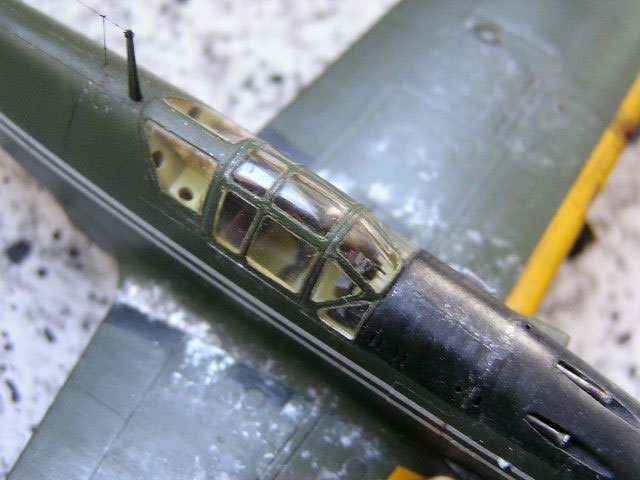
unavoidable. The main thing, it is still clear and the scratch built (no Aires
Set was available 7 years ago) cockpit interior can be seen pretty well without
distortion through it anyway.
Conclusion
Well, they say, perfectness has no limits, so that improving or re-doing already
finished models could be an endless process. However, the Hien is certainly one
of my favourite Japanese fighters and I found it just a shame as it became
obviously, that the initial camouflage and markings of my model were actually
spurious. On the other hand, there was a good opportunity to try some new (for
me) techniques or products (for example Aclad or Future) without being too
afraid of doing something wrong.
Moreover, I find the new paint scheme not only more accurate, but more
attractive too (well, maybe just matter of taste...), and in addition I had a
good opportunity to correct some small inaccuracies, I was not aware of while
building this Tony for the first time (those can be noticed on the photos).
At
least, now it is nothing to be said [in my
terms ;-) ] against putting it along with the MC 202 and the Bf 109E – just to
complete the line of the DB 601-engined fighters.
References
-
1. Modelpres
Ki-61 Hien
-
2. Monografie
Lotnicze AJ-Press Ki-61 Hien
-
3. Famous
Aircraft of the World #17, Army Type 3 fighter “Hien” (1989)
-
4. Famous
Aircraft of the World #5, Army Type 3 fighter “Hien” (1984)
-
5. Model Art
Extra #428 “IJA Kawasaki type 3&5 fighter (1994)
-
6. Wings Vol 28
no.2 (April 1998)
-
7. Wings Vol 29
no.1 (February 1999)
-
8. Wing Masters
no.4 (June-July1998)
-
9. Avions #99
(2001/6)
-
10. B-29 Hunters
of the JAAF – Osprey Elite Units #5
-
11. 244th
SentaiHome Page: http://www5b.biglobe.ne.jp/~s244f/
-
12. http://www.j-aircraft.com
Igor
|
|