|
History:
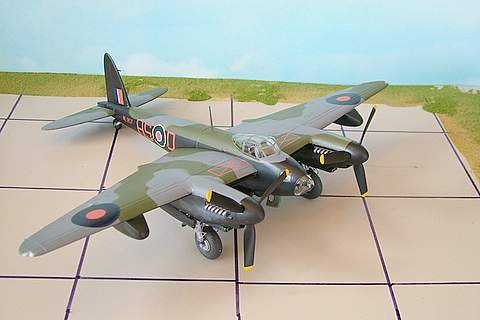
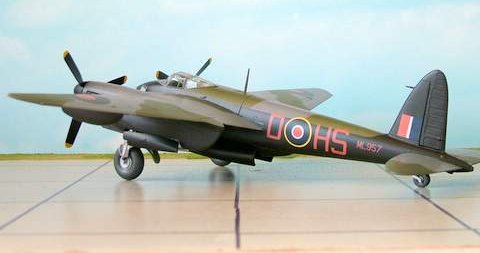
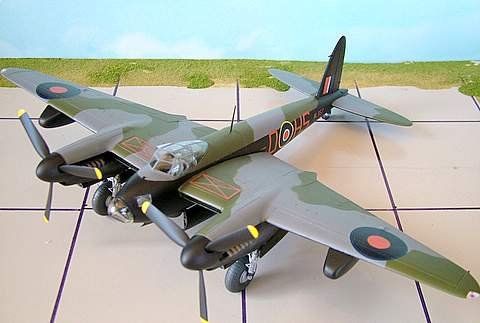
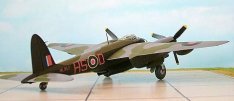
The
B Mk XVI was the penultimate wartime bomber version of the De Havilland
Mosquito. Its Rolls Royce Merlin
Series 70 two-stage engines pushed its top speed to 408 mph at 26,000 ft and
raised the service ceiling to over 36,000 ft.
Operational in 1944, it served with the RAF Light Night Striking Force
and Pathfinder Force, locating targets and marking them with flares for the main
bomber force. The bomb bay was
enlarged, resulting in the “pot belly”, and the 4,000 lb “cookie” could
be carried. The PR XVI had the
speed necessary to make interception very difficult, even for the Luftwaffe’s
latest piston engine fighters. This
version was used by the RAF and by the US Eighth Air Force for strategic
reconnaissance.
|
Click on
images below to see larger images
|
|
|

|

|
The
Kit:
Airfix
released separate kits of the fighter (NF 30) and bomber/recce versions of the
two-stage Merlin Mosquitoes in 2003. They
are based on the 1/48 Mosquito FB Mk VI and contain all of the parts for the
original kit. The Mk XVI kit
contains new parts for the engine nacelles, the top wing sections, bomb bays,
the “cookie”, canopy/windows, and the long range wing tanks. Additional
parts (camera windows and standard bomb bay doors) are provided for the photo
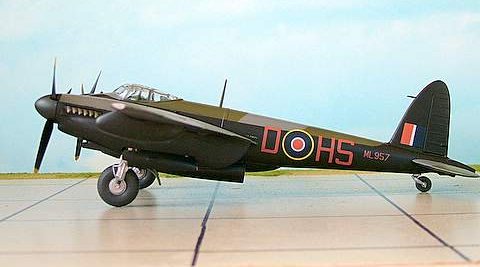
reconnaissance version. A decal sheet provides markings for a USAAF PR XVI, a B
XVI from 109 Sqdn RAF, and a PR XVI from 60 Sqdn SAAF.
The
original kit of the FB VI is still a very nice model.
The fit of the original parts is good.
The few panel lines are raised, and detail is a bit softer than state of
the art.
Those
fit problems that arose during assembly stemmed from the “new” parts.
These parts have soft detail, heavily recessed panel lines, and a pebbly
texture (easily sanded smooth) on the external surfaces.
I suspect that the front of the “pot belly” bomb bay is too blunt,
and the tops of the long range tanks should be more rounded.
In retrospect, I would recommend the resin wing tanks that are available
from Ultracast.
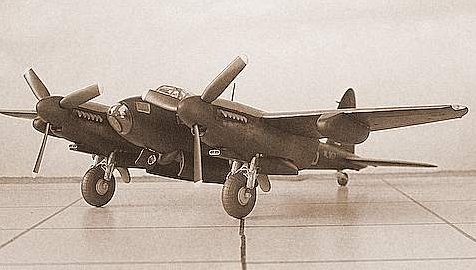
Construction:
Fuselage
assembly (Steps 1-6) was per the instructions.
My only addition was seatbelts made from foil and painted.
There are no rudder pedals or throttle quadrant, but I’m not sure that
they would be visible anyway. Otherwise,
there is a fair amount of detail included, and the passionate cockpit builder
can add details as he sees fit.
The
bomber canopy parts were not a good fit (Step 7).
I first glued the main canopy (Part 193) to the fuselage, concentrating
on fit at the front and rear of the canopy.
The blown side windows had to be trimmed and coaxed into position.
I might have been better off if I had attached parts 182 and 183 to the
main canopy before gluing it to the fuselage.
The clear nose (Part 184) was a press fit.
(Later, after finishing the canopy installation, I came upon a close up
photo which shows the small circular DF antenna hanging inverted, from the top
of the canopy, right behind the pilot. I
regret that I didn’t find this earlier, it would have been a nice touch and
easy to add.)
At
this stage (Step 8), you must decide whether to have the bomb bay doors open or
closed. I found that they were easy
to cut apart. You must cement the
door hinges and test fit them to the fuselage now, but set them aside and attach
them (Steps 9 and 10) after the wings and landing gear have been mated to the
fuselage.
Landing gear (Steps 13 through 16) is unchanged from the original Mk VI kit. There was a lot of flash that encroached on the angled lines molded on the outside of the struts, but careful trimming with a sharp knife removed it. I drilled out the lightening holes on parts 32 and 33. The gear struts may be set aside.
I skipped the propeller assembly (Step 17) for now, for ease of painting later.
I deviated from the assembly sequence in the construction of the nacelles (Steps 18 through 21). I assembled the nacelle halves (Parts 131 and 132, and 133 and 134) first so that I could fill and vigorously sand the seams without interference from the landing gear and doors. Next, I completely drilled out the holes for the door hinges, in the nacelles and in the doors. I cemented the hinges to each door and then cemented the door to the nacelle. This resulted in a much sturdier attachment of the doors. Finally, I shaved off any of the hinge sticking through the holes, filled with a spot of CA glue, and then sanded it smooth on the exterior surfaces of the door and nacelle. If you do it this way, the doors must be attached before installing the landing gear assemblies. Each strut assembly was then set into the nacelle, a slight pinch from the front and rear of the nacelle being required to “bow” the opening enough for the strut assembly to fit through. I fit each propeller backing plate and glued the retaining ring into the respective nacelles. You should also attach the top of each nacelle (Parts 136 and 138) now.
The sides of the forward cowling intakes need to be shaped so that they “pinch” slightly around the intake. Photos show this “pinch” quite prominently. It was an easy matter to carve the soft plastic around the intake and then smooth the shape with careful sanding.
I assembled the wings (Steps 22 and 23), but left the nacelles off, so that I could true the wing and tail plane alignment as viewed from the front. I discovered that the openings of the leading edge radiators narrowed from the nacelle to the fuselage, whereas they should be constant width. I added a bit of scrap to the insides of parts 82 and 88 in order to spread the inboard radiator openings just a bit.
Attaching the wings is where assembly (Step 24) really got tricky. I was glad that I had not attached the nacelles yet. I found that each wing required a lot of material to close the gap between the upper wing and the fuselage, near the leading edge. Even worse, the port wing didn’t fit at all. First, I completed and installed the horizontal tail surfaces without incident, making sure that they were 90 degrees to the vertical stabilizer. I then attached the starboard wing, shimmed upper forward gap, filled with CA, and sanded it smooth. The port wing was a real wrestling match, but it eventually succumbed to generous amounts of liquid cement, CA, and sanding smooth around the join. Even more filler was required for the upper forward gap on the port wing.
The exhaust stacks were a disappointment. They stick straight out instead of lying almost flat against the side of the nacelle. The nacelles were a loose fit to the wings and required some shimming with plastic card and filling with CA. This was easy.
Final bits were attached, including the vertical radio antenna which is included (from the original kit) but not mentioned in the instructions.
Painting and Decals:
I used Polly Scale paints. They are tricky to airbrush, but touchup with a brush is easy with these paints. I thinned with 70 percent isopropyl alcohol with a paint/thinner ratio of 30:70. Several light coats gave the desired result.
I have many photos of Mosquitoes among my reference library, but only one photo of a B Mk XVI in the black/gray/dark green scheme. That photo is of ML957, the subject of this kit. This photo is of the fuselage which is inside a salvage hangar in May 1944. (I suspect that ML 957 was badly damaged in some kind of ground accident since the fuselage appears to be undamaged.) I went with the painting diagram as provided by
Airfix. Trim color for 109 Sqdn was yellow. I do have a photo of a 109 Sqdn Mosquito with yellow spinners, but since I didn’t have a photo of ML957’s spinners, I left them black, as per the Airfix painting guide.
Finally, the decals were just sweet. Care is required because they are so thin, but they lay right down. A little Micro-Sol made the clear decal film disappear completely. They look like they were painted on. Oddly, the red stencils disappeared completely against the black background. After applying three of these stencils, I ceased when I couldn’t find a trace of them!
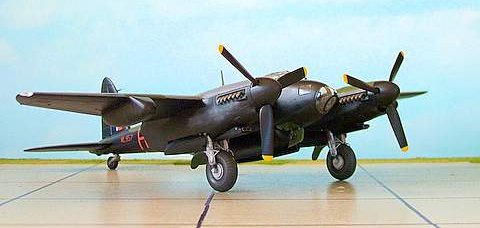
Conclusion:
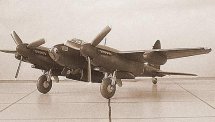
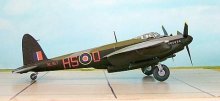
Well, this wasn’t a shake-and-bake kit, but it wasn’t a bad one either. At stages of the assembly, the mindset that this is a limited run kit was helpful: you encounter problems and then figure out strategies to overcome them. Airfix gives the modeler a basically sound model, and it is up to him how much detail he wishes to add or not.
I have a nice “shelf sitter”, and in my reveries, I try to imagine the mood the Mosquito crews of 1944-45. Only three years before, light bombers of the RAF were objects of slaughter at the hands of the
Luftwaffe; different now with speed and altitude capability to taunt the enemy’s best. Even with the “pot belly” the B Mk XVI was beautiful. And she was FAST!
Tom
References:
- Famous Bombers of the Second World War, by William Green, 1959
- Mosquito, A Pictorial History of the DH98, by Philip
Birtles, 1980
|
Click on
images below to see larger images
|
|

|
|
|
|
|