|
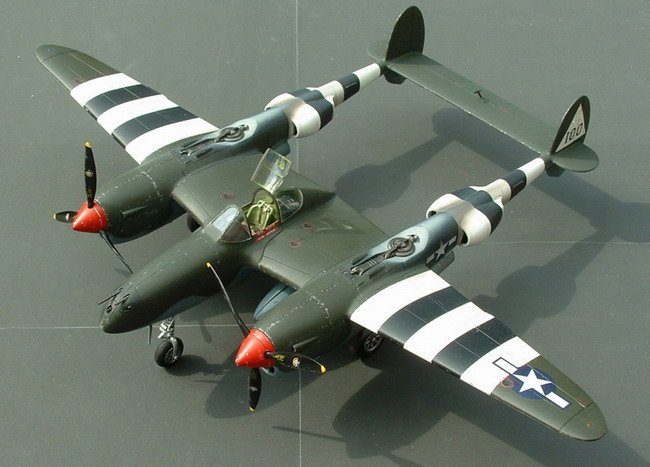
This build was a result of a bout of
indecision, and asking someone which model from my stash I should build next.
Having just finished an F-86, I wasn’t keen to do another NMF so soon, so when
this one was chosen for me as the next project, I decided that the olive drab
version was the way to go. Unfortunately there were no kit decals for such a
version, so I decided to go all fictitious and just make up a typical plane in
the ETO. Freed from the restrictions of historical accuracy, I decided to
brighten up the scheme with invasion stripes, as I know that they’re a
personal favourite of the worthy Steve Bamford. This one’s for all your hard
work, Steve!
Click on
images below to see larger images
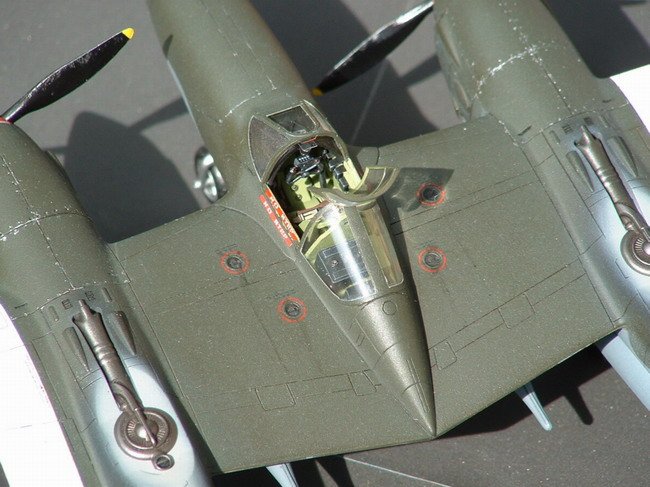
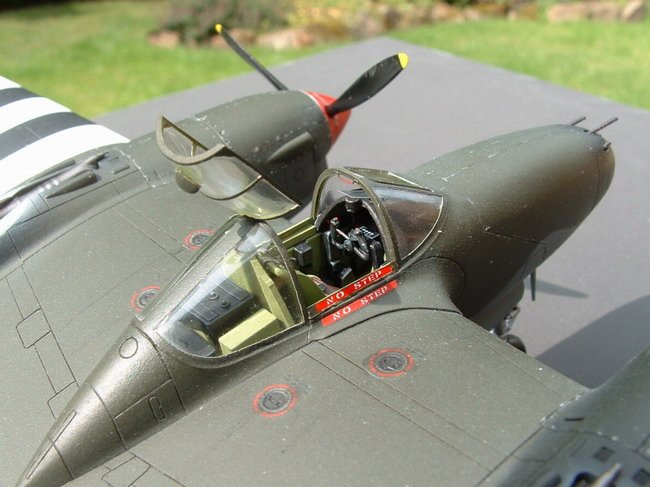
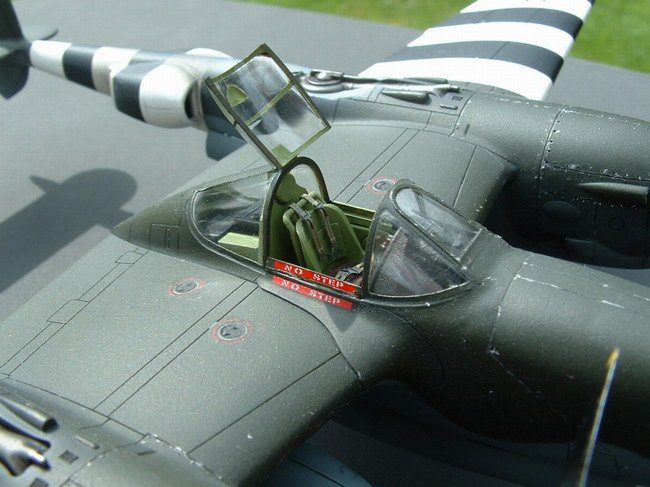
I
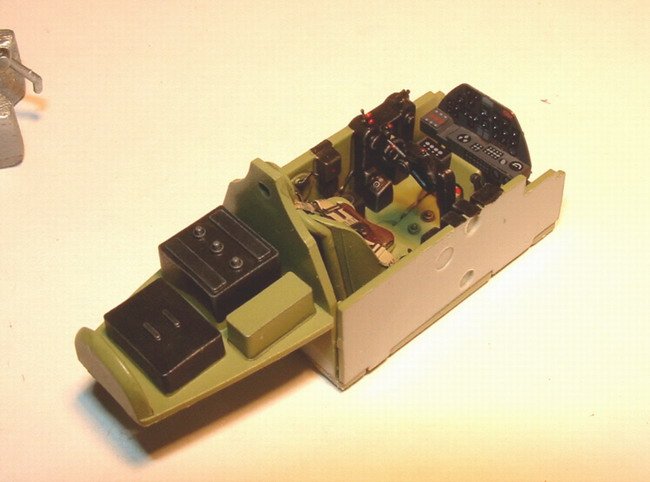
bought this kit a couple of years ago when I was in my reckless acquisition
phase, and I’d also got a pre-painted Eduard set for the cockpit. This was a
lot of fiddly work for all the throttle and mixture levers, but the results came
out well. Unfortunately, the instrument panel really can’t be seen when the
fuselage is closed, at which point I understood why Academy hadn’t even
provided one – just a decal onto a flat space under the cockpit coaming. All
future builders take note – you might as well stick with the kit version. I
finished the cockpit off with a pastel wash, matt coat and dry brushing.
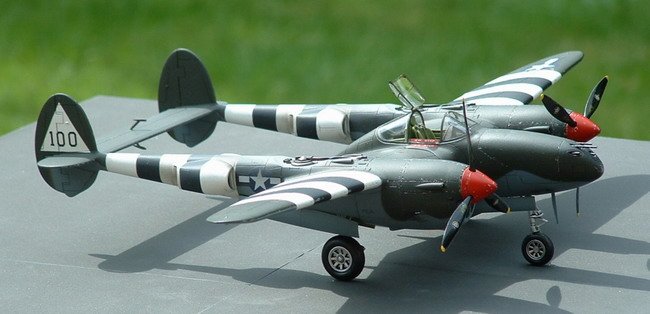
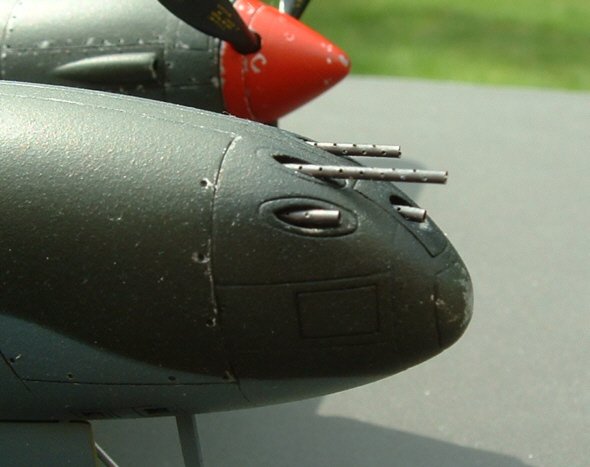
The kit allows several different nosed versions to be built, so the nose is a
multi part affair with some fit problems as a result. I ended up filling lots of
gaps here and doing some rescribing afterwards, but fortunately I’d remembered
to add plenty of noseweight. Some people advocate weights in the engine nacelles
too, but I found that this was unnecessary once the nose section was crammed
with lead.
I’ve read reviews of other makes of P-38 kit, and they all quote the alignment
of the booms to be tricky – no such problem with this kit. Once the connecting
faces of the boom to wing joint had been properly trimmed everything lined up
nicely first go. Unless I was just lucky. One thing to watch out for is that the
joint lines on the front of the booms are not the same as the panel gaps on the
real engine covers. Some filling and rescribing was done here.
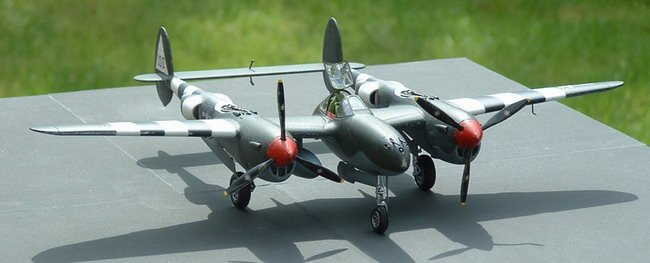
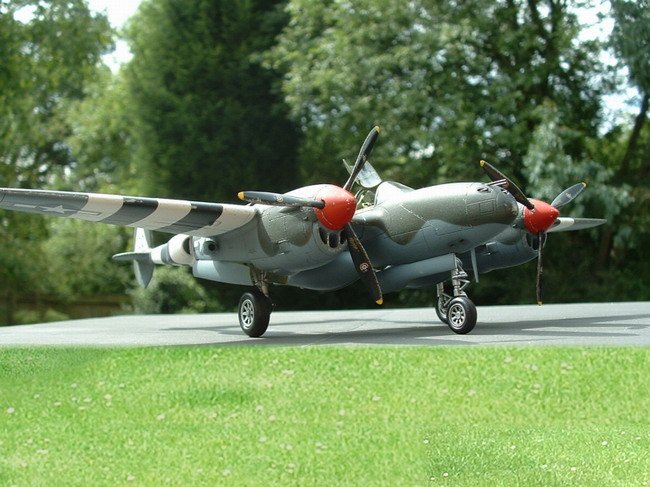
I tried a new
technique of paint chipping on the spinners, by using the salt over Alclad
trick. Can’t say I’m a big fan. The salty water beaded up on the Alclad,
making it difficult to control where it went, and then it was actually quite
difficult to get it to rub off after the topcoat went on. On the props I first
painted Alclad and then the black, followed by scratching carefully through on
the leading edges with a sharp blade. All other chipping around engine access
panels and leading edges was done with a small brush and silver paint. If the
rear of the fuselage pod looks too pristine, it’s because I couldn’t find
any reference photos showing the paint wear in this area consistent with the
pilot entering the cockpit, ground crew refuelling, etc. If anyone out there has
any info on this, I could finish my weathering…
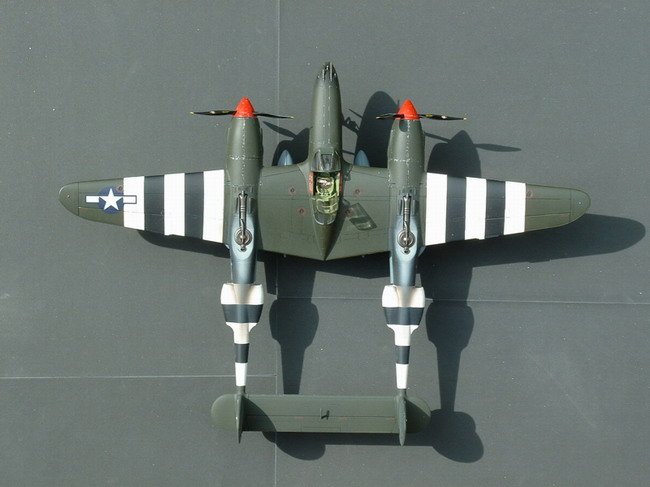
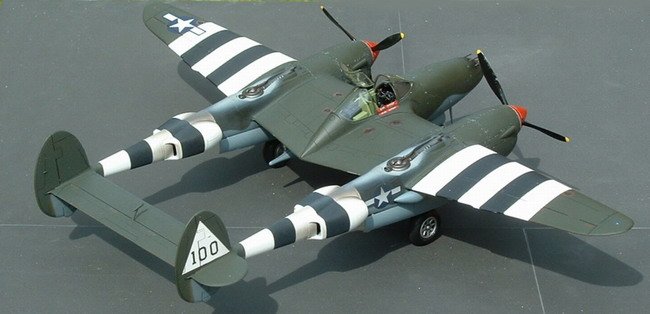
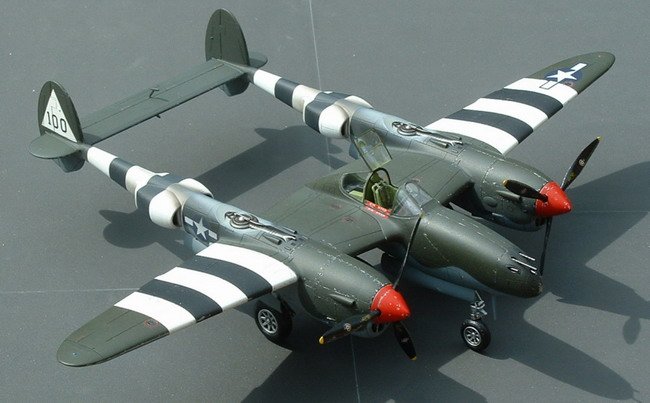
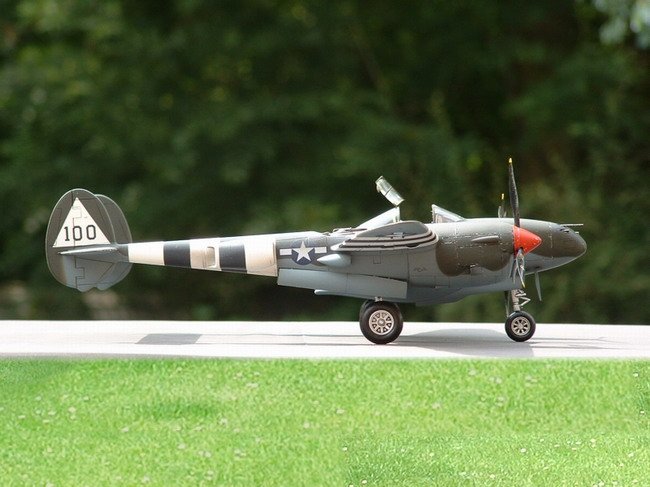
The whole plane was then sprayed over in white primer, polished smooth, and the
stripes masked and painted. These and the triangle on the fin were then masked
over for the exclusively Tamiya paint job, with demarcation lines masked off
using the Blu-Tak method. I didn’t lighten any panels, as this was a European
aircraft remember – we don’t get that much sun over here in Britain!
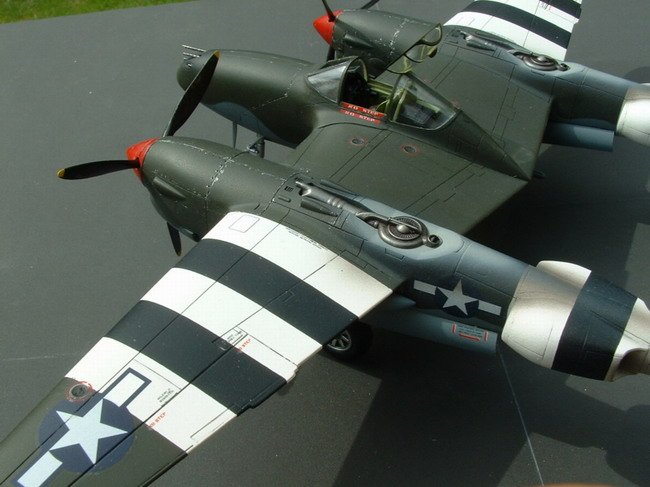
After a coat of Johnson’s, panel lines were filled with a black pastel wash,
and the same was used to simulate the staining and streaking around the fuel
fillers. I used my previous technique of putting a blob of wash on the filler
cap and then blowing it backwards with the airbrush, to get that subtle look.
Click on
images below to see larger images
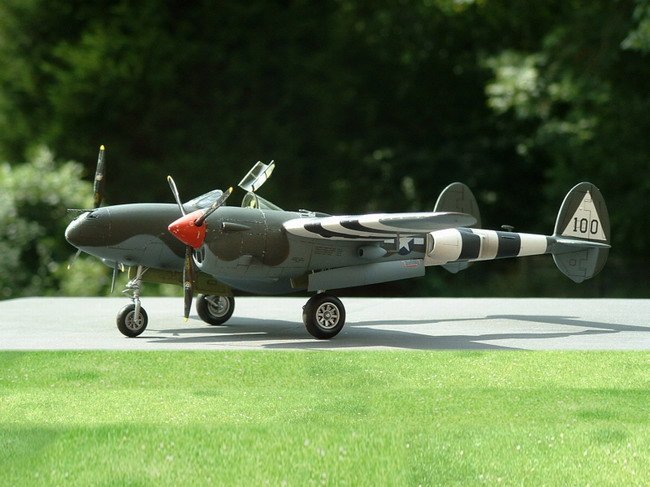
Exhaust staining was done
with the airbrush, first with black and then with the characteristic light grey
found around the superchargers of these beasts. As I was cleaning the airbrush
out afterwards, I thought I’d overdone the grey, but consulting references
showed that if anything I hadn’t done enough! Left it as it was though, as I
didn’t want it too heavily weathered – it’s always risky when weathering
over decals, because if you take it too far, it’s impossible to go back.
I replaced the guns in the nose with photoetched parts which were supposed to go
over the 50 calibres in the F-86, but I had them left over. I rolled them into
tubes around a needle, and they look the part more than the plastic kit ones.
They didn’t even need painting.
Click on
images below to see larger images
Overall,
I’d say that this was a pretty good kit to build. Apart from the fit
of the nose, only the decals let it down, as they usually do with
Academy kits, being very stiff to use and not responding well to
solutions. I got some silvering with them too, despite meticulous
surface preparations, but hopefully it’s not too noticeable.
Hope you like it.
Dean
|
|