|
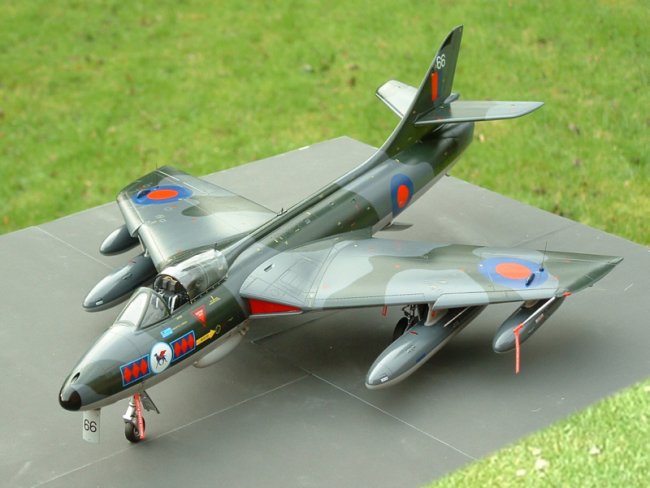
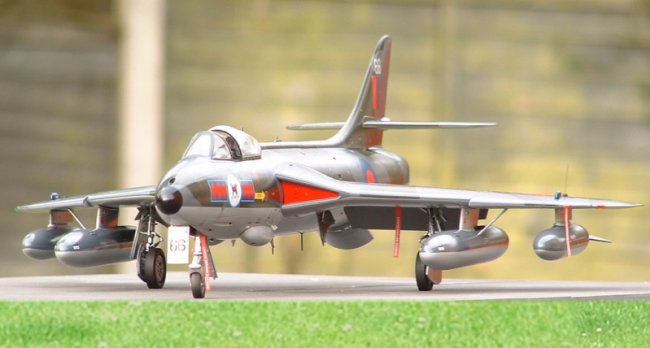
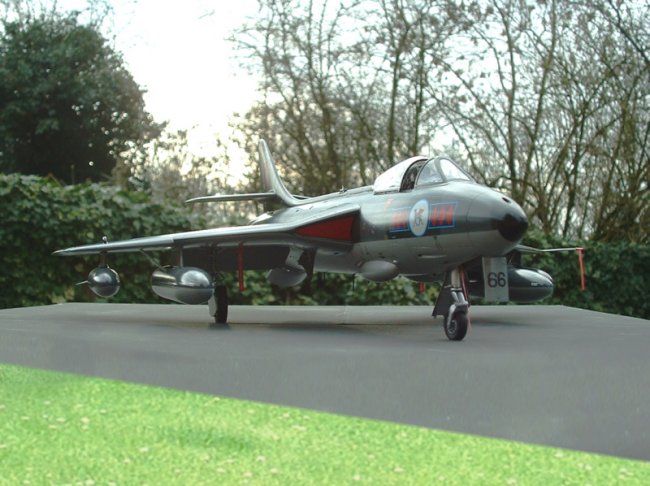
I was stuck for which model to start
next, and at the suggestion of my modelling friend Alex, I started on the big
Revell Hunter. Alex had done his in the Swiss markings, but being British I had
to do mine in RAF markings, although I did deviate a little from the published
paint scheme. My research had shown up a couple of pictures of RAF Hunters, one
from 45 Squadron, (the same as the kit markings) with light grey undersides
rather than the high speed silver finish specified in the kit scheme. I decided
to go down the grey route, as it would give me a chance to model a 45 Squadron
machine fresh from the early seventies paint shop in its shiny new finish,
without having to worry too much about weathering.
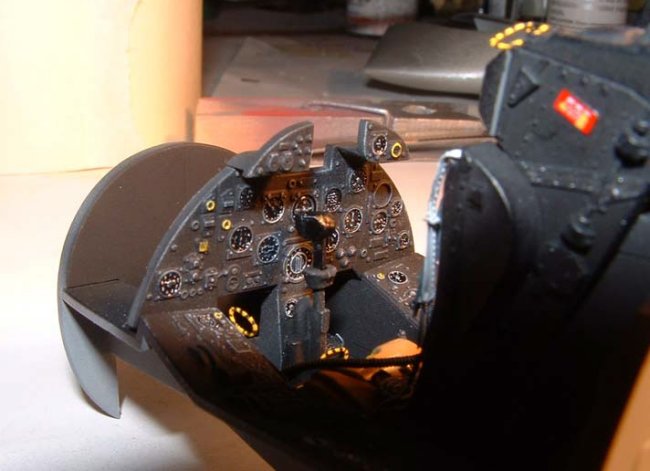
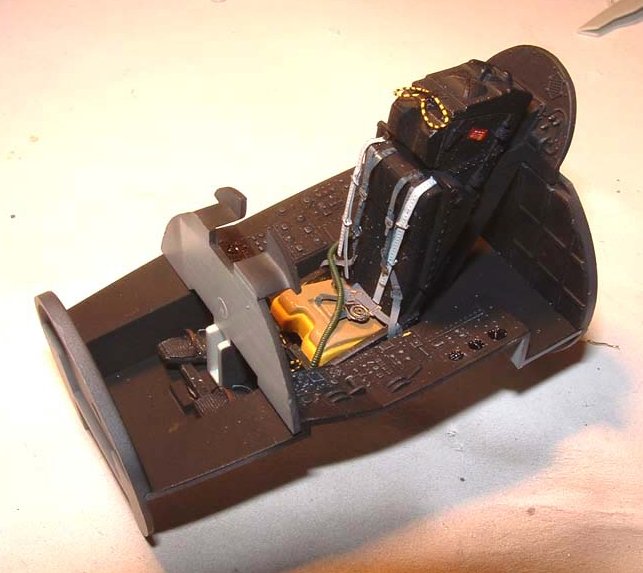
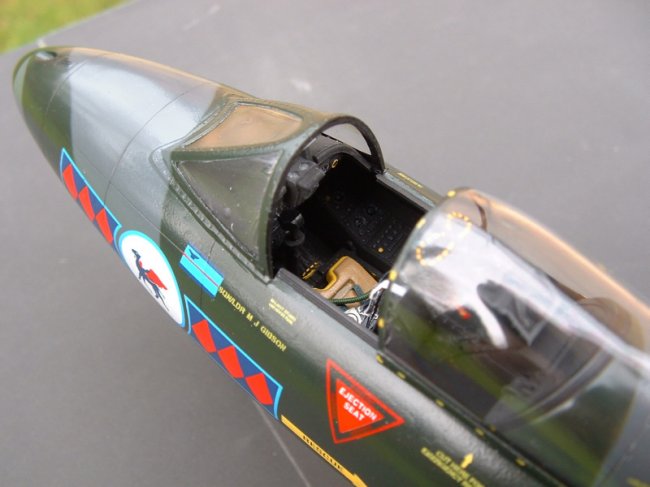
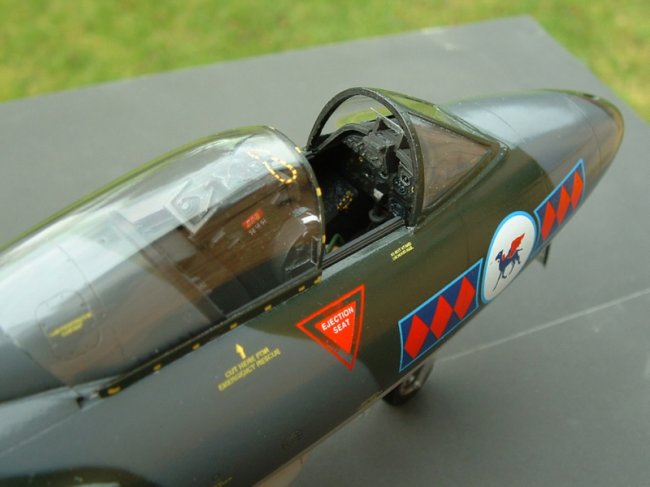
I started with the cockpit, but being matt black all over, I did little in the
way of detailing apart from a little drybrushing and adding a few photoetched
parts. I added PE straps and various other scratchbuilt items to dress up the
ejection seat a little, and then closed the cockpit halves.
Click on
images below to see larger images
This was where the
fun began – everyone else seems to have had nothing but praise for the fit of
the parts, but in my example almost all of the fuselage parts seemed warped, and
had to be coaxed into alignment with a mixture of brute force and cyano +
accelerator. Wing fit was better, but far from perfect, and it was only after a
lot of sanding and rescribing that I got the basic airframe looking something
like. Unfortunately, it was at this stage that I had the bright idea of masking
off the insides of the air intakes before assembly, which I did with Tamiya
masking tape. This came back to haunt me later.
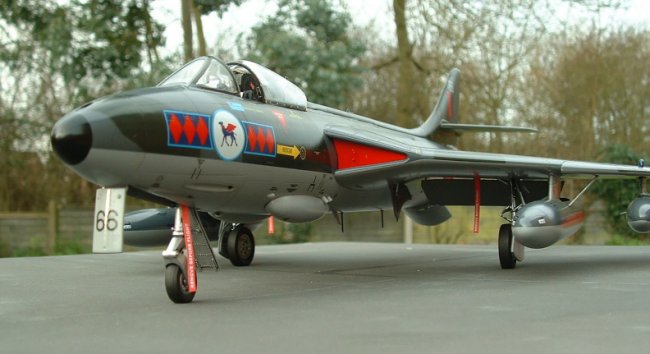
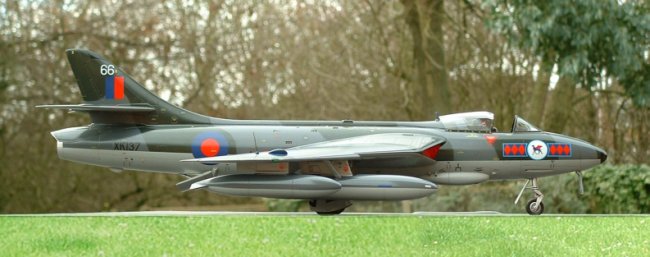
Then it was onto the
usual Tamiya airbrushed colours, followed by a coat of Johnson’s and the panel
line pastel wash treatment. One thing I tried different here was using a black
wash on the dark colours of the topside, and a brown wash on the grey
undersides…seems to have given a less stark, more subtle effect on the panel
lines, and I’ll definitely do it again.
The one thing I will
mention about this kit is the sheer number of decals used. I spent days covering
the airframe with the stencils and national makings, and as far as I can see
there are about 270 of them in all! Be prepared for some marathon decaling
sessions. I don’t know if they silvered at all, as I carried on over the top
with a glossy finish, which makes it harder to tell than with matt.
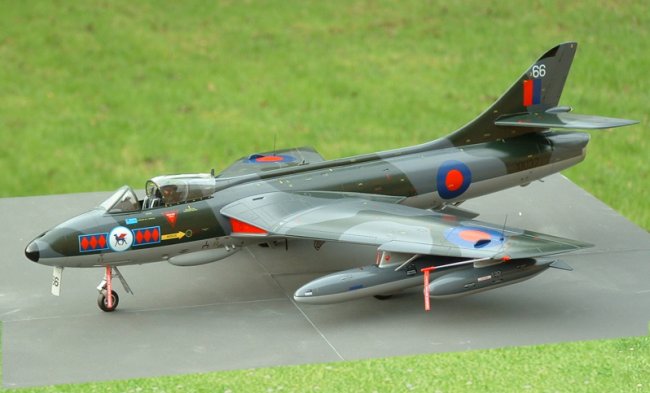
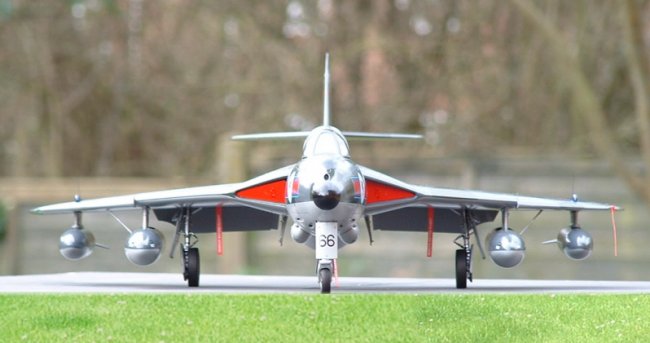
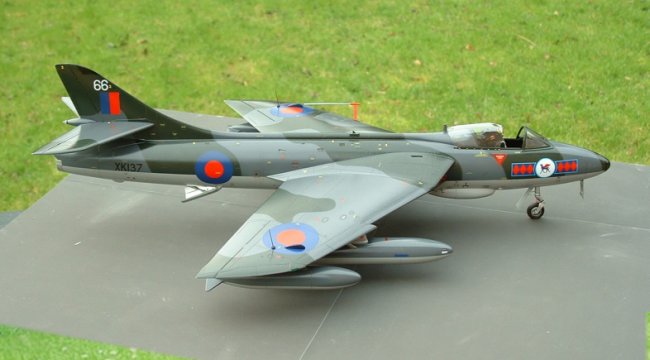
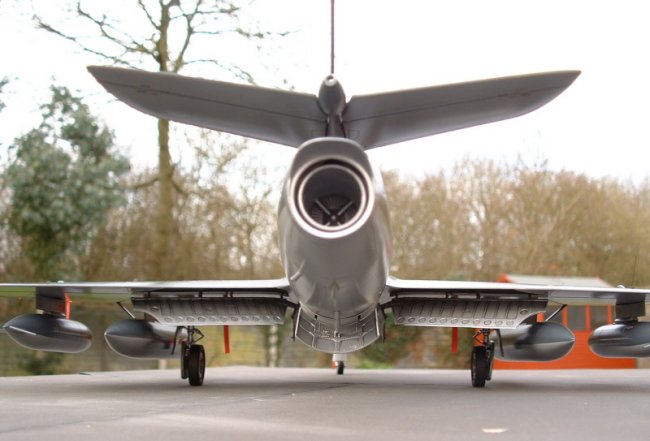
The fuel tanks were
difficult to mask and paint due to the dark/light demarcation halfway down them
– easy enough to do by eye on one tank, but trying to do four of them and get
them all to line up? That was a difficult task, and required several attempts
before I got it somewhere near right.
The undercarriage
was replaced with a white metal set, as I’d heard bad things about heavy
models on plastic undercarts, and this was just a direct replacement with no
fettling required. It was finished in Alclad Aluminium with a black pastel wash,
and I was pleased with the level of detail in the kit parts. In fact, I had the
Eduard PE set for this kit, and apart from the odd lever in the cockpit and the
seatbelts, I didn’t use any of it, as the kit parts were sufficiently detailed
not to need enhancing. That’s got to be a recommendation!
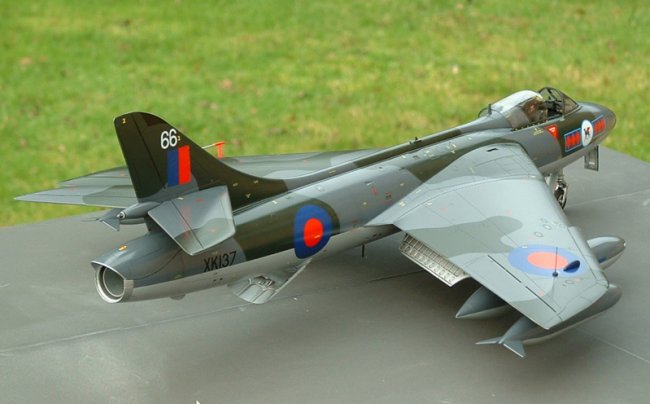
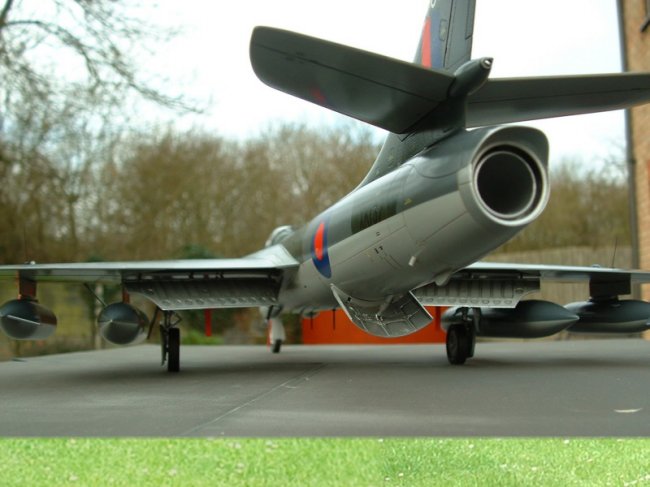
Once the painting
was complete, I unmasked the intakes only to find that the tape had become glued
between the wings and the fuselage when they were joined. I couldn’t pull the
tape free, and there was no access to cut it, so I was left with the only option
– hide the intakes behind FOD covers. I had to scratchbuild these, with no
real references, but they look the part ok. They were made by painstakingly
trimming paper to shape until it fitted the opening, making two plastic card
copies, and finishing them off with two PE handles left over from my Hurricane.
I decided to add a pitot tube cover and some home made RBF streamers too, while
I was at it. Never done that before.
Now all I need is somewhere to put it…
Dean
Click on
images below to see larger images
|
|