|
The
Douglas B-66 Destroyer was originally envisaged as a replacement for the
World War 2-era piston-engined Douglas B-26 Invader. The design of the
B-66 was assigned to a Douglas-Long Beach
team under the direction of John C. Buckwalter. The Destroyer was
initially manufactured in two separate versions - a reconnaissance
version designated RB-66B (Douglas Model 1329) and a bomber version
designated B-66B (Douglas Model 1327A). They were basically similar in
overall configuration, differing primarily in the equipment carried. The
RB-66B carried flash bombs in its bomb bay for night photography
missions and was equipped with a battery of reconnaissance cameras. The
RB-66B could be fitted with a removable in-flight refueling probe
attached to the right side of the forward fuselage. The first RB-66B
flew in March of 1955, and deliveries began in February 1956. 145
RB-66Bs were built, which made this version numerically the most
important of the Destroyer variants.
The
first official B-66B flight took place on 1/4/55. The B-66Bs began
entering the Tactical Air Command in March of 1956. The first recipient
was the 17th Light Bombardment Wing, based at Hurlburt Field in
Florida. In September 1956, TAC began to transfer its B-66Bs to the United
States Air Forces in
Europe
.
Click on
images below to see larger images
My kit was the Testors offering
from the mid 1980’s. It’s the same kit as the original Italeri issue.
I picked it up at a local hobby shop for about $19. I had one years ago
but it must have gotten lost or tossed in any number of moves. The kit is
nice and has fully engraved panel lines. The plastic is a quasi
silver/grey and come in a single poly bag.
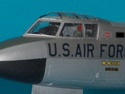
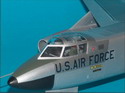
The cockpit is done first. The instrument
panel has some detail molded on it as well as the B/N and WSO stations.
Unfortunately they sit too far back to be really visible in the completed
model. The ejection seats are composed of several pieces. I pre-painted
all the cockpit parts interior grey followed by painting the IP, console
tops and glareshield black with some dry brushing to pick out the details.
The seats were then detail painted with red arm and head rests.
The WSO windows were glued in place followed by the cockpit and
nose wheel well. You need to add some weight to the nose to prevent it
from being a tail sitter. I used some BB’s on each fuse half held in
place with thick CA. Once this was done the fuse halves were joined.
Because the only choice of finish for a B-66B is natural metal you have
some seams to clean up. I also glued the canopy in place and masked it
off. I used some putty and Mr. Surfacer and a lot of sanding and polishing
to clean up the seams and to fair the canopy into the fuse. Some of the
panel lines were lost in the process so rescribing was in order.
The wings and engine pods were assembled,
seams filled and sanded. Detail that was lost from sanding on the engine
nacelles was rescribed. The horizontals were glued in place and care needs
to be taken to assure dihedral and symmetry between the left and right
sides. The wings were then glued in place and some filler was required to
blend the wings properly with the fuse. Once this was accomplished the
engines/pylons were glued in place. The fit of these was very nice and no
filler other than the Pro-Weld was needed.
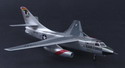
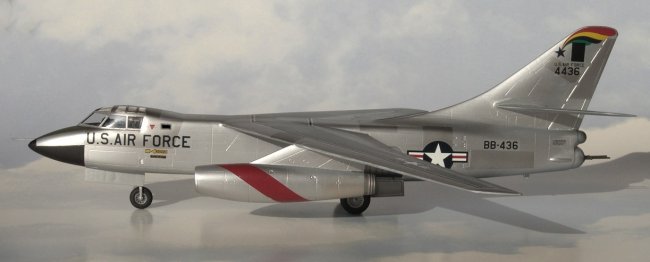
Since this is a NMF airframe plenty
of surface prep is needed to make sure seams and flaws are well hidden. Lots of
time wet sanding, applying Mr. Surfacer and Future and polishing with 2000 to
8000 grit cloth were invested in order to achieve a base for the Floquil bright
silver. Once the silver had dried it was time to mask off panels for the various
of metallic shades. I used a mix of Testors metalizers and Alclad II shades to
achieve the desired effect. I had to be careful in that I applied the Alclad II
colors first followed by the Testors metallizers so as to avoid applying masking
tape over the Testors and thus ruining the finish. The nose radome area was
painted with Tamiya black.
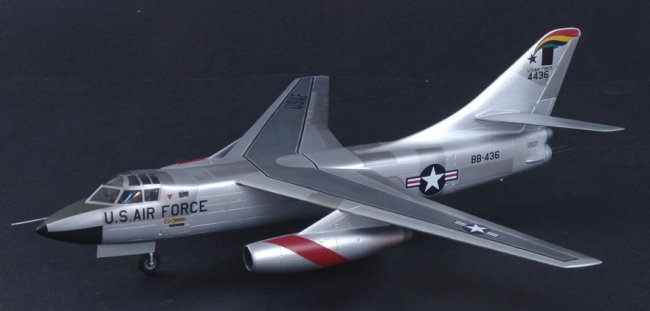
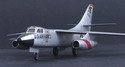
B-66 color schemes were not noted
for being colorful. The kit gives you option for two aircraft; The first
is an RB-66B of the 42 TRS/10 TRW based at RAF Chelvston in 1960. The second is
for the 19 TRS/66 TRW RB-66B based at Spangdalem,
Germany
in 1959. I chose the first one because of the red diagonal stripe on the engine
nacelles and the rainbow comet on the tail. The decals were VERY old and
the clear areas of them had a bit of a milk haze to them. I found if I soaked
them extra long in the water and used a brush this “haze” could be removed.
Needless to say this resulted in more time than usual to apply all the decals.
Microsol helped them to settle nicely. Once decaling was finished I applied a
coat of PollyScale clear to seal everything in.
Now was the time to add all of
the fiddly bits; IFR probe, tail guns, landing gear, wheels, doors, etc. After I
had these in place the canopy and window masks were removed to reveal the clear
parts in all their glory. I applied a light wash in the gear bays to bring out
some of the detail there.
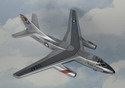
All in all this was a nice
build, despite being a NMF (which I am not a fan of). The kit is going on 30+
years old but it’s still the only game for a bargain priced B-66. The
CollectAire kit is nice for 1/48 scale but it’s completed size matches it’s
price tag. With this one done I’m tempted to build Italeri’s EB-66 in
SEAC cammo. That might go a bit easier…..
Jeff
Click on
images below to see larger images
|