|
Hello folks!
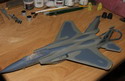
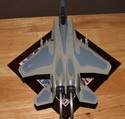
This is my second offering to you all. The model is a Hasegawa
F-15C. We all know about Hasegawa, so on the the real story.
This is my
first official commissioned build. A friend of mine is an Air
Force pilot. His first assignment was to England with the 48th FW at
Lakenheath. His squadron (493rd) is the only F-15C squadron in
Europe. The history of the 48th FW is quite interesting, I would
suggest looking into it. Its quite a story. When he got back
here to the states, his wife (a high school classmate) asked me to
build him his plane from England as a surprise present. How could I
turn a request like that down. I started the build going in 1/48th
scale, but after months of trying to locate a set of Astra 48th FW
decals, I had to switch to 1/72. Now that I'm done, I'm glad I went in
1/72. The F-15 went well, my biggest issue was I didn't know it was
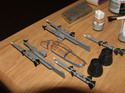
short the armament. So, the hunt was on. I had to have some
help in getting the unit markings and the armament. This is where
some carefully placed questions from my friend came in. She waited
until he was talking to her about flying and then she leaped into action.
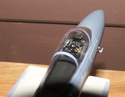
I was then provided a plethora of info. By this point I was in need
of a pilot. I didn't want to purchase some other kit to just get the
pilot, so I went looking. Many, many moons ago, I made 7 WWII planes
for what I called a ceiling diorama (B17, B24, P-51, P-38, Me-262, Me-109,
FW-109) in 1/72. I went digging and found my volunteer. He
gladly gave up his old ride (P-38) for the chance to fly the best fighter
around. After a change of clothes, and a bit of training, he's now
going supersonic.
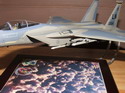
After I got
everything built it was on to the paint booth. I started off by
giving the whole plane a coating of the light grey. A few days after
that was dry I masked off where the dark grey should be using that puddy
stuff that you buy at a office supply store to stick stuff to walls.
It worked far better than I had hoped. It gave me the soft edge I
was looking for, without taking the paint below it off. It
didn't leave any residue either. I also tried using tissue paper (the
kind that your wife would use to fill a gift bag) to fill in the areas to
be masked off. That worked well too. It stuck to the puddy and
kept out the overspray. I also used the puddy method to mask off the
cockpit. Except I used tape and cotton to fill in the hole.
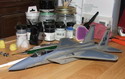
After all the paint was dry I removed the masking and put on several coats
of gloss so I could put on the decals.
This was also
my first time using an aftermarket set of decals. I was pleased.
Astra makes a great set. They were thin and clearly printed,
and they went on well with a little help from micro set and micro sol.
I did have a little trouble with silvering, but I think that was my fault.
My gloss coats were bad, I even thought Id have to start over. It
wasn't fun. Anyway, the decal set included all the stencils and
everything else you could think of, but personally, I don't like the look
of a stenciled aircraft. It's too busy. Basically, I used all
the unit markings plus a few of the larger decals around the nose of the
eagle. After all the decals were on, more gloss coats. Then a
final layer of flat. All my paints and gloss/flat coats were using
Testors Model Master paints.
Click on
images below to see larger images
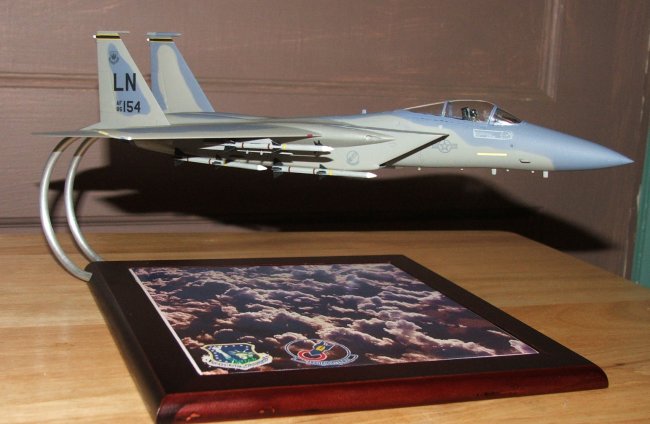
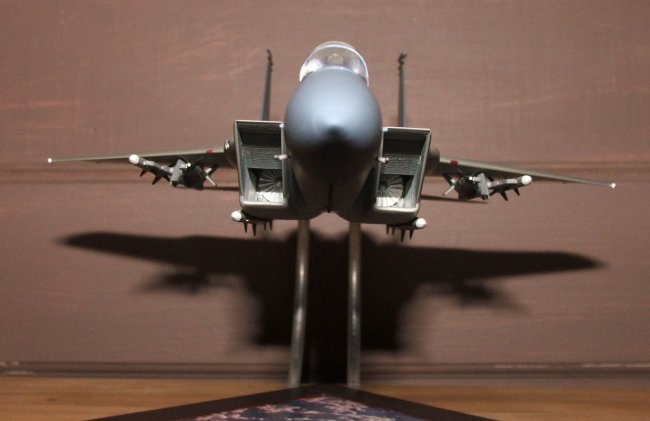
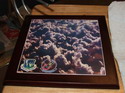
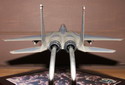
| I'm sure you've
all noticed the display base. You might even be asking yourself how
that was done. Well, here goes. I like doing planes when
they are "clean", wheels just get in the road, plus its
less parts to deal with. I have my parents to thank for the base.
It is a "trivett". I don't know what a trivett is but
it also works great for a base. The middle is actually a
square of ceramic tile. First, I found a picture of clouds that
looked the part, did a little bit of photo editing to get the colors to
come out a bit. I then added the unit markings to the picture.
I emailed this to my dad who printed the pic out onto some special decal
paper that is used in the ceramic industry. My mom then applied the
decal to the tile and baked it in her kiln. This decal film is extra
thick so it survives the baking process. When it comes out, it is
baked into the tile. The tile was finally glued down on the the
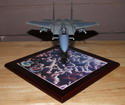
wooden part. I then took some aluminum pipe and bent it into the
shape you see and had some holes drilled into the wood part of the base.
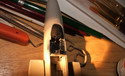
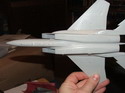
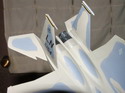
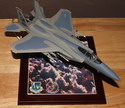
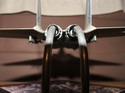
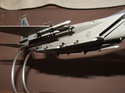
On the plane however, I really didn't trust the back of the burner can
to hold up the plane for, hopefully, years. In the #4 pic above you can see what I did to add support to the
burner can. I glued a tube that's id is the same as the od
of the pipe through the burner can (the total length is about
1"). For more support, I glued little pipes in four places
around the larger tube only on the back side. Finally, to tie
everything together, I took sheet plastic and made strips and glued those
to the smaller tubes and the burner can. It almost didn't fit into
the plane, but with a little force, it popped in. In the rows of
pics at the bottom, the 3rd from the left and 5th row down (#25) you
can see how the visible side of the support looked when done.
I didn't glue the F-15 to the pipes, I figured if they ever needed to
move it, it might be easier to pull the plane off. |
|
There were several
firsts used in the making of this eagle, most of them I learned while
reading the other articles here. I coated the "glass" with
future. I will be using it to gloss the whole model next time. Using
the puddy stuff, what a great find! I believe I will be using
more of those aftermarket decals. Another first that will become a
standard use was using gloss coats to seal paint and decals. And
lastly, the base, if I ever get another request, I'm gonna have to use
that process again.
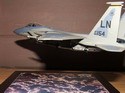
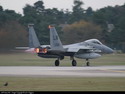
I've included a
picture of the real deal that I found on a really neat site, check it out
(copyright goes to that fellow). In theory, my friend may be the one
behind the stick. Who knows.........
Thanks for looking,
please feel free to email with questions/comments. Just don't throw rotten
tomatoes.
Douglas
Click on
images below to see larger images
Remember, if someone
doesn't like it, they can do it themselves next time!
|
|