|
Intro:
This
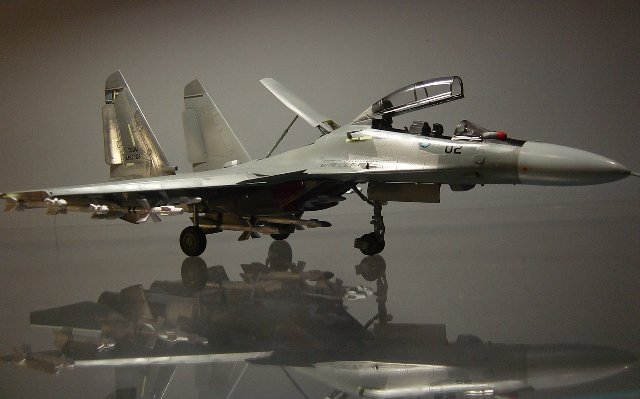
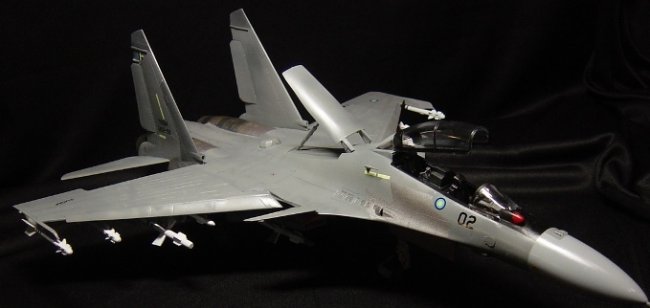
one of the static display of the Sukhoi SU-30MKM ordered by the RMAF
(TUDM) during the delivery ceremony on June 19, 2007, that wore the
number 02 serial. This aircraft was build to complement the Merdeka Group
Build organized by the local society (SFTPMS) in conjunction with the 50th
Independence Day on August 31, 2007.
The
kits:
1/48
MiniHobby Model SU-27UB Flanker, this is the only one I have in my stash
and was eagerly wanting to build the MKM so this will be base of the
conversion and lot of things need to be done to make it to at least 50% of
the MKM. This is one troublesome kit to begin with and I should have tried
my best to find the Academy SU-27UB instead, the decals are from VFA
Production which has most of the decal position spot on much like the
delivery scheme of the MKM.
The
conversion;
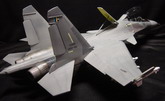
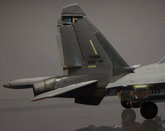
-Scratch
building the canard and the canard shoulder using plastic sheet
-Scratch
all those antenna (Saab antenna on the spine and under the nose)
-Scratch
build the IRST
-Scratch
build the intake cover
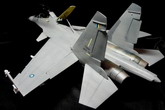
Paint
& others:
-Gunze
H335
-Lighted
H335 for the nosecone
-Gunze
Clear Yellow, Clear Blue & Burnt Iron for the nozzle and the engine
area (I try to follow the guide in the ARC Tips Section)
-Future
for the final coat.
-Squadron
Green Putty
Click on
images below to see larger images
The
Build:
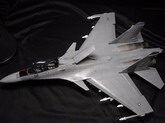
Despite
the problem the base kit thrown to me, I manage to complete this by the
dateline. The kit comes with both type of landing gear (single wheel and 2
wheels) although not very accurate but it’s usable with my newbie skill.
The nosecone needs a lot of work to make it complement the real nose.
First the bulging appearance of the kit nose need to be tone down via
extensive sanding and scraping (unless you want to go the resin route for
the nose, then can skip this step)
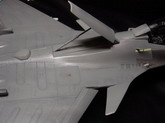
There’s
a big gap present at the join of the nozzle and the body that need a lot
of putty and sanding to make it level and cover the gap (although I did
use a strip of plastics sheet to cover the gap before I apply any putty).
There are also gap and unevenness at the place where intake and the lower
fuselage meet. Again a lot of putty needed, of course the join between the
new (scratch build) canard shoulder & the fuselage
The
IRST also need to be scratch build since the one that came with the kit
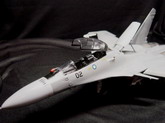
located at the center of the canopy need to be removed. Noted that the
cockpit is non existence so I did try the best I can with what I have if
only I can get my hand on a replacement cockpit, and then can ease the
headache in this part.
Finally
noted that the canopy doesn’t align properly with the cockpit (I
realized this at a later stage because due to the lack of dry fitting) so
I have no option but to make it an open canopy setting even though the
detail in the cockpit is non-existence.
Overall:
This
is good “learning“ experience for me and I do gain a lot of knowledge
on how to improve my skill in the future, The kits will give a good
challenge to those who seek it and hopefully someone can do a better job
with it in the future.
Azlan
Click on
images below to see larger images
|