|
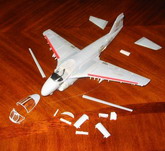
I first built
this Fujimi A-6E back around 1992, and it was one of my first
airbrushed models. Over the year it has suffered through several
moves, being packed and unpacked over and over until it had shed so many
parts that it had been given a permanent home in the Box of Forgotten
Styrene. Earlier this year I was in the mood to work on a model, but
was much more interested about painting and finishing than the actual
construction, so I decided on a restoration instead of a complete build.
For the past
several years most of my modeling activity has been in that odd little
subculture of "What-If?", so I originally thought I would
refinish this as a Royal Navy Intruder S.2, but I really love the look of
the Intruder in late USN/USMC colors, so this plan fell to the wayside and
I decided to venture back to Real World modeling.
Since most of
the landing gear had long since been lost/destroyed/cannibalized the first
step of the restoration was to close up the gear doors and stow the flaps
& slats. This also made an in-flight display necessary, so while
waiting for everything to dry I built a quickie stand from a $0.99 wooden
plaque from a craft store and a length of brass tubing. A small
section of narrower tubing would be glued into the belly of the finished
model so that it slots nicely into the stand.
Click on
images below to see larger images
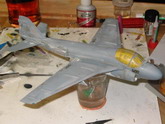
After starting the
modifications to backdate the original Fujimi TRAM A-6E to a non-TRAM
Royal Navy aircraft (meaning I chopped the turret off and plugged the
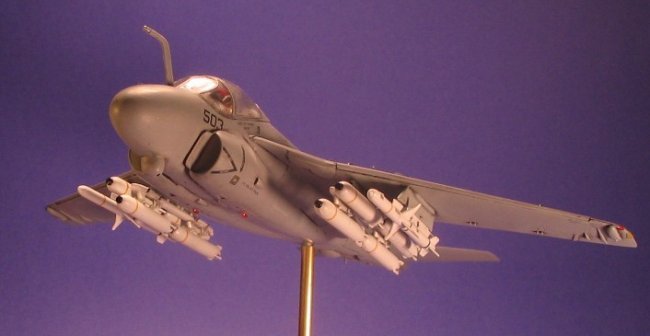
hole) I decided to go back to a TRAM machine. Fortunately the turret from
my Italeri A-6E kit fit well with just a bit of sanding. The decals from
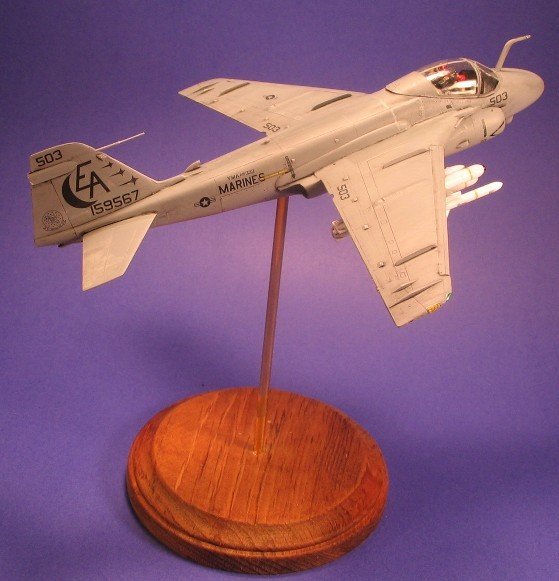
that kit were also used, making this machine from VMA-332 "The
Moonlighters" in 1993. I also went with the kit SAM supression
loadout of 2 X AGM-88 HARM and 8 X CBU-87s. The kit had no pilots, so for
the inflight display I found a couple from a pair of Airfix kits. They
aren't the best figures, but with desert tan flightsuits and red helmets
for some color, they work OK in a closed pit.
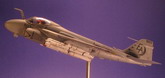
I wanted a fairly heavily weathered appearance, so after painting,
decaling, and flat overcoat I did some light sanding followed by an
alcohol washdown, trying to reproduce a heavily weathered effect
I discovered when I was sanding the old decals down. It worked fairly well
at giving that faded, uneven finish seen on real USN/USMC hardware, though
it's not as pronounced as it was during the stripdown, but I had to
compromise between getting the effect and leaving the decals and paint
intact.
After the 'fading process' I did a thick sludge wash of black watercolor
and soap. This darkened the finish a good bit, and I did some highlighting
by removing more of the wash using an alcohol soaked cotton swab. Finally
I outlined a few panels with a fine brush using the base color to simulate
the spot painting seen in real life.
The colors are not an exact match, since I had Light Ghost Gray, but no
Dark Ghost Gray. Since I've read on several ARCair features that the two
colors blend together so well it's hard to notice the demarcation, I
decided to do the lower surfaces in LGG and the uppers in LGG + a few
drops of Gunship Gray. It may not be completely accurate, but given the
variation seen in the real article depending on weathering and lighting
I'm happy with it.
This restoration
took about two days, and while not a perfect model by a long stretch it does
show that sometimes the quick-build fix can be satisfied by digging through the
Box of Forgotten Styrene that I'm sure we all have somewhere.
Nick
|
|