|
Kit:
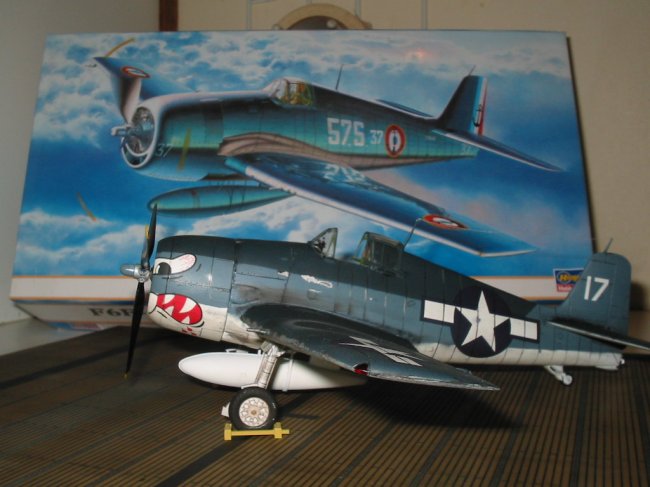
Hasegawa F6F Hellcat 09600
Additions:
Aires F6F Hellcat cockpit 4270
AeroMaster decals Hellcats pt.II 48-600
Constructions:
I had been looking
for a Hellcat for the past couple of years at my local Hobby shops, but could
not find anything. That was until I came across Calum on E-bay a few years
back when I brought my first Hasegawa F-14. I now buy most of my kits from
Calum and Craig rather then the ever lacking hobby shops in Adelaide. I sent
Calum an E-mail to ask if he could get a hold of the Hasegawa F6F and in his
next order it came in. When it arrived via post I opened it up, and
had a look at the only available F6F at the time was the Hellcat marked with
French Navy decals. My next step was to send Craig at Aeroworks an E-mail to
order the decals 48-600 and the Aires cockpit 4270. Once every thing had
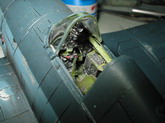
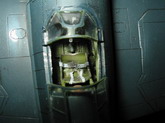
arrived it was time to start assembling the kit. I had a few problems with the
Aires cockpit, superglue can be a challenge to work with and that of the fiddley
parts of the resin. However I managed to get the cockpit
finished and ready to place into the fuselage. The overall assembly of the
kit went together with little fuss, I always seem to have a problem closing
the fuselage halves together when I add an aftermarket cockpit to a kit.
Normally I'm left with a slight gap in the fuselage halves that I need to fill
with putty. Which can cause complications down the track not always but in
this assemble it did.
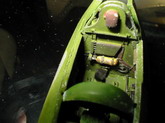
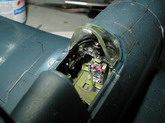
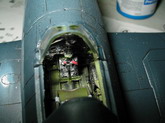
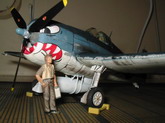
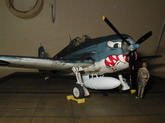
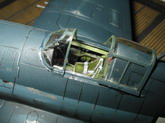
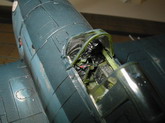
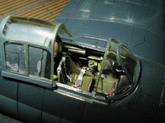
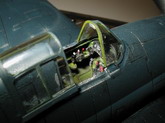
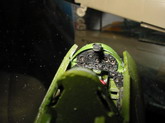
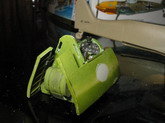
| Picture 03 and
04 is the finished Aires cockpit painted in Model Master interior
green. I then when over the cockpit with the Tamyia weathering powders to
give the cockpit a dirty and rag tag look. |
|
Click on
images below to see larger images
|
 |
 |
|
Before paint I gave the cockpit
window a dry fit to make sure it would fit when it was time to glue into place.
All seem to dry fit well. It was now time to paint.
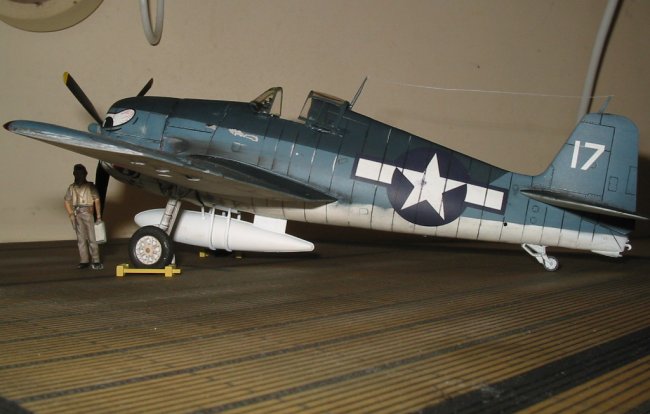
Painting:
I used Model Master enamels
and started with a cote of Aluminium paint over the Hellcat followed up
with a cote of gloss clear. Its was now time to add some colour. The underneath
was painted in flat white, with the fuselage painted in Intermediate blue and
Sea blue. After the paint had dried, I used some medium grade wet rub paper and
went to work over the fuselage and wings until the aluminium coat was exposed.
The kit was now ready for a coat of gloss paint.
Click on
images below to see larger images
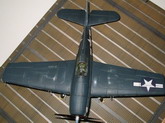
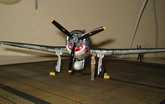
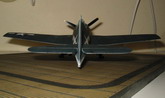
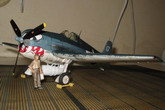
Decals and Finish
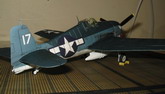
I used the decals to represent
Hellcat F6F-3 of VF-27 onboard USS Princeton 1944. Once the decals were on, I
covered the kit in another coat of gloss clear followed up with the pastel wash
to high light the panel lines. Finishing off with a matt clear to seal in the
pastel wash. All that was left was to add the remaining parts such as landing
gear, drop tank and cockpit window, however the cockpit window would not fit
which was a real pain in the backside. After some mucking about I got the
cockpit windows to fit into place, not as good as I would have liked though
some touch was needed around the windows to try and blend the paint which half
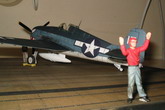
worked. That is that, the Hellcat was finished. I got the Carrier base from
Craig its the Eduard 1/48 U.S. Navy Essex Class Carrier deck 8802.
Click on
images below to see larger images
Thanks
-
Calum for getting a
hold of the Hellcat, you can visit Calum at gib@gibstuff.net for
a list of kits for sale or drop Calum E-mail.
-
Craig from Aeroworks,
you can get in contact with Craig at aeroworks@iprimus.com.au for
a list of gear for sale.
-
Steve Bamford for
all his great work with this web page.
Alan
|