|
History
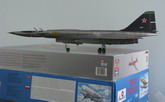
The T-4, or Project-100, was
a Mach 3 capable bomber developed by the Sukhoi design bureau of the former
USSR. It was nicknamed "Sotka" because of its proposed gross
weight of 100 tonnes. Design work began in 1961 with technical specs of
Mach 3.0 top speed, Mach 2.8 cruise speed, and a range of 6000 km.
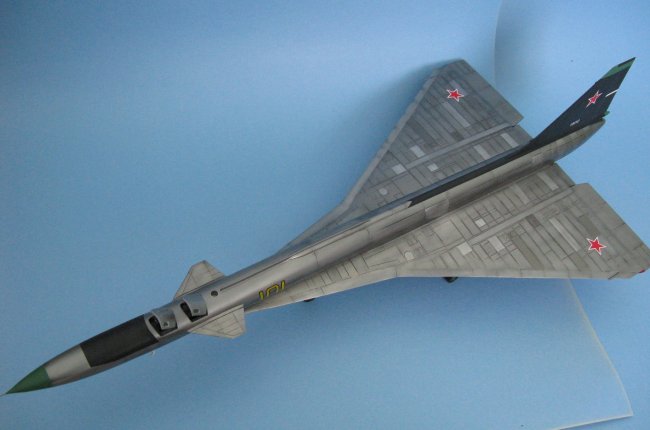
The first prototype "Yellow 101" with an airframe constructed
in titanium, was completed in 1971 and flew for the first time in 1972.
Yellow 101 only made 10 flights, breaking the sound barrier only once, when
the T-4 program was cancelled in favour of the Tupolev Tu-22M. Today,
the sole surviving Sotka prototype rests in the Monino Museum outside of
Moscow.
The Kit
This is Russian manufacturer
Amodel's first attempt at making big kits using the "Amonster"
moniker. Rumour has it only 200 copies of this kit was made, but I
suspect there're more out there. The main fuselage and wings are molded
as a gigantic single piece of fibreglass. The fibreglass surface is
pretty smooth with fairly heavy engraved panel lines. The rest of the
model - front fuselage, leading edges, landing gears etc - were injected
molded. The mold quality of the injection molded parts was subpar
with a lot of flash and blemishes. A very cloudy clear sprue, a decal
sheet and the instruction booklet rounds out the kit.
This is your typical short run
Easter European kit. In case it isn't obvious to you, it's a kit that
your should avoid if you expect Japanese precision engineering. However,
if weird Cold War era jets is your cup of tea AND you are ready to spend some
time on construction, then this kits fits the bill.
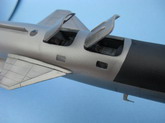
The Cockpit
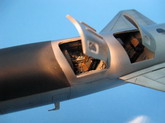
The kit's supplied cockpit was
crudely molded and generally un-usable. Unfortunately these short
comings cannot be overlooked because I plan on opening the cockpit hatches.
The kit's cockpit floor and the pilot's instrument panel were retained
and highly modified. Just off the top of my head, the following were
used for constructing the rest of the cockpit: random resin chunks, PE pieces
from a Hasegawa 1/48 F-18, Pavla 1/72 SU-24 cockpit set, Revell
1/72 SU-34, Classic Airframes Canberra, Trumpeter RA-5C. Basically the
way I built it was "if it fits and it looks good, then it goes in"
because there was no reference material available for the Sotka's cockpit.
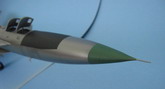
The cockpit roof has two tiny
windows on the starboard side. They were blended into the fuselage with
CA glue and polished. The kit's plastic pitot tube was replaced with a
commonly found household needle blended into the radome with CA again.
Click on
images below to see larger images
Fuselage Construction
Generally speaking, the parts
break down was pretty simple. In fact it's so simple that this kit could be
a weekend project - if it was manufactured by Tamiya. Unfortunately
the fit of all the plastic and fibreglass pieces was very poor,
hence the builder needs to spend an inordinate amount of time filling and
sanding. I really needed to employ all the tricks to deal with the gaps
- CA glue, Tamiya putty, Bondo automotive putty, plastic stock... you name it.
Further worsening the situation was as you sand the fibreglass body, you'd
inevitably expose even more pin holes, thus throwing you back in the
vicious cycle of more filling and sanding again...
The uneven material hardness
of fibreglass, plastic and putty also presented challenges during panel line
rescribing. The fibreglass was very hard, as I dragged my scribing tool
from the FG to the softer plastic, the force applied might be too much and the
putty would chip off. Yup, more filling and sanding ensued... Oh,
did I mention this needed to be done in a natural metal finish thus
necessitates a smooth finish?
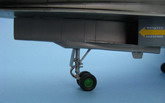
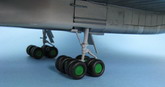
Undercarriage
Like the rest of the
kit, the landing gears were crudely molded. But if you've come this far to
get to the gears, this would be a walk in the park for you. The wheels had
no details on them what-so-ever, but I just left them as is. Fortunately the
level of details on the gears was acceptable, but the supporting struts
were too short and had to be replaced by whatever I could find in the spare box.
Painting and
Decaling
I found that regular
hobby primer (Mr. Surface) doesn't stick well to the fibreglass body, hence I
used automotive grey primer in a spray can. It's great stuff and way
cheaper than Mr. Surface.
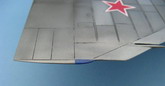
I use a total of 6
different shades of Alclad for the highly panelized natural metal finish.
Out of the bottle colours were: magnesium, steel, dark aluminum, and aluminum.
There were also a couple of custom mixed shades using magnesium and jet exhaust.
To my dismay, during the intensive masking, some paint was ripped off by the
Tamiya masking tape. So I used 3M Post-it notes as masks during touch up
sessions.
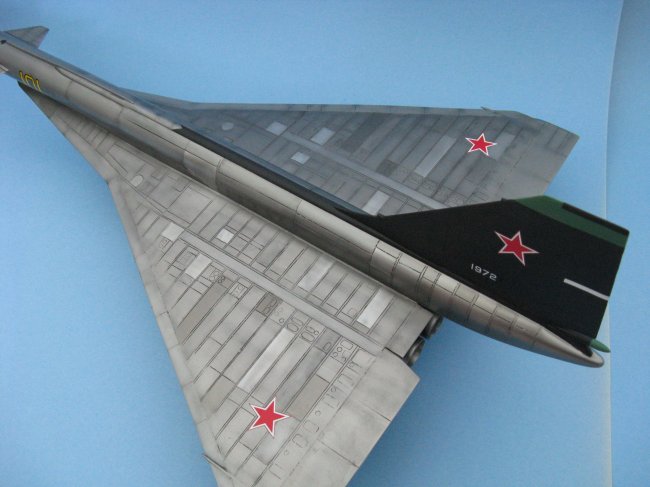
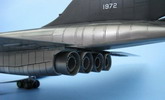
The kit's paint
instructions was for the Sotka resting in Monino today with "red 101"
decals. However, I wanted to model "yellow 101" in 1972 during
its maiden flight glory. So the black fin and green radome and fin tips
were done using Gunze acrylics. The 101 bort number was done with yellow
paint, and wrapped with black decal strips.
Conclusion
This is probably the
most difficult model I've built so far. However, its sheer size (almost 2
ft in length) and the metallic finishes is very satisfying to look at. I
have two more Amonster kits waiting in the stash and I can't wait to start them.
Terry
Click on
images below to see larger images
|