|
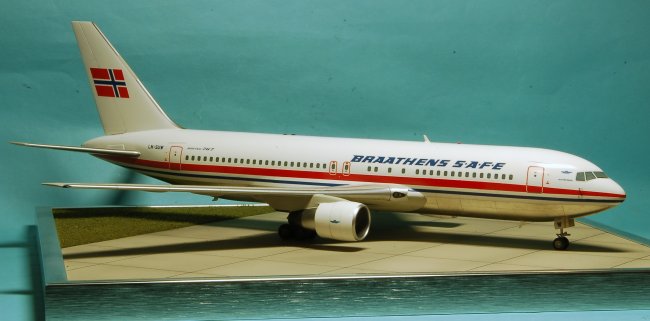
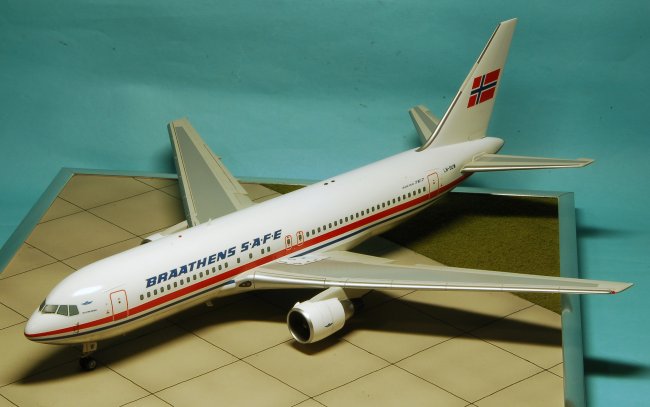
Possibly the biggest
tail to serve as a canvas for the Norwegian flag was Braathens S.A.F.E.'s two
Boeing 767-205s. They were ordered in 1980 to handle charter traffic and
take the peaks on Braathens S.A.F.E.'s domestic network. Braathens S.A.F.E.
was founded in 1946 to support the Braathen fleet of ships in far away
destinations - South America and the Far East (hence the S.A.F.E.). As
they were operating as a charter airline, they were not allowed to fly
international scheduled routes - the tri-Government owned Scandinavian Airlines
System (SAS) had a monopoly on such routes. The aircraft, LN-SUV and
LN-SUW were delivered in 1984. They were named in the tradition of the airline;
after Norwegian kings of the Hårfargre (translating as "fair hair")
bloodline and baptised with beer brewed specially for the occasion by Norway's
oldest brewery. LN-SUV was named "Harald Hårfargre" who united
Norway to one kingdom, by swearing that he would not have his hair cut until all
of Norway was under his rule. LN-SUW was named "Olav den Hellige"
(Olav the Holy - later proclaimed a Saint), and can be considered to introduce
Christianity to Norway, though that didn't happen peacefully, and he paid for
his efforts with his life at the battle of Stiklestad in 1030. The
aircraft served less than two years before the airline had to dispose of them
and settle for a fleet of Boeing 737-200s. However, the aircraft showed
the crews what to expect from the next generation 737.
Click on
images below to see larger images
|
|
|
|
|
|
|
|
|
Photo 3 |
|
Photo 4 |
|
Photo 5 |
|
Photo 6 |
This is the Revell kit of
the first release of the 767-300. In order to make the shorter -200
version, one needs to shorten the fuselage 21.3 mm ahead of the wing and
23.3 mm aft of the wing. The bump under the tail must also be
removed - this retractable skid is not found on the -200. In order to
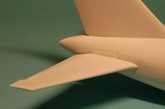
enhance the model I also made some changes. The main changes are
correcting the flap track fairings and improving the engines. The
flap track fairings are wrong - they should be more pyramid shaped, and
this was achieved by cutting off portions of the flap track fairings and
glue on 2x2 mm square strip and sanding them into a pyramid shape.
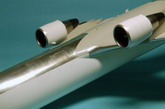
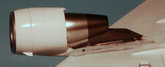
The engines in the kit are a mixture of Pratt&Whitney JT9D/PW4050
series and General Electric CF6s. To create a better illusion of the
curved hot cowling of the P&W engine, sand the lip of the hot exhaust
2 mm shorter, then resharpen it by sanding. Not perfect, but better.
The cold cowling can be left as is, but extend the hot cowling inside the
cold exhaust with Evergreen plastic tube to prevent see-through. The
intake and fan is fine as is, but the rear of the pylon should be extended
to almost touch the rear spar position of the wing (the engraved line
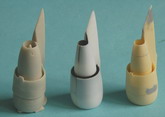
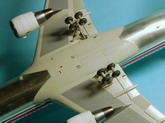
ahead of the flaps). Photo 03 shows the BraZ Models engine with the
kit engine and my resin copy. The BraZ Models engine is very poor,
and you're better off using the kit engines as is if you don't want to
modify them. Photo 04 shows the modified engine in place on the
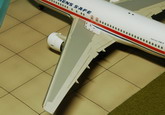
wing. Other changes I chose to do was thinning the wing trailing
edges, filling the recess on the rear fuselage (photo 05), adding air
conditioning intakes and exhausts (photo 06), rescribing panel lines,
dropping the elevators and high-speed ailerons as well as adding vents
from scratch.
To recreate
the Braathens S.A.F.E. livery, I used decals from F-DCAL (http://www.f-dcal.net/
) - the only source I know of for this scheme. They provide the
decal either in inkjet printed or laser printed form, and I chose the former for
slightly higher colour density. It needed a clearcoat to seal the colours,
and I may have been applying too much varnish as the edge of the decals does
show even after repeated applications of Future. However, the decals
snuggled down well over the compound curves and panel details. The white
is Halfords Appliance Gloss White, and the bare metal belly was done with Bare
Metal Foil, laid panel by panel. In order to accurately locate the
separation between the white and the bare metal belly as well as the Boeing Grey
wing/body fairing, I photocopied the decal and then taped it to the model (photo
07). This allowed me to lay thin strips of masking tape along the
fuselage that served as a guide for laying and cutting the foil as well.
The result can be seen in photo 08. Weathering was done very restrained
due to the short time the aircraft were wearing this livery, so the main thing
was highlighting the panel lines on the wings and add some streaks - the
fuselage was kept deliberately pristine (photo 06 and 09).
Jens
Click on
images below to see larger images
|
|