|
Fellow modelers of
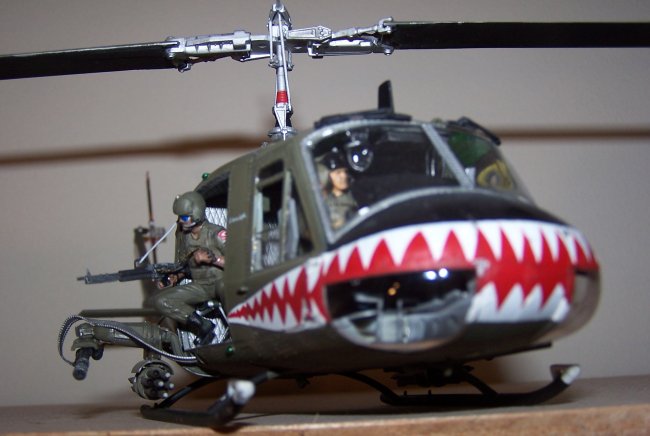
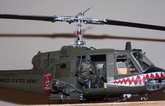
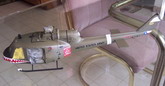
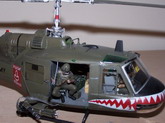
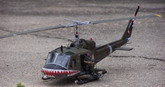
ARC, we meet again! This time around I've built the first of many Hueys in
1:35 scale. This one is the old Academy mold. Actually, it's a
pretty good kit. Stock details are excellent. The only real gripe I
have is with the overall fit of the fuselage parts to the cockpit/cabin... Oh
that was fun. The windshield is also a pain, but with some effort and a
bit of patience, it can be overcome. I had to trim down the instrument
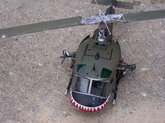
panel quite a few times in order for it to fit right. The last part of
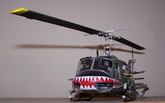
this model that is just ridiculous is putting the sharkmouth decal on.
Those of you who have dealt with this know what I'm talking about. Make
sure you have a lot of decal solvent and time! This kit took about six
months to build, but since I had other kits on the table... well you know how it
goes :)
Aftermarket parts
and markings -
Believe it or not, I
didn't use any aftermarket parts except for some copper safety wire, a
clothespin, and parts from DML Dragon's Nam series helicopter crew. I
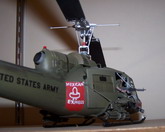
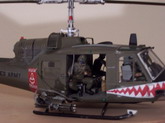
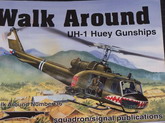
didn't much care for the kit markings, so I decided to build the "Mexican
Express" which is shown on the cover of the Huey walkaround by Squadron
Productions. I had originally intended to use the quad gun M-60 weapon
system and I even bought the kit from Cobra Company, but I decided to go with
the XM-134 minigun mount instead (I wanted to be as close to the real aircraft
as possible).
I plan on using the quad gun set for another huey down the road.
Click on
images below to see larger images
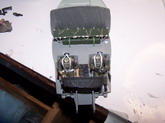
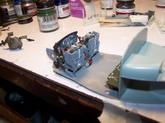
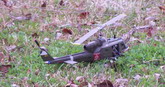
Getting Creative
-
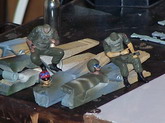
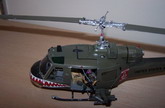
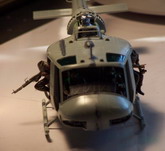
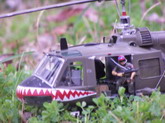
I wanted to display
the pilot windows open, so I just cut up the glass and left the middle piece out
so it would look like the windows were rolled down. The ammo crate in the
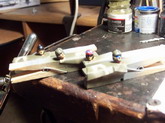
back is the original part from the kit, except I added some real wood. I
didn't have any more "wood" paint, so I just shaved off thin pieces
from a normal wooden clothespin and glued them to the assembled box. And I
really like the way it came out. I filled the box with frags, smoke
grenades, and ammunition. I also made some spent shell casings and put
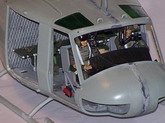
them on the deck along with the ammo cans. The visor and sunglasses on the
crew chief and gunner were made from squadron white putty and painted over.
I tried to detail the figures as much as possible. If you look close you
can see the gunner is holding a smoke grenade ready to pop smoke. It
should be noted, that the confederate flag marking was used by a different crew
chief on a UH-1D from another squadron, the Dolphins I think. I just liked
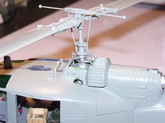
the idea so I used it. Moving on, I scratch built the helmet mikes and the
wristbands and watches from wire and tape. I had to rearrange the
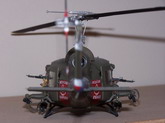
co-pilot's gunsight because it wasn't at the right angle. I positioned the
miniguns at the same angle as the gunsight so it would look more realistic, as
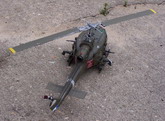
if the co-pilot were searching for a target. I wanted the rocket pods to
look like they had been fired, so I drilled out the tips to show that rockets
had indeed been dispensed. The last thing I did was hand paint the
"Mexican Express" and the Texas state flag markings. I got the
stars from a spare decal sheet.
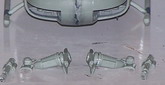
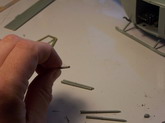
Conclusion -
Lots and lots of
super glue was used.... end of story. For some reason, the kit didn't
include the pitch change links for the main rotor. I just scratch built
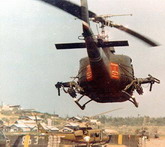
two rods from plastic. I don't what happened to this particular bird.
It's hard to say if it survived the war or if it was lost in combat over the
jungles of Vietnam. I wish I knew, but there is very little information on
the aircraft or it's crew. I did find one picture of this helicopter
taking off, on a mission perhaps.
I really enjoyed
this model and I look forward to doing about six more. Starting with a
Navy Seawolves gunship. Every helicopter will be different in some way:
different weapons, crews, markings, open doors, etc... I hope they turn
out just as good, if not better than my "sharks" bird.
Enjoy and Happy
Modeling,
Ben
Click on
images below to see larger images
|