|
During
the Korean War, due to increased structural strength being built into the jet
fighters of the day, U.S. F-86A/E Sabre pilots were quick to discover that the
U.S. standard armament of the .50 calibre machine gun with its fast rate of fire did
not pack as much of a "punch" as it had against lighter
built aircraft in World War II. It took more hits in vital areas from a
.50 to bring down a Mig-15, which in comparison, had two 23 mm and one 37 mm
cannon and had been known to bring down a Sabre with just one round, whereas
Sabre pilots fired approximately 1,000 rounds to down one out of every
three Migs engaged! The Mig was not without its own deficiencies
though, as it's cannon armament had a slower rate of fire and the gun-sights
were not as good as that found on the Sabre. Other than their gunnery
systems, they were basically comparable aircraft.
As
pilots returned to the U.S. from Korea and imparted their experiences on higher
command, it was decided that an evaluation was needed to improve and upgrade the
Sabre both in armament and engine thrust. In regards to engine thrust,
pilots got their wish with the F-86F variant (and late E's), but were still
saddled with the .50 cal machine guns. By 1952 Project Gunval had been
initiated to assess the armament situation and the Air Research and Development
Command (ARDC) at Eglin AFB, Florida, was given this task. Modifications
were undertaken to fit four German-designed Mauser T-160 (M39) 20 mm cannons in
place of the six .50 calibre machine guns. The weapons bay had to be
lengthened and widened to accept the weapons and new larger titanium gun blast
panels with two cannon ports were manufactured. Six F-86F-1's and four
F-86E-10's were modified and reclassified as F-86F-2's. Of these, eight
were sent to Korea for combat evaluation and two were kept at Eglin AFB for
further testing.
The
Korean bound aircraft were attached to the 335th FS of the 4th FW at Kimpo
Air Base and started flying combat testing in about February 1953. A
couple of initial problems arose quickly. The first being that there were
no tracer rounds with which the pilots could observe the trajectory of their
rounds, which consisted of armor piercing-incendiary (API) and high
energy-incendiary (HEI). This was overcame by dipping the heads of the
projectiles in a mixture of beeswax and kerosene that was allowed to harden and
would give off a light smoke trail when fired. The 2nd problem was with
gun-gas ingestion causing compressor stalls and flameouts when the guns were
fired at higher altitudes. This lead to the loss of one aircraft during an
early combat mission when the pilot could not get the engine to restart and had
to eject over the Yellow Sea. Many different tests and modifications were
made trying to sort out the problem, including making holes at the back of the
gun-bay panels to help purge gun gases, but this didn't totally fix the problem.
North American Aviation also devised a simple horse-shoe shaped deflector
that could be welded into the gun-port troughs that would still allow the rounds
to pass by, but deflected the gun gases out away from the aircraft. This still
didn't totally cure the problem though. The pilots just had to be aware
and take measures to try to avoid it by dropping the nose of the aircraft and
flying out of it if they sensed a compressor stall coming on.
To
conceal their Top-Secret mission, the Gunval aircraft were mixed in with flights
of normal F-86's with standard call signs and tactics being used. No
special markings were painted on the aircraft and the cannons were not discussed
over the radio. To make them appear like the normal .50 cal armed birds, a
"fake" gun-port was painted below the two 20 mm cannon ports.
Thankfully, of the two aircraft that were lost from the program, they were both
ditched in the Yellow Sea... and of the two aircraft that got damaged in combat,
they were able to make it back to Kimpo to be repaired... so none ever fell into
Communist hands.
The
project ended in May of 1953 after 307 combat sorties, in which Migs were
sighted and engaged on 139 occasions. 41 Migs were fired on with hits
being registered on 22. 6 were destroyed, 4 probably destroyed and 12
damaged, which was a higher percentage in comparison to their machine-gun armed
brethren. Even though the project seemed a success, 5th Air Force
concluded that the modification was not suitable to combat due to the compressor
stall/flame-out problems and the limited amount of ammunition that could be
carried for the cannons. Thus it was decided not to modify anymore Sabres
as the standard F-model was deemed sufficient (due to its improved
high-altitude capabilities) against the Migs at this late stage of the war.
The project did pave the way for heavier cannon armament to be introduced into
future generations of U.S. fighters though.
One
of these aircraft still survives today and is currently displayed at Buckley
ANGB in Denver Colorado, in the markings of the Minute Men flight demonstration
team:
http://www.airliners.net/photo/USA---Air/North-American-F-86F/0259757/M/
Click on
images below to see larger images
I
can't remember when it was that I first recall hearing about this little-known
project, but I have always been fascinated with the concept as it sounded like a
pretty good idea that may have had better success if it had been initiated
earlier in the war and had more time to be fully developed, as it always seemed
odd to me that even in World War II, the U.S. stuck with machine gun armament
with the majority of its fighters, even though most of the other Allied and
Axis countries had been arming their fighters with cannons.
(Interestingly, several of the U.S.'s top aces from WW II had flown the P-38
which had a 20 mm cannon... coincidence?)
I
had always wanted to model one of these birds and like with many other projects
in my back-log, was waiting for the right time for all my skills, technology,
references, etc. to come together to allow it to be possible.
I
chose to go with the Hobbycraft/Academy kit as the basis for this build (and all
my other future Sabre builds) as they seem to be a little more commonly
available than the Fujimi kit and have a few less parts that helps speed up the
build process. I would also highly recommend going for the Academy boxings,
as I discovered that there's not much out there in the aftermarket in the way of
all the stenciled type markings that are found on the Sabre and Academy has most
of these included in their boxings. They have also re-moulded a few places
on the kit to help with construction and clarify some problem areas found
in the original Hobbycraft boxings.
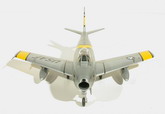
An
area that I would recommend paying close attention to during the build is the
intake ring. The instructions have you attaching this after the fuselage
halves and the intake trunking/cockpit have all been glued together, but this
risks a bad fit between the intake trunking and the opening in the intake ring.
I found it better to glue the intake ring directly to the trunking BEFORE
sandwiching the trunking and the cockpit between the fuselage halves...
as it is easier to deal with the seams on the outside of the intake ring, than
it is on the inside (where alignment is concerned), and helps with the alignment
of the cockpit and trunking inside the fuselage.
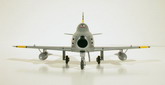
In
regards to accuracy, the fuel tanks and pylons do not appear to be very accurate for
the birds that flew in Korea. The pylon itself seems to be
accurate as a Sabre pylon (seen in photographs), but this type was rarely seen
in Korea. They are moulded with the front of the pylon being angled, when
most had this leading edge straight up and down vertically. I fixed this
with sheet styrene and cyano. I then moved the pylon about 2 (maybe 3)
mm's forward on the top of the tanks as they appeared to sit too far back on the
tanks. I also filled in the mounting holes on the underside of the wing
and moved them back on the wing about 4 mm's each as the pylons were mounted too
far forward on the wing. The way they are out of the box, they
would especially be a problem with the thinner chord wing of the E-models, as
the pylon would interfere with the slats on those models, so they definitely do
need to be moved back. Many pictures that I poured over confirmed my
suspicions and the finished kit looks much better now in my opinion.
Another
small accuracy issue with these kits is the little wing fence on the
leading edge of the 6-3 hard-wing as moulded out of the box... they're way too
tall and incorrectly shaped. Careful filing can help this.
For
the Gunval modifications, I had to do a lot of careful filling of certain panel
lines with cyano and re-scribing of the gun-bay panels and the gun-port panels.
To replicate the larger 20 mm cannon troughs, I used some plastic tubing from
Evergreen. I cut elongated holes in their approximate positions within the
nose and got pre-cut sections of the tubing positioned in their approximate
locations and then froze them there with cyano. I went back and ground the
tubing down as close to the fuselage surface as possible and then finished
fairing them in with files and sand paper. Once covered in paint they came
out pretty good. I also had to drill a few extra gun-gas purge holes as
seen in photos of the Gunval aircraft.
Painting
was done with Citadel Mithril Silver, Chainmail and Bolt-gun metal acrylics.
I also used Floquil Platinum Mist enamel and Model Master Chrome Silver
enamel.
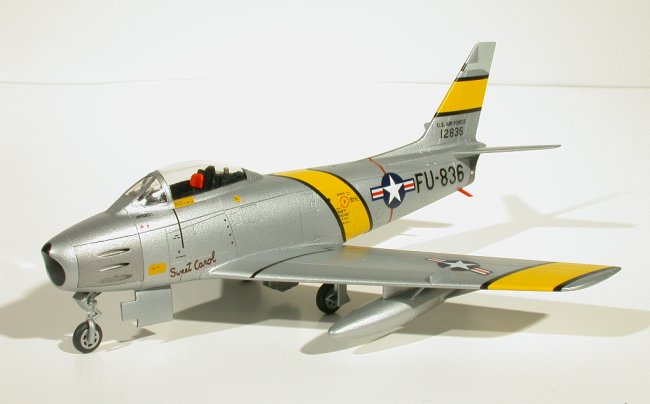
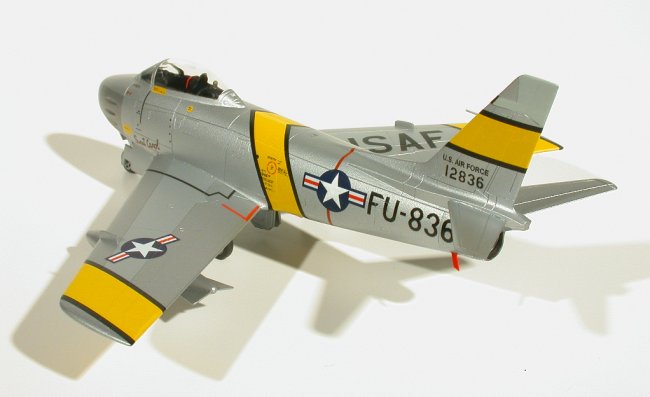
Marking
this aircraft was a lot of fun. Early on I had decided that I wanted to
replicate two different aircraft, so decided to give this kit a
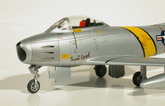
split-personality. The left side is of 51-2836 "Sweet Carol"
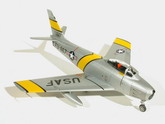
flown by Capt. Lonnie Moore who scored 1.5 kills in this aircraft and the right
side is of 51-2867 in which Lt. Col. George Jones scored a Mig kill in March of
1953 to become an ace and which also made him the 30th jet ace of the war.
I
created the name "Sweet Carol" and the numbers and codes to be printed
on my laser printer and I also printed the 1.5 star kill marks for Moore's side
of the aircraft. I had reservation about the quality of the red in the
name and on the kill marks, but decided that they came out pretty good once I
got them applied on the model. Creating the codes and numbers was fun too,
since I could not find any suitable fonts anywhere that matched to the type
applied to Korean War Sabres. Seeing as I have three other future Korean
War Sabre projects, I just decided to create them all now, so that they would be
ready when I decide to tackle those projects in the future.
The
"fake" gun-port was even created on my laser printer and I wasn't sure
if it would show up against the natural metal due to questionable opacity, but I
think they came out pretty good and look the part.
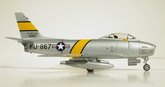
The
yellow/black I.D. bands came from an older Superscale sheet and were touched up
with Model Master Blue Angel yellow acrylic as it was the only yellow I
could find that came close to matching the yellow that Superscale used.
The rest of the markings are from the Academy kit and worked pretty well when
used in hot water.
The
last modification I made was to use a nose-wheel from an Airfix F-80C as pics of
many of the Gunval Sabres show this kind of wheel instead of the finned wheel
that comes in the Hobbycraft/Academy kits. Since some of my F-80 projects
will use the finned Sabre wheel, this was a good swap.
And
there you have it, the beginnings of the big-gun Sabres!
J.C.
Click on
images below to see larger images
|