|
I
think that there must be some kind of Fokker virus.
It all started when I scratchbuilt the V.42 seaplane glider (yes, I know). Then
I couldn’t resist to make the VLE Models F.IV (aka T-2).
Then
browsing through my files I re-encountered the marvelous Universal and the
epitome of grandeur: the Fokker F.32 of which I hope to receive soon a kit (more
on that one in the future).
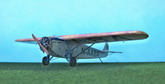
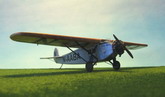
The
Fokker Universal, the subject of this article, was the first American Fokker,
designed by Robert Noorduyn and produced in
New Jersey
by the Atlantic Aircraft Corporation.
Although it kept a number of Fokker design trade marks, it also incorporated
some local know-how.
Starting on 1926 more than forty were built, and a number of them went to
Canada
. Wheels, floats and skis were all comfortable shoes for the Universal.
A
nice article can be found in the ultimate source of canned knowledge, Wikipedia
http://en.wikipedia.org/wiki/Fokker_Universal
Click on
images below to see larger images
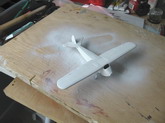
So here it
is the Universal kit in 1/72, thanks to VLE Models, another vac+bits kit
that is nice to build. I am glad that somebody will take the time and
effort to make a kit of this classic and sell it for a very reasonable
price
http://members.tripod.com/~vlemodels/main.htm
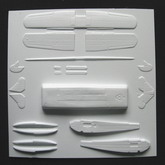
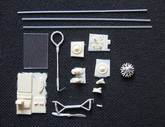
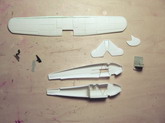
As you can
tell by the images, there is a low count of vac parts and a number of
details provided either as metal, resin or extruded styrene (struts) plus
decals for several versions. The decals are of passable quality and heck,
there are a lot, but I went for my home-made brew. For the reasonably
experienced modeler there are a lot of other versions livery-wise out
there too, if you can print you own decals.
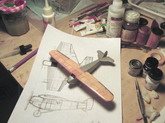
Once the parts were extracted from the sheets and sanded
down, minor adjustments were made to help their fit. If you want some
tutorials you may visit another Vac producer site, Khee-Kha art products:
http://www.mtaonline.net/~zdk/
The wing
construction is similar to that of the VLE’s T-2, in having a wraparound
leading edge that fits to a lip provided by the upper and lower wing
parts. That lip or step has in this case to be reduced to the minimum
expression in order to allow the LE to fit properly. Some panel lines were
a bit undefined and had to be re-scribed. A certain amount of filler was
also applied to deal with a few gaps. For most of the sanding I used wet
sanding with wet-or-dry sand paper attached to flat surfaces (small and
big); to accomplish that I submerged myself with the model parts in my
“Opland” brand winged bathtub, and took a small fleet of toy boats and
ducks to make me company. Well, not really. I sanded the parts under the
kitchen tap when SWMBO wasn’t around. Wet sanding definitely provides a
good grip and gets rid of the clouds of dust.
With the kit you get,
besides the above-mentioned multi-decal options, floats, skis and wheels
to dress your Universal in the appropriate attire. The cockpit area is
also covered by the extra parts plus a bulkhead that closes the cabin
area. You will have to provide a cabin interior according to the version
you are building. A clear plastic strip is provided for the windows. It is
covered, both sides, by a protective film. I didn’t realize that with my
Fokker T-2 from the same manufacturer, and put the part aside replacing
it, due to its less than clear look (Doh, it had the protective film on!).
That teaches you that not always the manufacturer is to blame. This is
simpler and smaller build than the T-2, and things proceeded smoothly on.
In the intermezzos I read out loud poems by Mark Strand, which, as it is
universally known, always helps to tame the model parts and provide for a
better fit. Next the interior was stuck in with some structure that is
visible from outside and that, in the case of the windows, will later
support the transparencies. The fus halves were glued, and wing and stab
added, then the metal part that accounts for the main frame of the landing
gear, which, by the way, helps a lot with all those struts.
Once dried,
the joins and little faults were remedied with Milliput and putty. Metal
control horns were added where necessary and little holes made for the
minor parts and future rigging. Brass “Strutz” tailskid was added. The
usual filling/priming/sanding cycle went on couple of times, and then the
wing was painted to replicate the wood finish, using a combination of
acrylics, oils and clear coats. A few photoecthed parts were added here
and there. For the fuselage alu dope finish Humbroll 56 was used. The
home-made decals were applied and then the rigging (kinda complex in this
one, as the control cables are exposed). Struts were added and with
engine, minor details and windshield it was done.
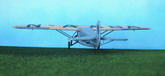
Bear
in kind that many machines exhibit minor differences in their strut arrangement,
not only because of the skis or floats, but also among wheel-equipped machines.
Variations can be noticed in rudder profile, cockpit area and
the immediate wing surface directly after the cockpit. Exhausts have many
alternate arrangements.
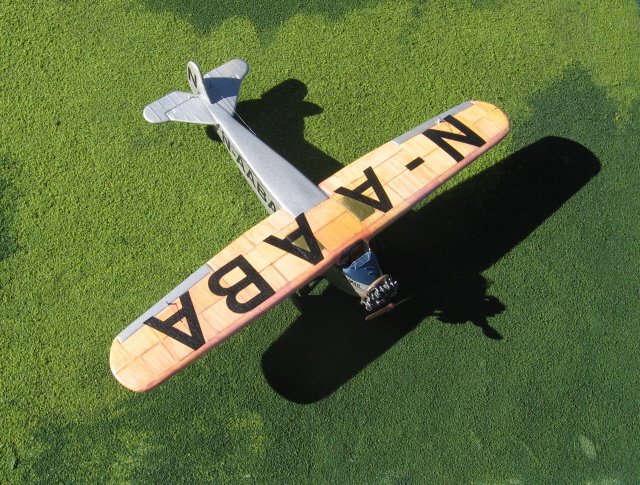
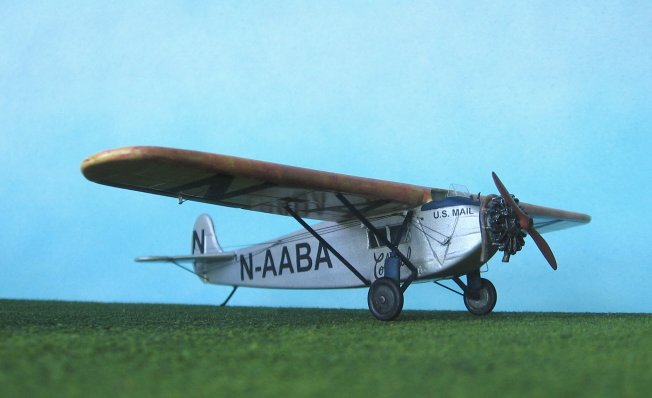
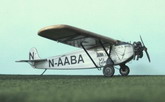
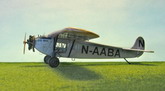
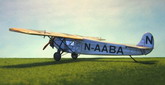
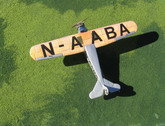
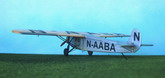
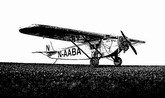
The
plane represented by the model is one of the two Colonial Air Transport
Universals that were allocated to CAM-1, under contract with the U.S. Post
Office. The strange registrations are due a short-lived system that was used at
the time. The window on the door was covered. I opted to make my wing in wood
finish, as many other Fokker were like that, and added regs to it, although
photographic evidence may point in another direction (the one suggested by the
kit)
Nice kit that allows you to go as simple or complicated as you may
wish and produce, with a little work, the replica of a Classic.
Gabriel Stern
Click on
images below to see larger images
|