|
Jolly Rogers F/A-18F First Combat
Cruise
Building a
respectable aircraft model in scale takes some effort...building an aircraft
carrier also makes your life a bit uneasy, combining those two, is a nightmare.
Don't worry though, I just gave a boost to my ego. Building this diorama
was a joy. The only thing you need is luck, good planning and inspiration.
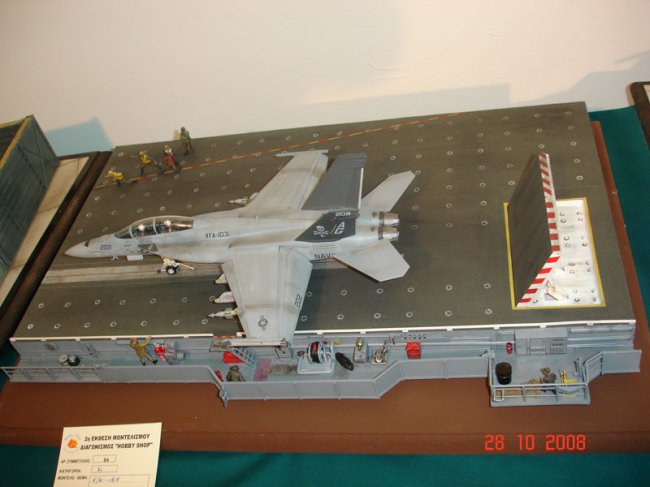
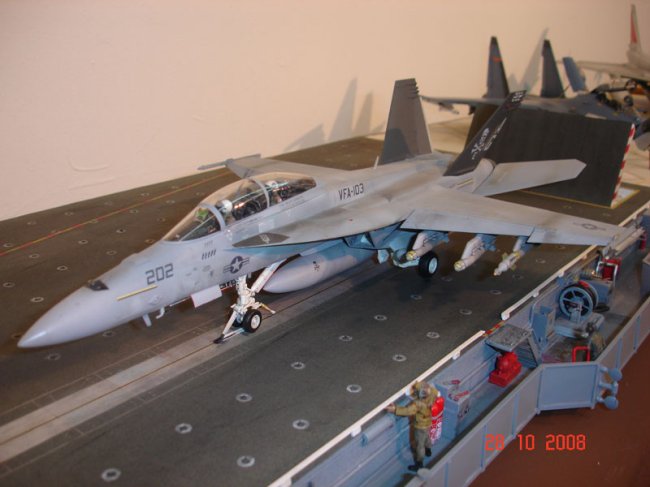
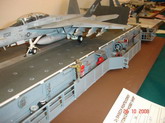
The main attraction is of course the Hasegawa F/A-18F in 1/48 scale, with the
well known "scull and bones" tail from Jolly Rogers. I am not
going into detail of how I built that kit. I just followed the instructions and
the model just came together with no troubles at all. I was thinking of using a
resin cockpit but the one given with the kit was up to my standards and on the
other hand the cockpit would be closed, occupied by the crew leaving no
space for the unwanted evil eye to have an exhausting inspection to it. The only
thing I added was the usual mirrors found on the canopy. For the crew I had to
make some adjustments. The pilot, using minor "plastic surgery", was
fixed saluting the deck crew just before taking off, and the backseater bracing
himself on the handle on top of the coaming, anticipating the jolt
associated with the take off. Another minor modification was made at the
nosewheel landing gear - shuttle connection, where the associated pull bar and
the restraining bar at the back of the nosewheel was added.
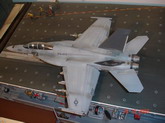
Since I adore dirty, heavily weathered aircraft I chose to represent a secondary
aircraft from the particular squadron and not the prestige high visibility
"00" aircraft. Now, what is the right way to paint the patchy
camouflage associated with modern U.S. Navy aircraft ? Well I don't know
the right way, I know my way....and it's up to you to decide. First I painted
the model according to the instructions given. The fun starts at the next stage.
I placed in front of me every single shade of gray I had in stock...about a
dozen bottles. Then cross checking photographs of the actual aircraft with the
shades I had in front of me I discarded some colors. To the ones left, I just
added the one that every body uses in painting, white. I started loading the
airbrush with the grays I had left, one at a time, airbrushing some panels,
picking up some panel lines adding from time to time some white to the original
paint to lighten the shade a little bit. After all this mess I used the lighter
shade of grey to pick up some individual panels. I did the same but in a smaller
scale using the darkest shade. Every time, I was consulting actual photos of the
aircraft trying to replicate in scale the picture I had in front of me. I
suppose the secret is not to overdo it. When you have the slightest suspicion
that you might exhadurated, don't think any more , stop immediately take a deep
breath and check your model over and over again. I am very happy with the end
result and I have to admit that it turned out better than I thought. The final
weathering was made using oils for the washes, and my personal favorites,
pastels for everything else.
The loading of the aircraft was done according to photos found in the internet,
and the very useful instructions given with the Fightertown decal sheet. The
GBU-12 is from the Hasegawa weapon set, and the GBU-38 are a piece of art, resin
from Shull-24, the detail must been seen to be fully appreciated.
Having already built the alternative from Revell, I thing that Hasegawa has that
extra touch that makes the difference between a good model and a great model.
That is how the first - and easier - part of the diorama was finished. And now
for something completely different...
How do you start with the deck of an aircraft carrier?
When the aircraft model was finished, I took the appropriate measurements so
that it fits in the overall picture. The base is made out of two rectangular
pieces of wood, the one fixed on top of the other. The difference is that in the
top piece of wood, a rectangular shape was cutoff to act as the base that the
jet-deflector sinks in. All the dimensions are estimates calculated from
pictures and diagrams of aircraft carriers. The surface area of the deck is dark
grey carton glued on top of the wooden surface.
Click on
images below to see larger images
Now before you start
any modeling project, RULE No1: try to make your life easier. What I mean ? I
chose to make this particular catapult section because simply, it had the
smallest jet-deflector consisting of only four plates-pieces. During the
"brainstorming" that followed my initial decision to build that
diorama I discovered that I had to face and resolve the following
sub-projects:
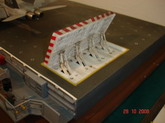
1. The jet-deflector plates
2. The section that the deflector merges with the deck
3. The narrow area where the shuttle from the catapult is pulling the
aircraft to take off speed.
...and something
that I didn't anticipated during my first configuration plans, if I chose to
represent the side catapult section at the edge of the aircraft carrier deck, it
would be nice if I could add and the catwalks that are so prominent in that
particular area. Decision taken to go ahead with this. What a mistake!!!
First things first though. The deflector plates. The prominent structure at the
back side, were constructed according to photos using various sections of
Evergreen. The difficult part, was to take accurate measurements so that it
looks accurate enough for the scale. Looking at the photos of my model you
realize why I chose to built the four-section deflector, and not the one with
the six plates. Just a negative comment from my part. The deflector
section is a bit on the "thick" side...Yes it is...But I realized that
when 99% of the work was already done, and I didn't have the courage to start
all over again.
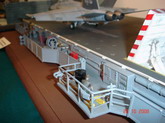
Now the area that the shields merges with the flight deck. Because it was to
deep, I cut a rectangular piece of plastic sheet that fitted exactly into the
crevice and placed it further up towards the surface of the flight deck. Before
that, I opened the four "holes" where the lifting mechanisms protrude
from the inside of the opening. The hardest part was to manage to align the four
pairs of pistons coming up from the flight deck with the four pairs of
supporting brackets at the back of the shield. I don't want to hear..Ohh eeeasy.
It took a lot of time, mathematical calculations, bad language, and the one and
only - the "luck factor".
The narrow area where the shuttle slides was proved to be a much easier job. I
masked the deck with Tamiya tape and airbrushed it silver. The very thin lines
on the side were drawn using a common silver pencil. I added metallic shades of
red, orange and blue to represent the weathering seen on the metal plates in
that particular area. A fine black tip pen was used to draw the black line in
the middle representing the opening on the flight deck where the shuttle moves
forward.
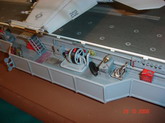
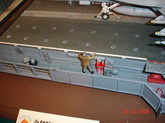
And now, something that really gave me a headache. The catways, so eminent,
hanging at the sides of the flight deck. To start with, I studied pictures,
hundreds of pictures trying to figure out what-how and why, and try to imagine
what I could see for real, how it could be done in scale. First I measured the
length and the width needed. Using plastic sheet (relatively thick to give some
strength to the structure) I constructed the main L-shape structure. I left
some openings to put some rails just for the shake of interest. Now in order to
fix the structure securely to the sides, I opened perpendicular holes to the
side of my wooden deck and fitted in them wooden toothpicks. Using gel-superglue
I fitted the catway structure on top of it and to the sides of the deck. Now
according to the photos I had seen, I filled the empty space with what ever
could be found in my old trusty spare's box. I paid special attention to the
staircase and of course to the fuel hose. The fuel hose is literally two
wheels from a Napoleon war cannon carriage in 1/72 scale. It fitted perfectly
to my plans. The rest of the detailed work was done using various lengths of
evergreen and plastic card. I could go on and on adding and detailing but after
four months on the same project I was seriously getting tired with it.
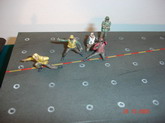
The figures used, were of course the familiar Hasegawa ones plus some from CMK
and yes one from Italeri. All were painted using as a guide many photos from
books or the internet.
And that ends my report on my latest project. I hope I didn't bore you.
Panagiotis Zarkadis
Click on
images below to see larger images
|