|
US
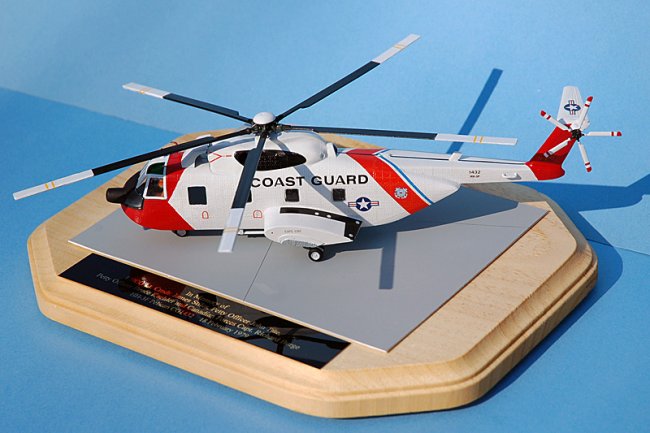
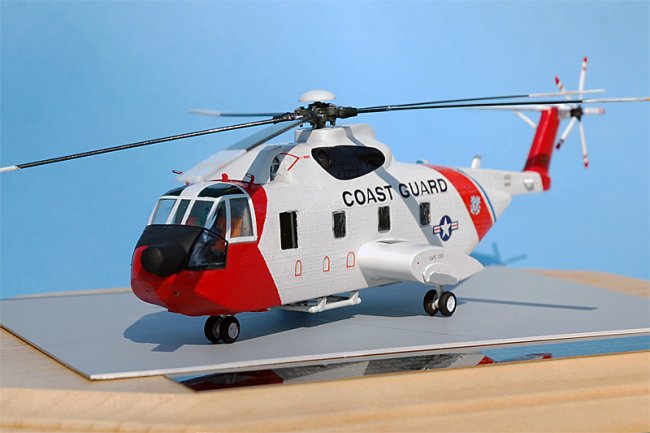
Coast Guard Conversion
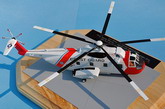
As part of the USCG
Air Station Cape Cod project, the final aircraft I needed to do was the
HH-3F Pelican. I used the 72nd scale Revell HH-3 Jolly Green Giant kit
with home-made modifications, and Hawkeye Decals for the Pelican. Thanks to
RotorheadTX for some free parts to the kit.
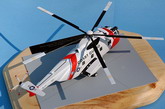
When I started
building this model, I was not sure which airframe to depict. I was part way
through it when I read a story about the 30th anniversary of "CG1432",
which was a
Cape Cod
based Pelican lost in Feb 1979, and 4 of the 5 crew members were killed when it
crashed during a winter storm in the
Atlantic
while attempting a rescue. Clearly, I had to model that aircraft, and at this
point, the build took on a special meaning.
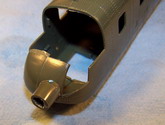
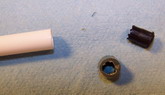
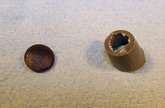
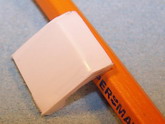
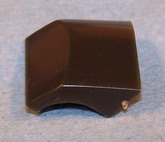
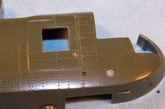
First I needed to
make the large protrusion on the front, and I cut the end off one of the kit's
fuel tanks which I would not be using. Here it is temporarily held on. For the
round-ish end, I used the end of a ball point pen (the black piece) and cut off
the stub part to make it flat.
Click on
images below to see larger images
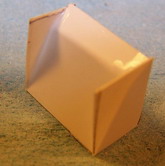
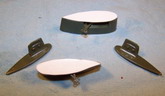
I then needed
to make the engine-intake guard that goes on top of the fuselage. I used
thin plastic stock to cut and shape one. I have an old Aurora H-3 kit on
hand, and was going through it for some parts, and found this part
already made after I made the engine guard - oh well.
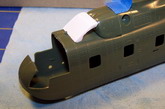
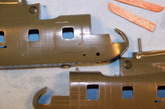
The gear sponsons
are for the USAF version, and needed to modify for the USCG version. Instead of
trying to remove the stub pylons, I simply made new outer portions from plastic
sheet by tracing the outline of the kit parts. Here they are attached prior to
final edge-shaping. For the floatation portion, I attached a small section of
paper towel, and soaked with super glue.
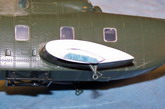
I had to enlarge the
forward side windows as they are larger. I simply used a sanding stick to
enlarge. Here you can see bottom one done, compared to the top. I used some
scrap thin, clear plastic from packaging to make new windows.
Here it is with
some pieces temporarily placed, and then the base white coat. Because of the
green plastic, I used Krylon white from a can, and it took 3 coats to cover it.
The flightdeck received basic detailing while interior was not detailed
as the windows are small and it is hard to see inside. I had thought about
leaving the rear door/ramp open, but decided against it.
I used decal stripes
for the canopy framing as I am not very good as masking and painting all those
frames. I used Tamiya Clear Green for the 2 top windows.
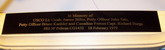
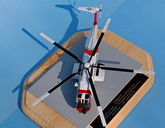
At a local trophy
shop, I had a special brass plate made with the inscription of the names of the
crew members and the date.
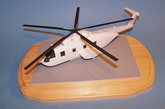
I
proceeded with the reddish-orange, made with my own blend until it looked right.
Decals and small details were added, including the pitot tubes on top of the
flight deck made from bent paper clip sections. The decals needed many, many
applications of solvent to snuggle down, and eventually did. I used red
decal stripes on the rear rotor.
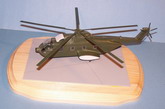
I
made one of my usually bases with plastic sheet tarmac applied to a wood base,
and it was complete.
The
completed model now resides in a display at the US Coast Guard Air Station Cape
Cod’s wardroom.
Thanks
for looking.
Ken Middleton
Click on
images below to see larger images
|